
In any endeavor we make use of certain skills within any one field. Sometimes we are required to use skill over multiple fields. Very rarely does a project come along that requires one to use almost every skill, and tool, they have developed to reach a goal.
A person whom I hold in very high esteem has been acknowledged very highly for their skills and abilities in Renaissance Italian Dance. Some time ago while visiting the Philadelphia Museum of Art we (this person and I) saw a Sgabello in the collection. This one, in fact:
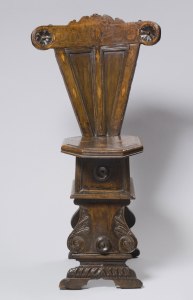
Photo from Philadelphia Museum of Art, Accession Number: 1949-9-1. Original Construction Dated 1500-1550
I was asked if I was able to produce a chair like this, and if so, what might it cost. Sadly I had to reply that I didn’t believe my skills were quite good enough to take on this project.
That was five years ago (2010).
Obviously, this is not a 100% reproduction, but a piece inspired by and in the style of the 16th Century Sgabello. Before getting into the detailed views, here’s a few other pieces which were studied for inspiration and stylistic elements.

Sgabello, VAM, 1550-1570, Tuscany. The seat back (top horizontal rail of the triangular frame and panel) appears to have been a late 19th Century replacement. There was also some additional carving on the lower “leg” section that added to the original 16th century carvings at the same time.

Tuscan, 16th Century. Metropolitan Museum of Art, New York. Compared to other examples, this one is almost bereft of carving.

Late 16th Century, Rome or Florence. The Met. The seatback on this Sgabello is highly ornate and borders on Baroque Style carving. Meanwhile, the box-apron, applied mouldings, rondels, and urn-shaped legs are highly consistent with it’s contemporaries.
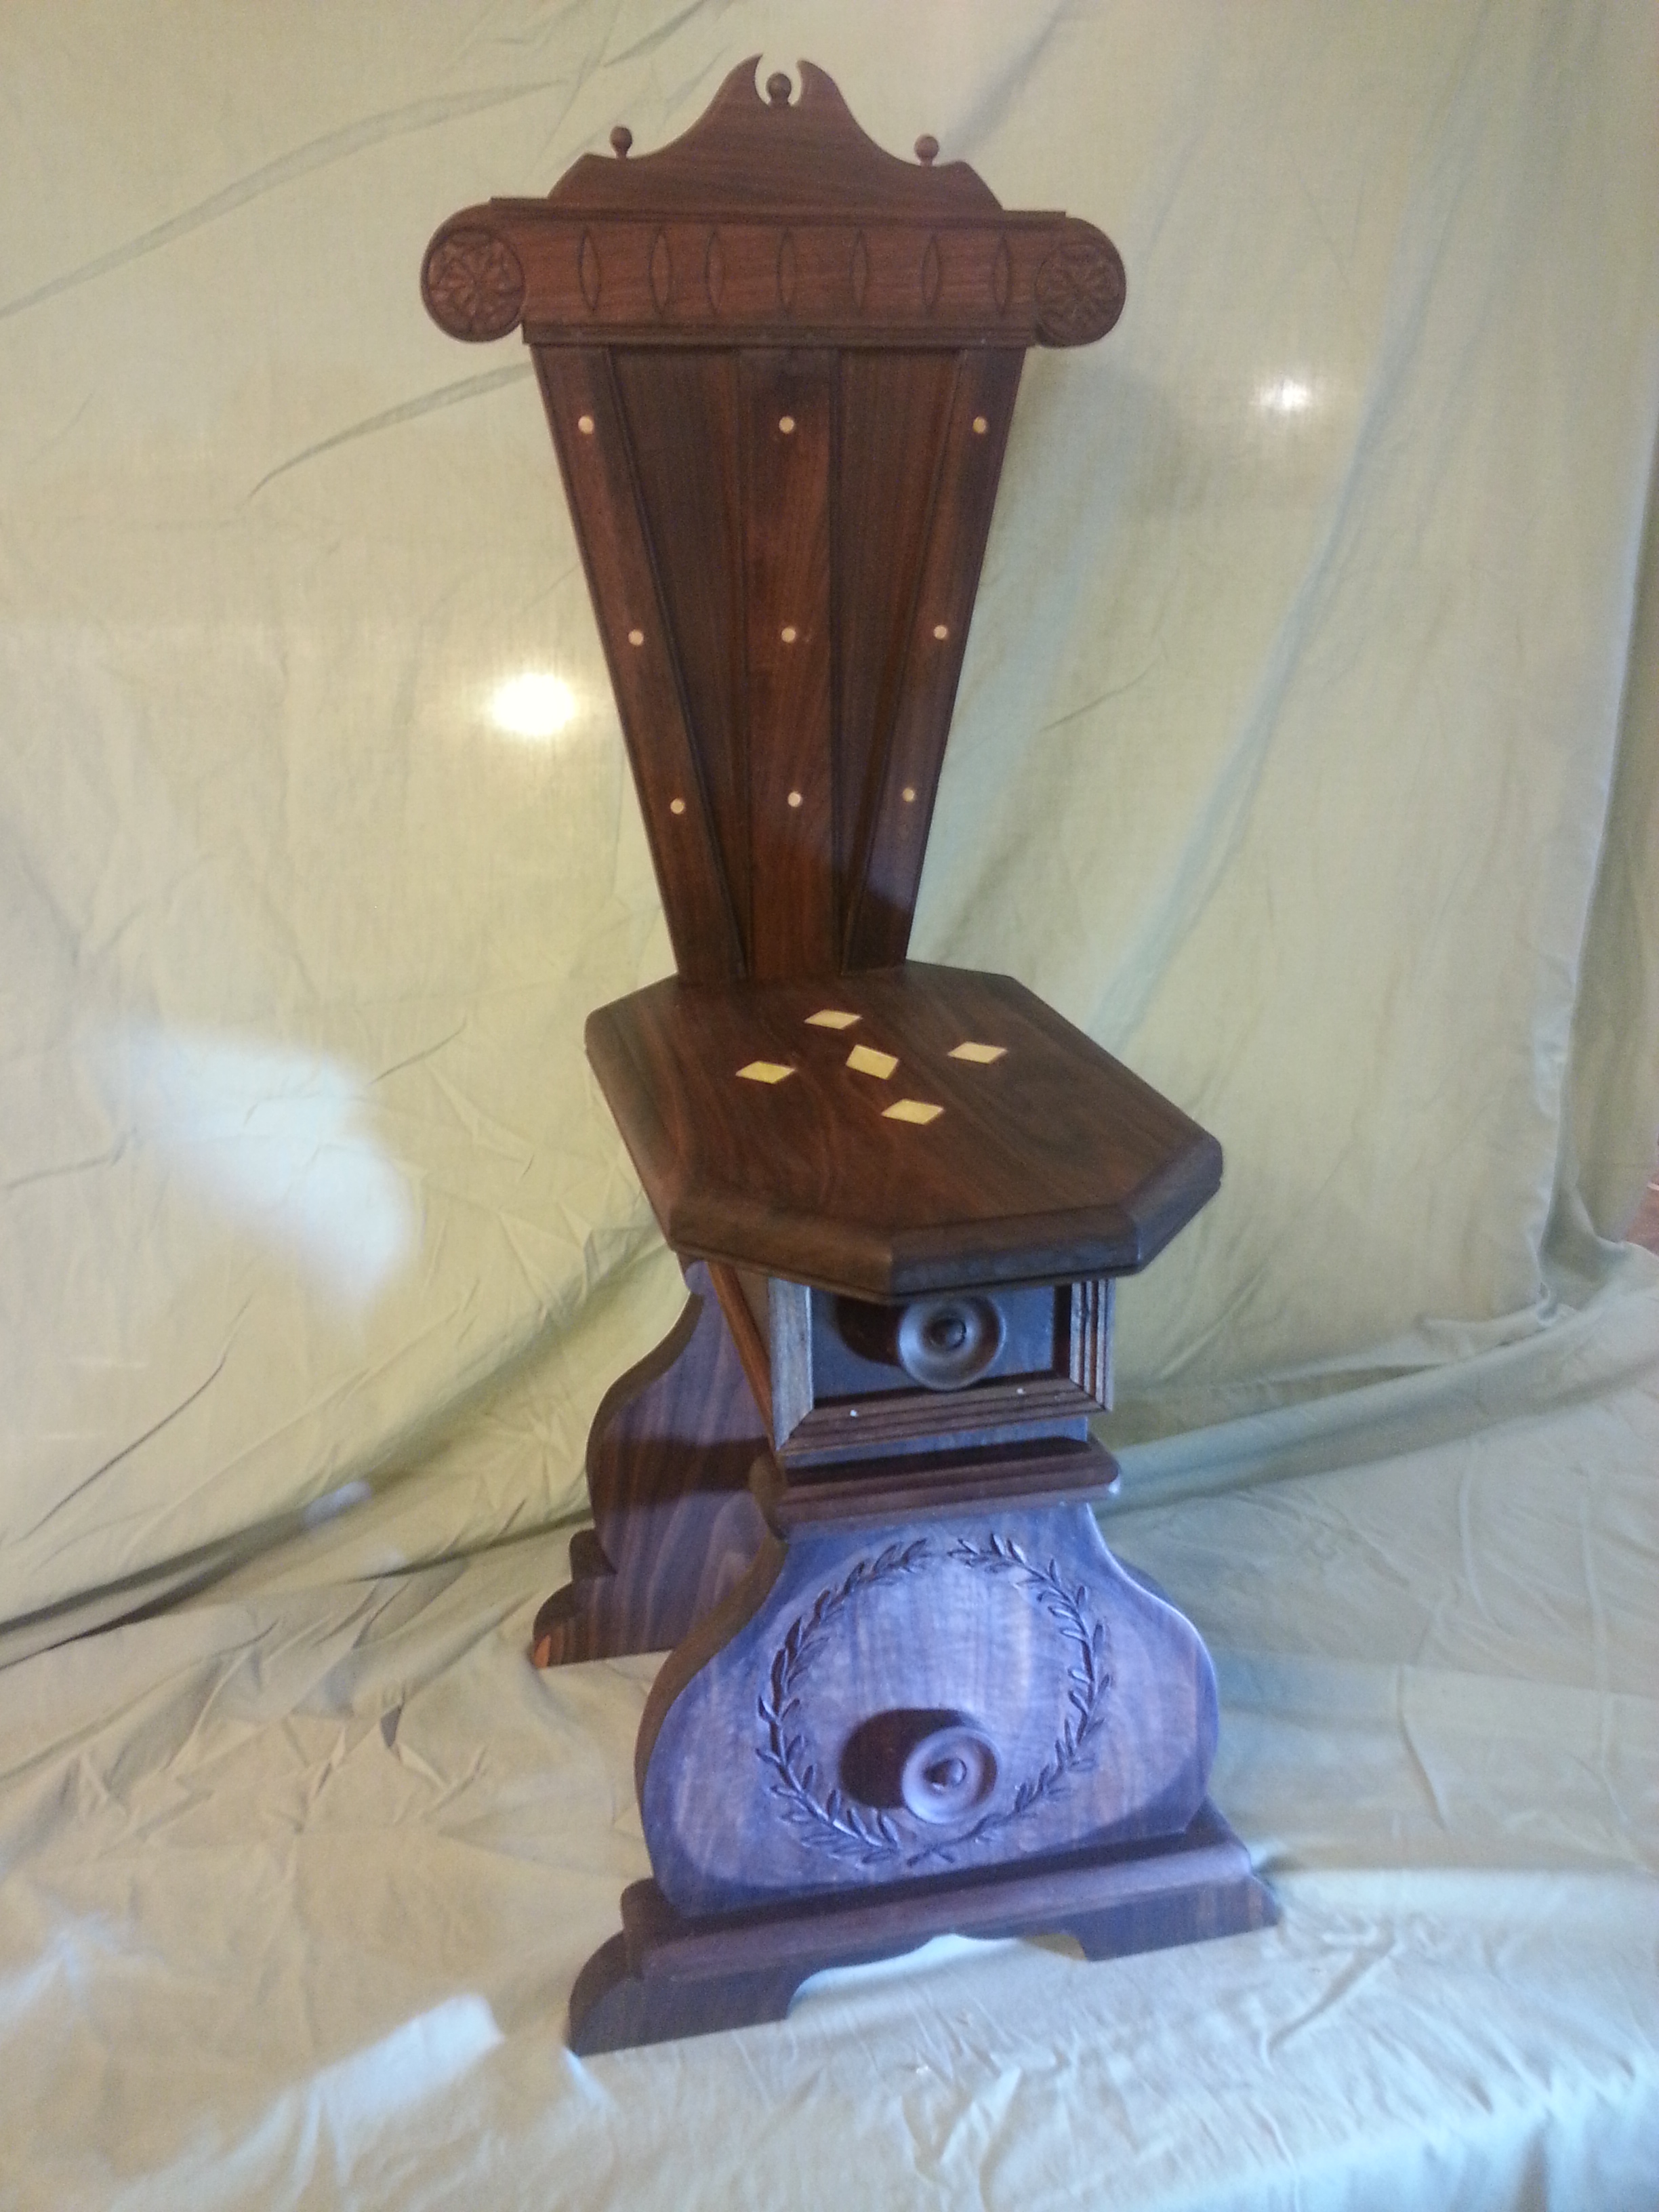
The form is generally constituted of an urn or vase shaped lower section, a box-shaped apron, rondels or rosettes on the “leg” faces, applied ornamental mouldings (uniformly attached with nails!), octagonal seat, a “V” shaped back, and carving, from minimal to extremely ornate. Quite a few Sgabelli in the collections of the VAM and Met have also been restored or modified in the 19th century, adding a dizzying level of details and decoration to the original 16th century pieces. But hey, this is about me crowing of my own successes, so lets get back to that.
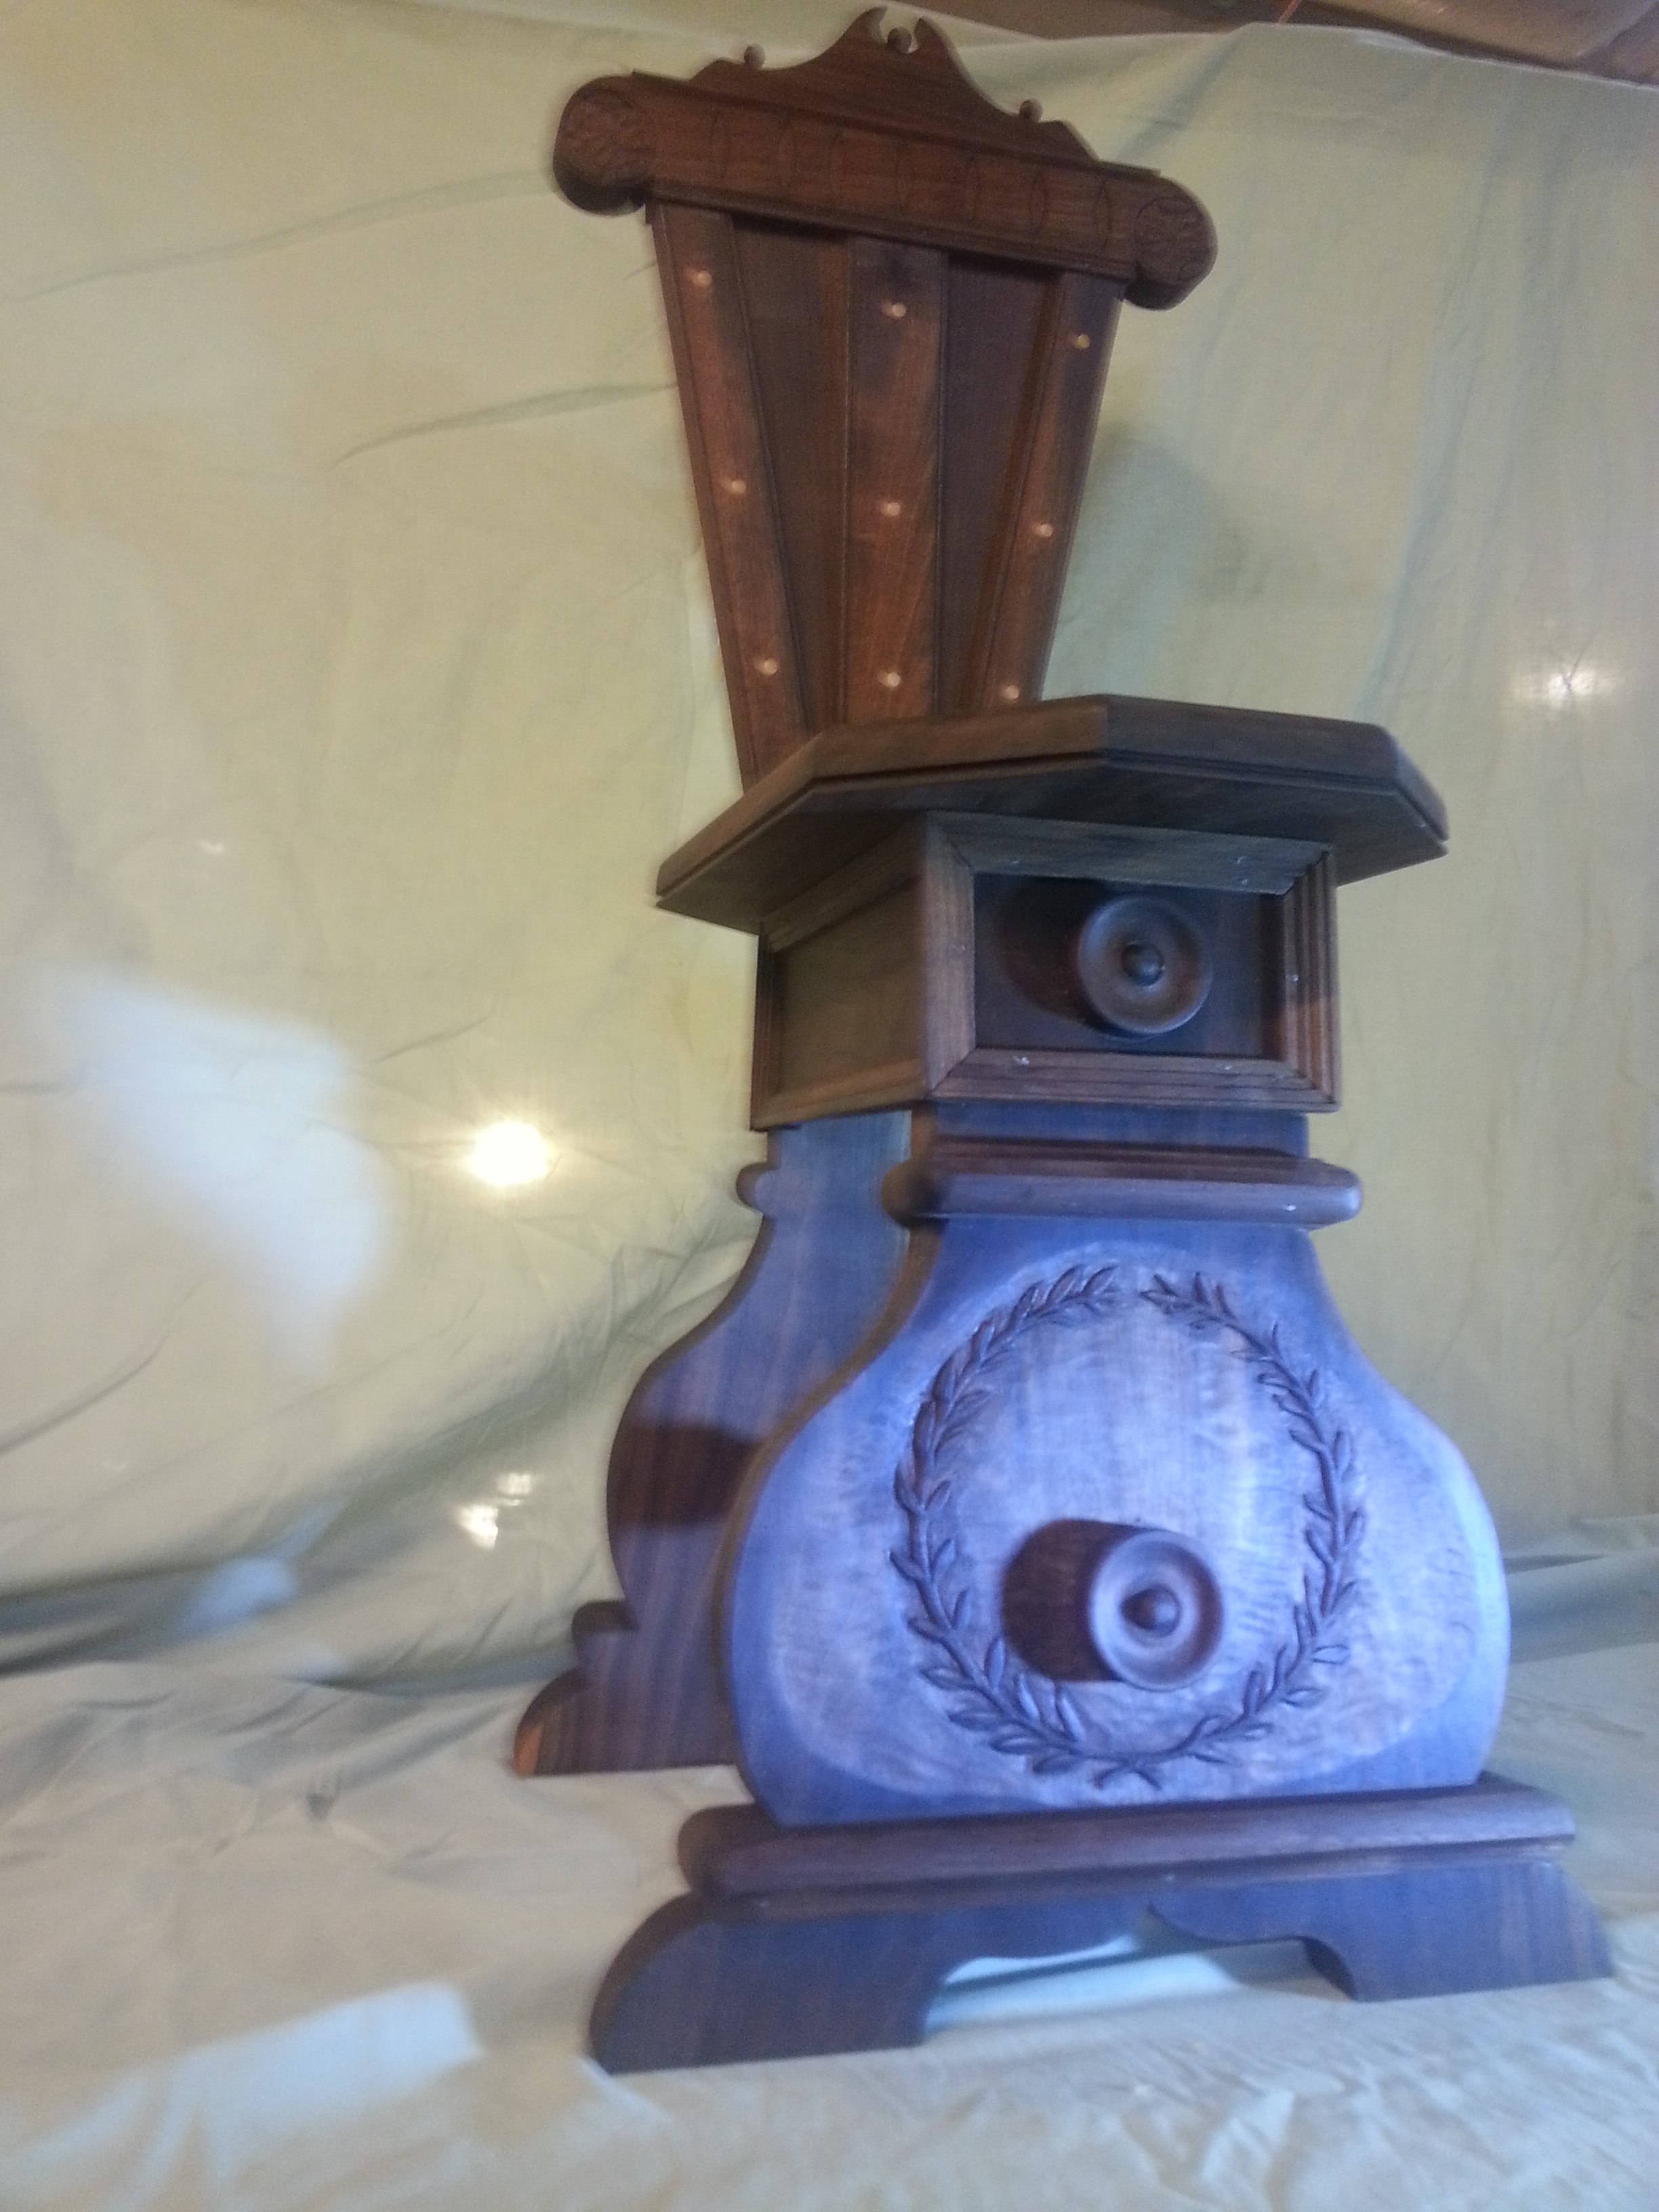
“Morning Dew” A slightly better look at the lower section of the chair, highlighting the laurel wreath carved around the lower rondel. Each of the four rondels (two front, two rear) on this piece were face turned by hand. The carving, quite obviously, was all handwork as well, laid out with a set of dividers around a central point.
The primary wood is Black Walnut with inlays of Holly. Were I able to acquire Italian Walnut, I would have used that instead as it gives a brighter, less imposing color. Given the available materials, the Holly inlay pops a lot more against the Black Walnut than does the Maple inlay in the primary inspiration piece.
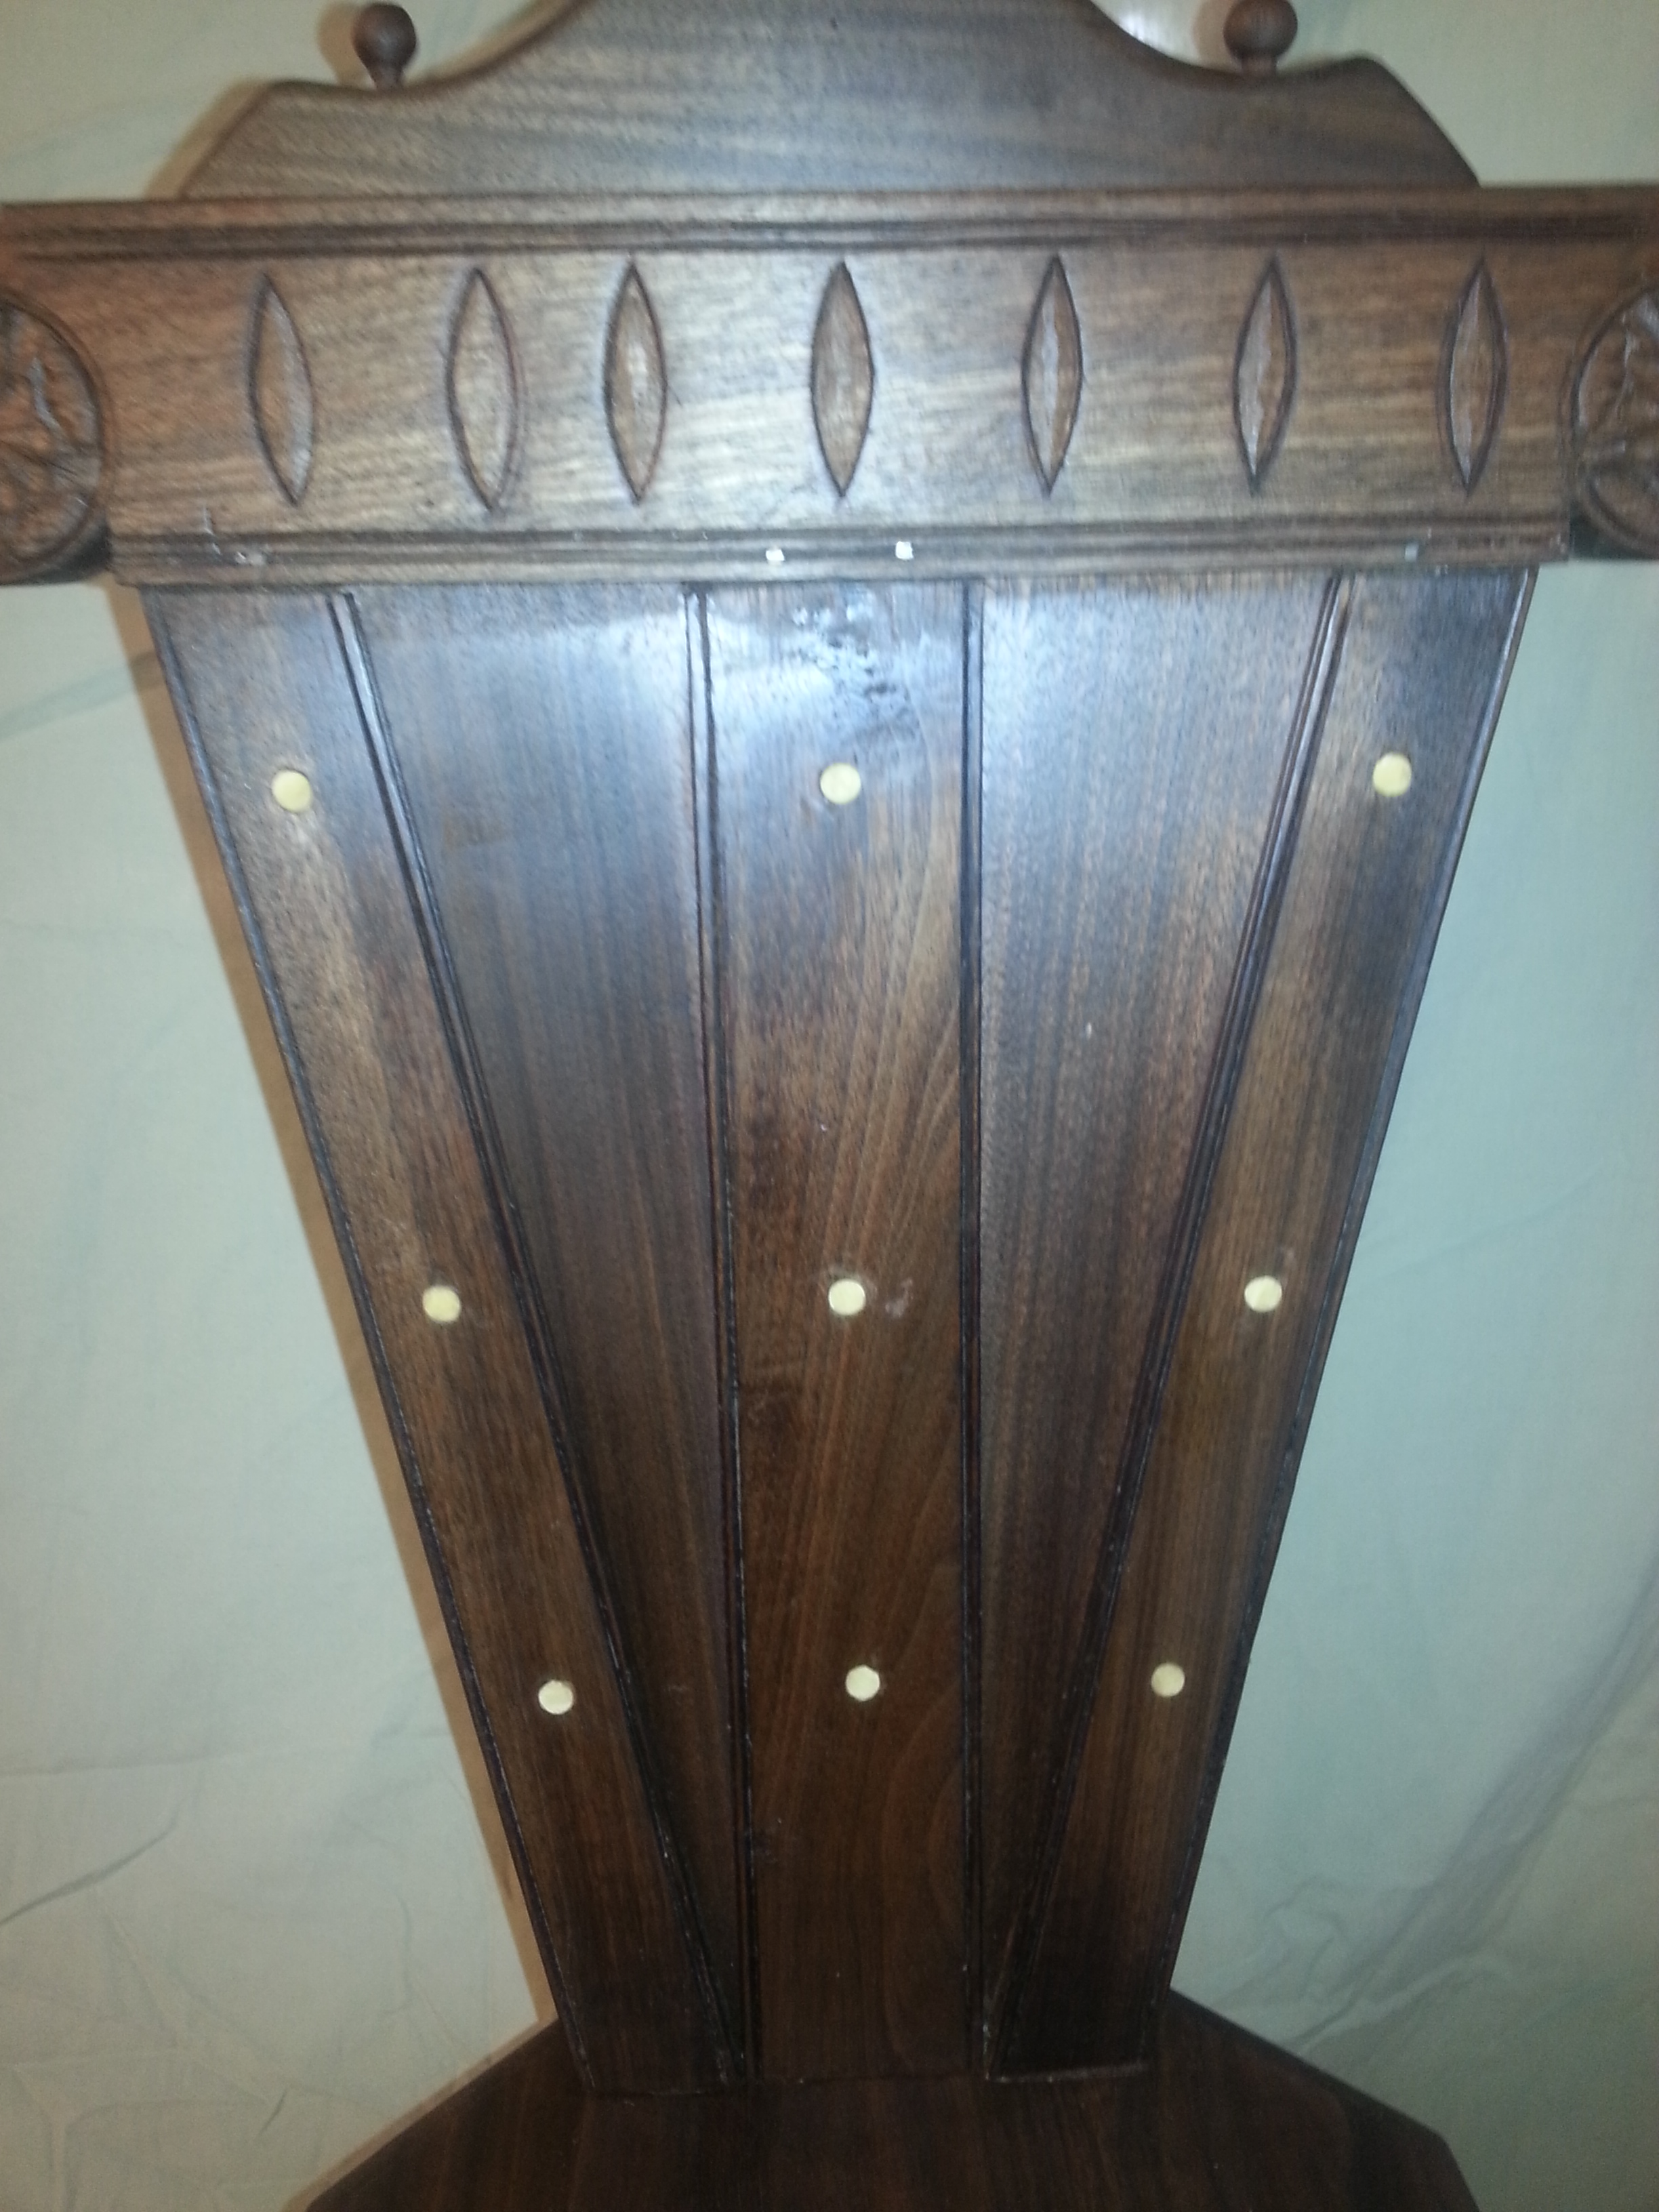
The triangular frame and panel backrest. The “white dots” are holly inlays set at an interval like the ivory dots in a modern guitar neck. That shadow line that runs along the stiles is somewhere about a 1/32″ quirk bead. That tiny profile is actually cut on all the corners of the stiles, including the two that are on the inside faces around the panels.
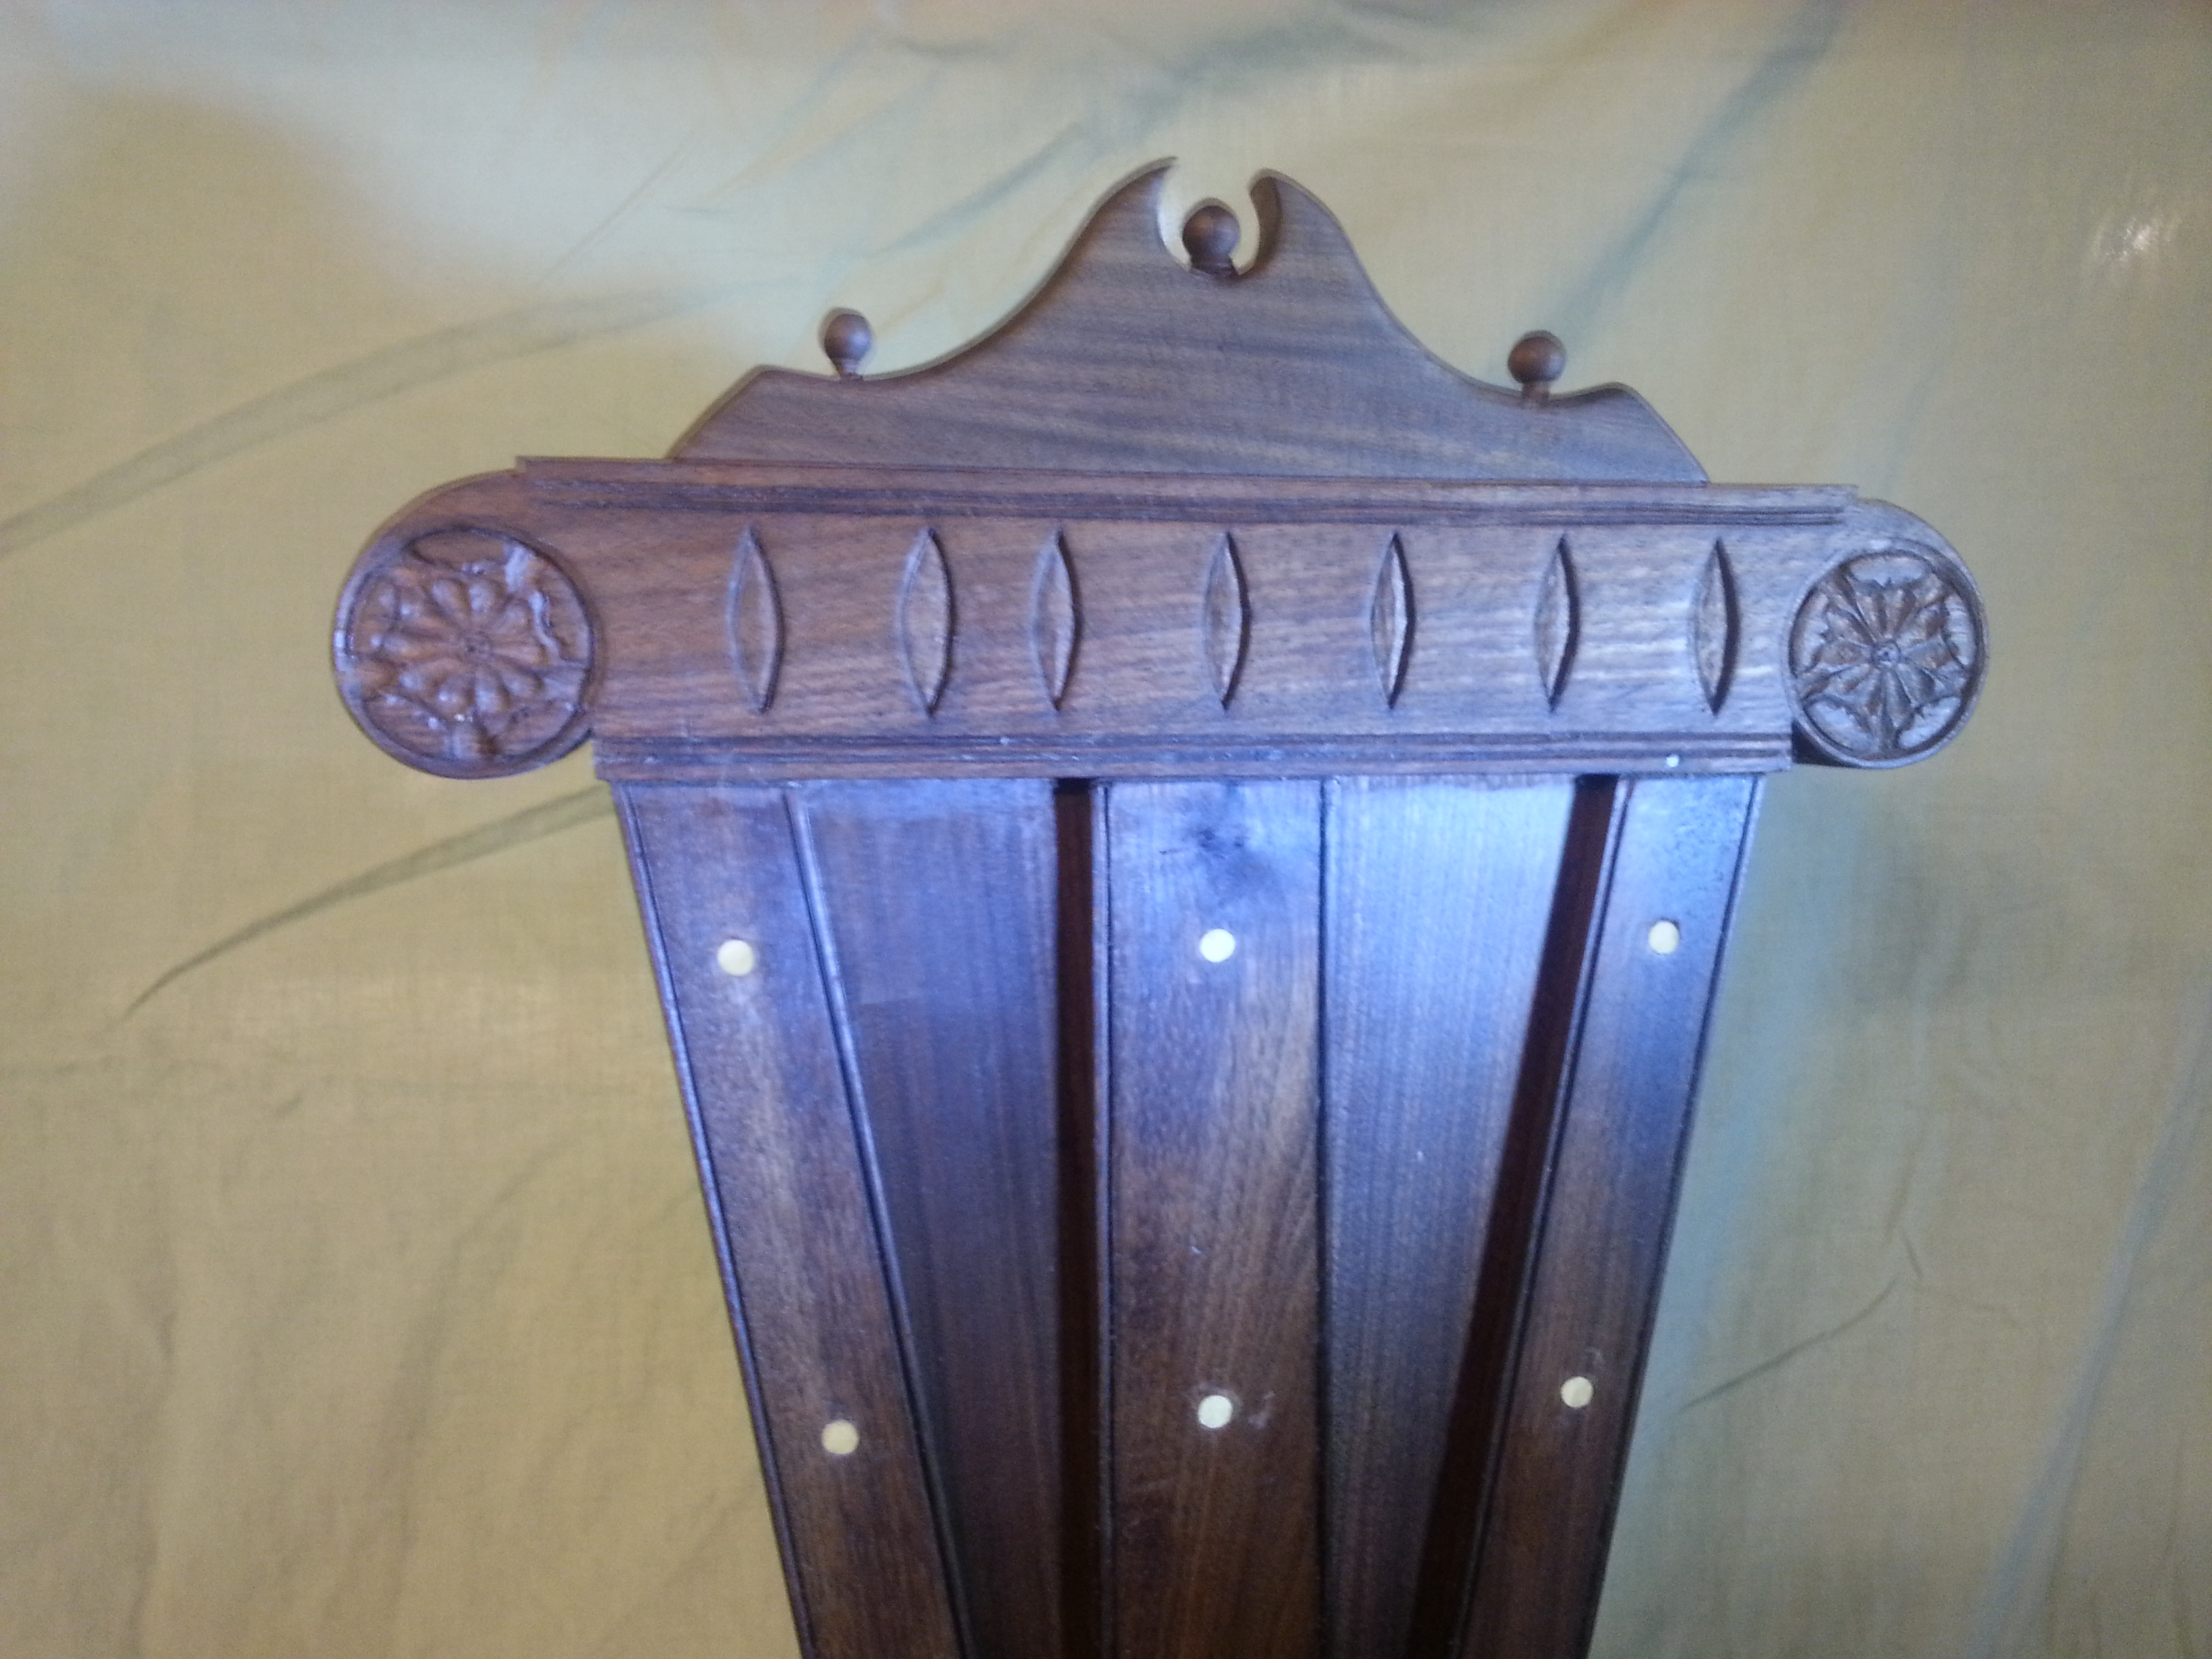
Then there are the carved roses. The Medici Sgabello (from the PMA) has roses in this same orientation. These are roses of five petals. Aside from the small scale carving of these pieces, the layout geometry for a five pointed object within a circle is exceptionally difficult. Grab a set of dividers and give it a try. Finding 1/4th of a circle is rather simple. Finding 1/6th of a circle is impossible to screw up. Getting an accurate 1/5th? Even the easy way is rather difficult. The finials at the top were individually turned and then with a tapering round tenon driven into the seatback to hold on the decorative compound ogee riser.
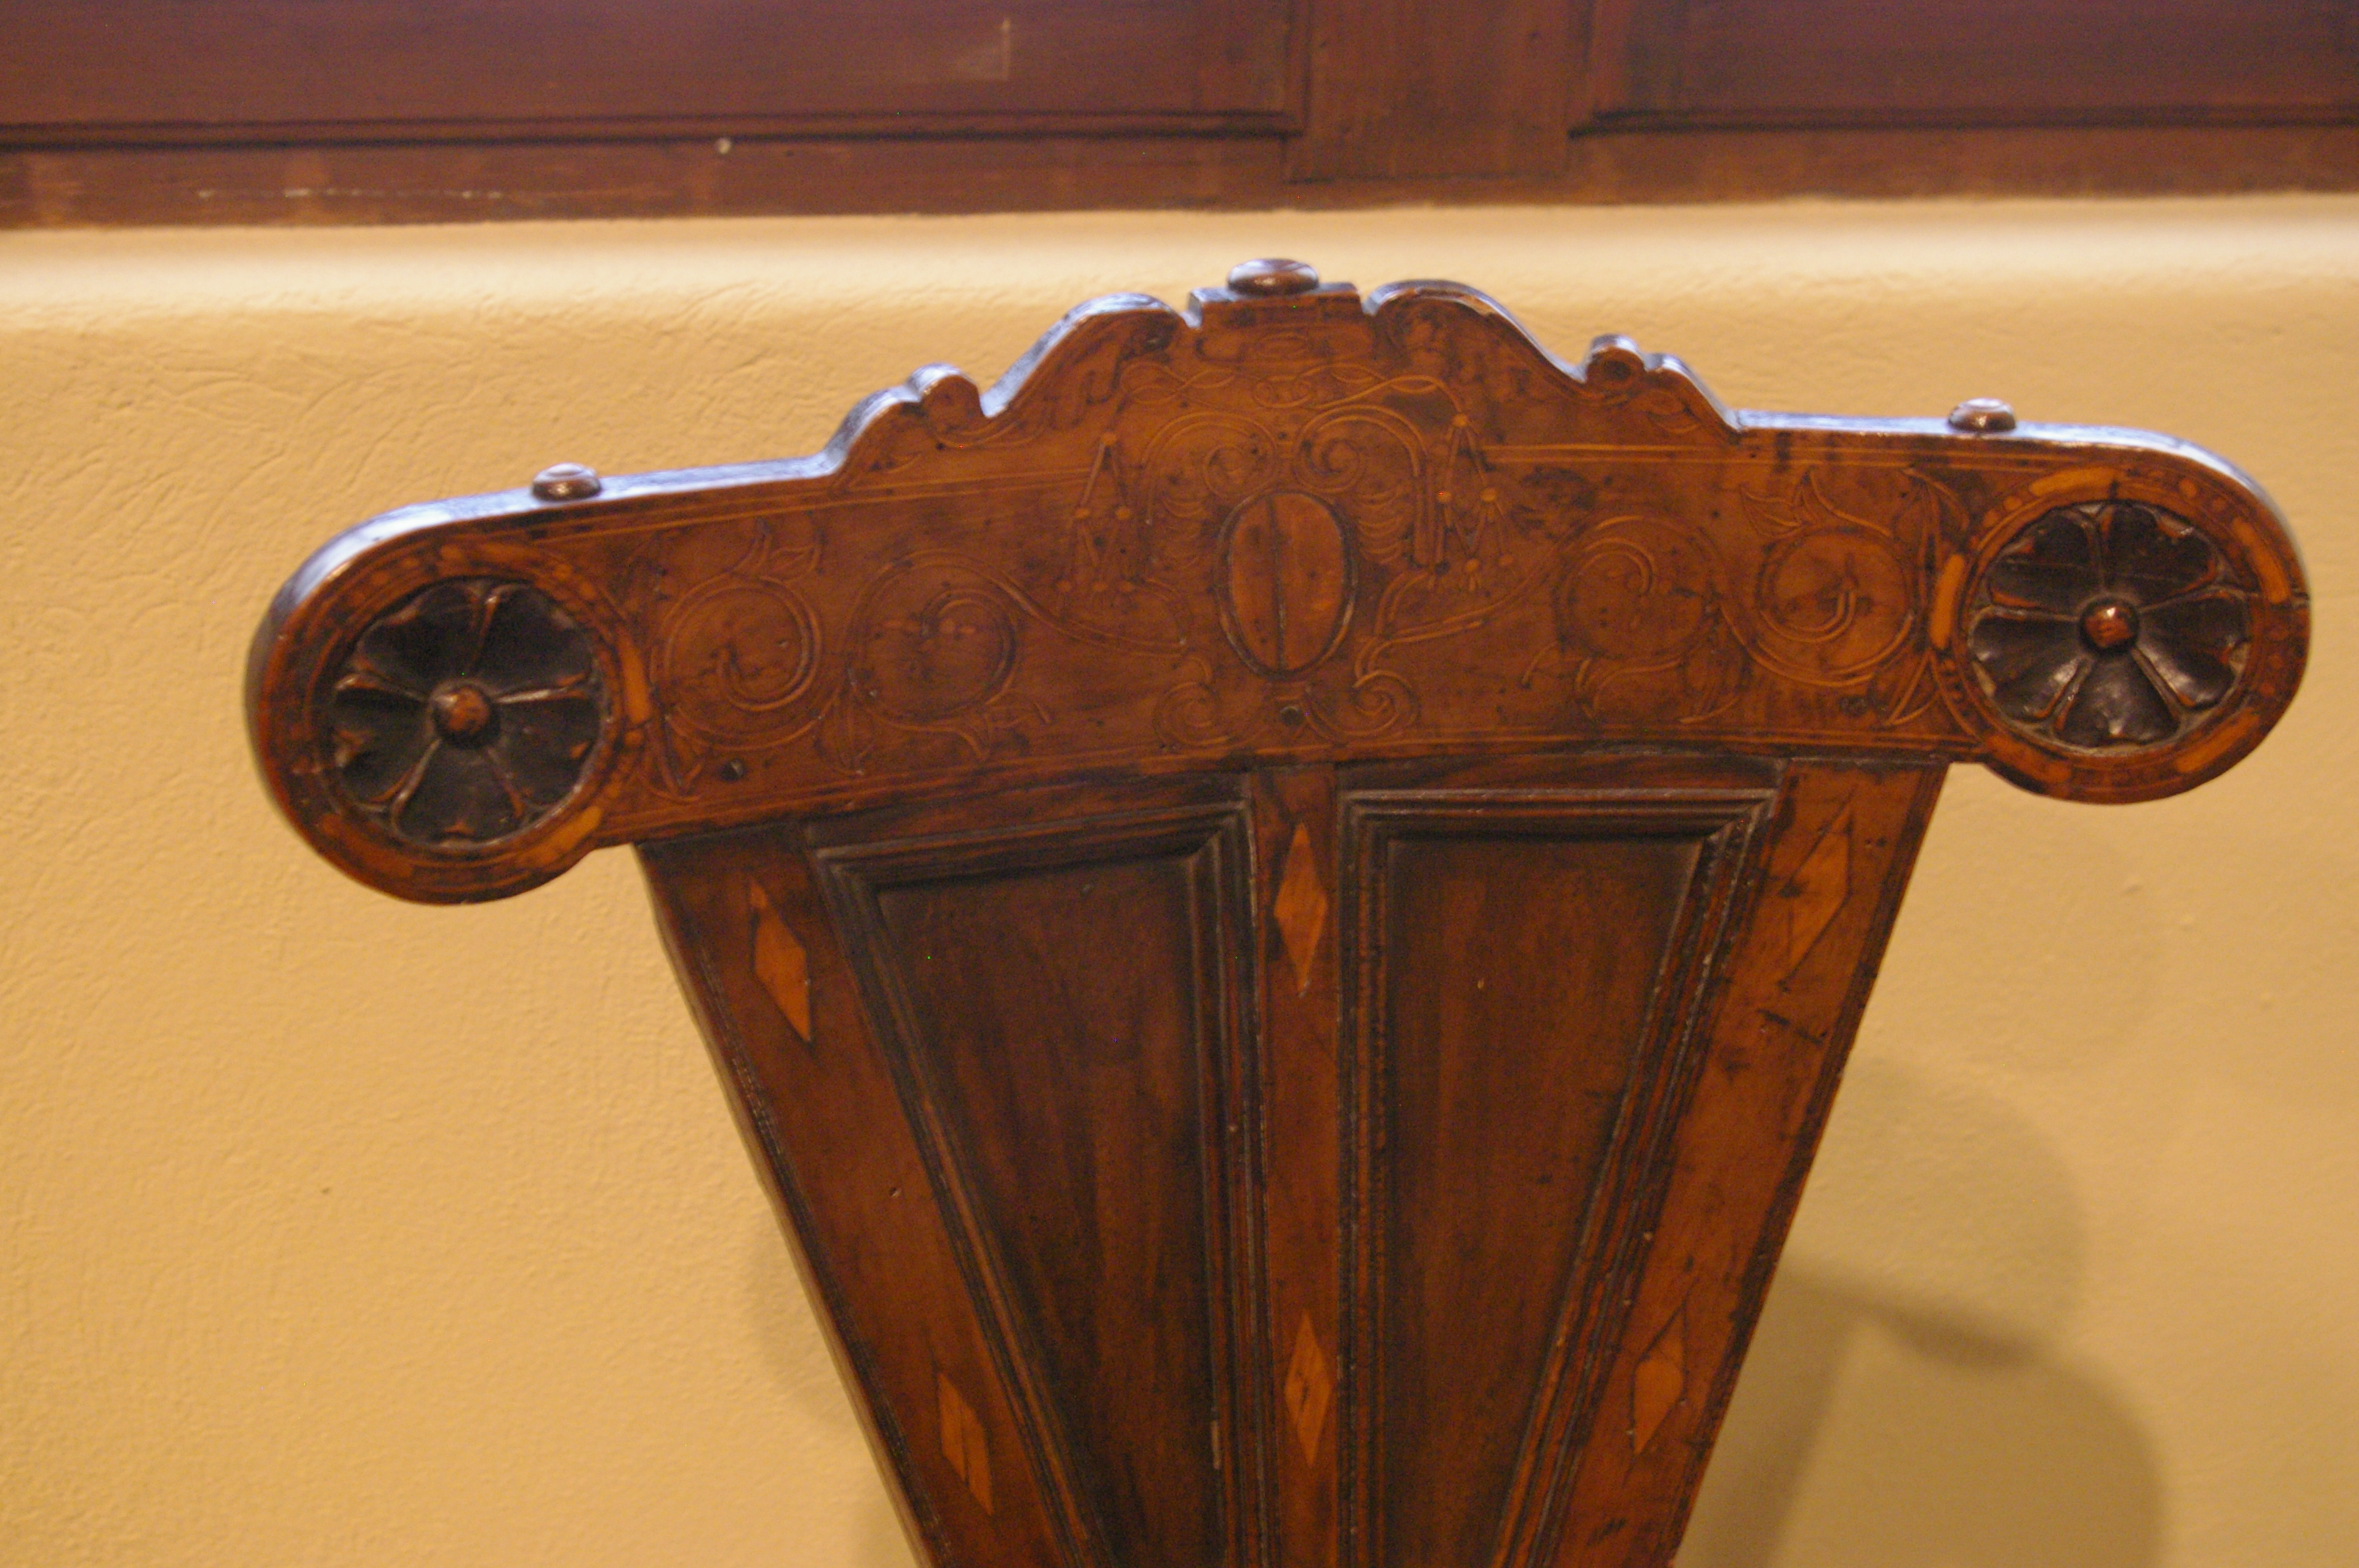
A detail photograph of the Medici extant in the PMA. This shows the far simpler rose pattern used in that example. Meanwhile, it also shows a very intricate string inlay pattern that I chose not to include on my piece. In part, it was lack of proper tooling. In the other, I have done string inlay and I really despise having thin filaments of wood explode when I touch them. We can also get a good look at the applied moulding profile that was added inside the frame and panels on the original chair. I pulled this element out of the the f&p and used the stepped profile instead on the box-apron. (Author’s photo)
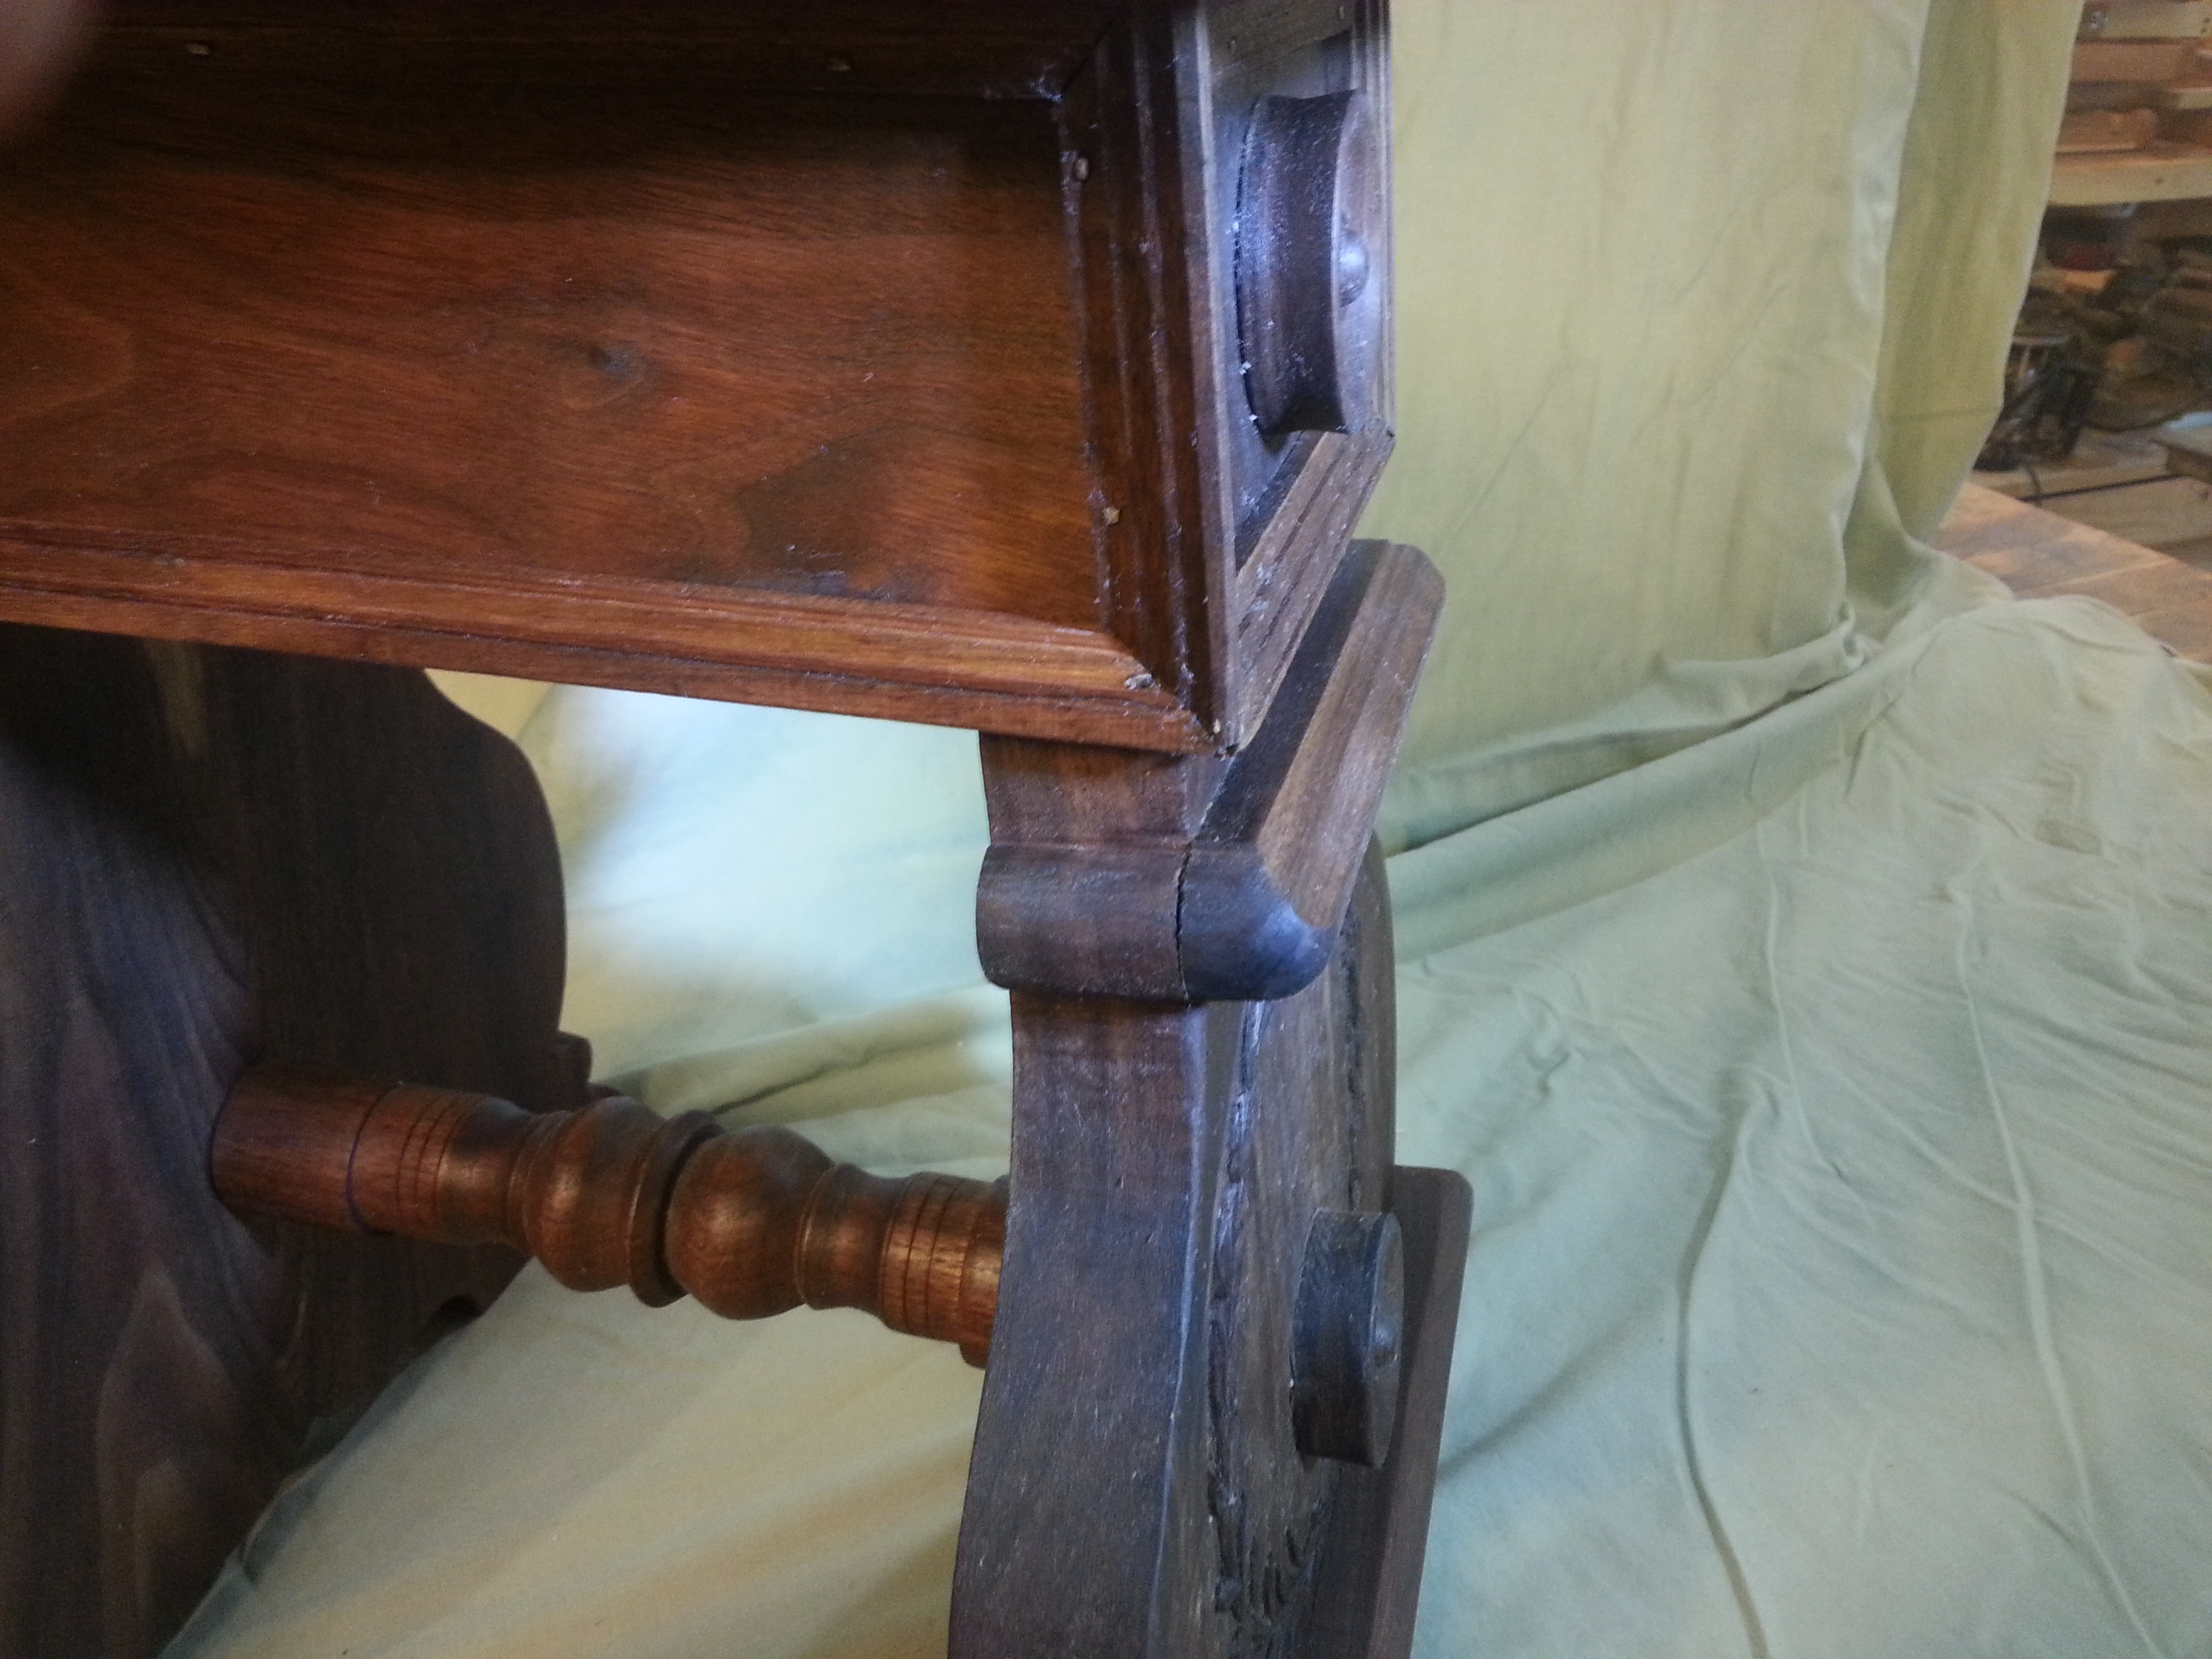
Speaking of the box-apron, here we have an oblique view. Also visible is a raised applied moulding on the front “leg” face, and the decorative spindle that acts as a stretcher between the front and rear “legs”. The urn shaped profile was derived by trial and error in the design phase, working different radii of compound arcs against one another until I found a pleasing shape. The stretcher is an off-set turning: the primary profile was turned over-long, then once completed the whole piece was offset by a touch, then the ends were re-turned to add to the feeling of thickness at the bottom of the chair and thinness in the middle. This picture barely captures that detail. Integral tenons were then turned off of the offset to mate into round mortises hidden behind the lower rondels on the front and rear assemblies. This picture barely captures that detail. Also, as noted in the original examples, all the mouldings and applied decorations are nailed into place– here, using 1.25″ square cut headless brads from Tremont Nail. Note specifically that the profiled mouldings that wrap the vertical corners of the box are not mitered together or spliced. The profile is cut into two adjacent faces, the highest faces of the profile being the outside arisses. On the back side of the stuck mouldings is a square rabbet which faces the joined corners of the box-apron. Matching the profile on these faces, aligning on the rake of the box, and mitering the corners of these compound mouldings was a very painstaking process. The difficulty involved in “nailing on a moulding” was surprising.
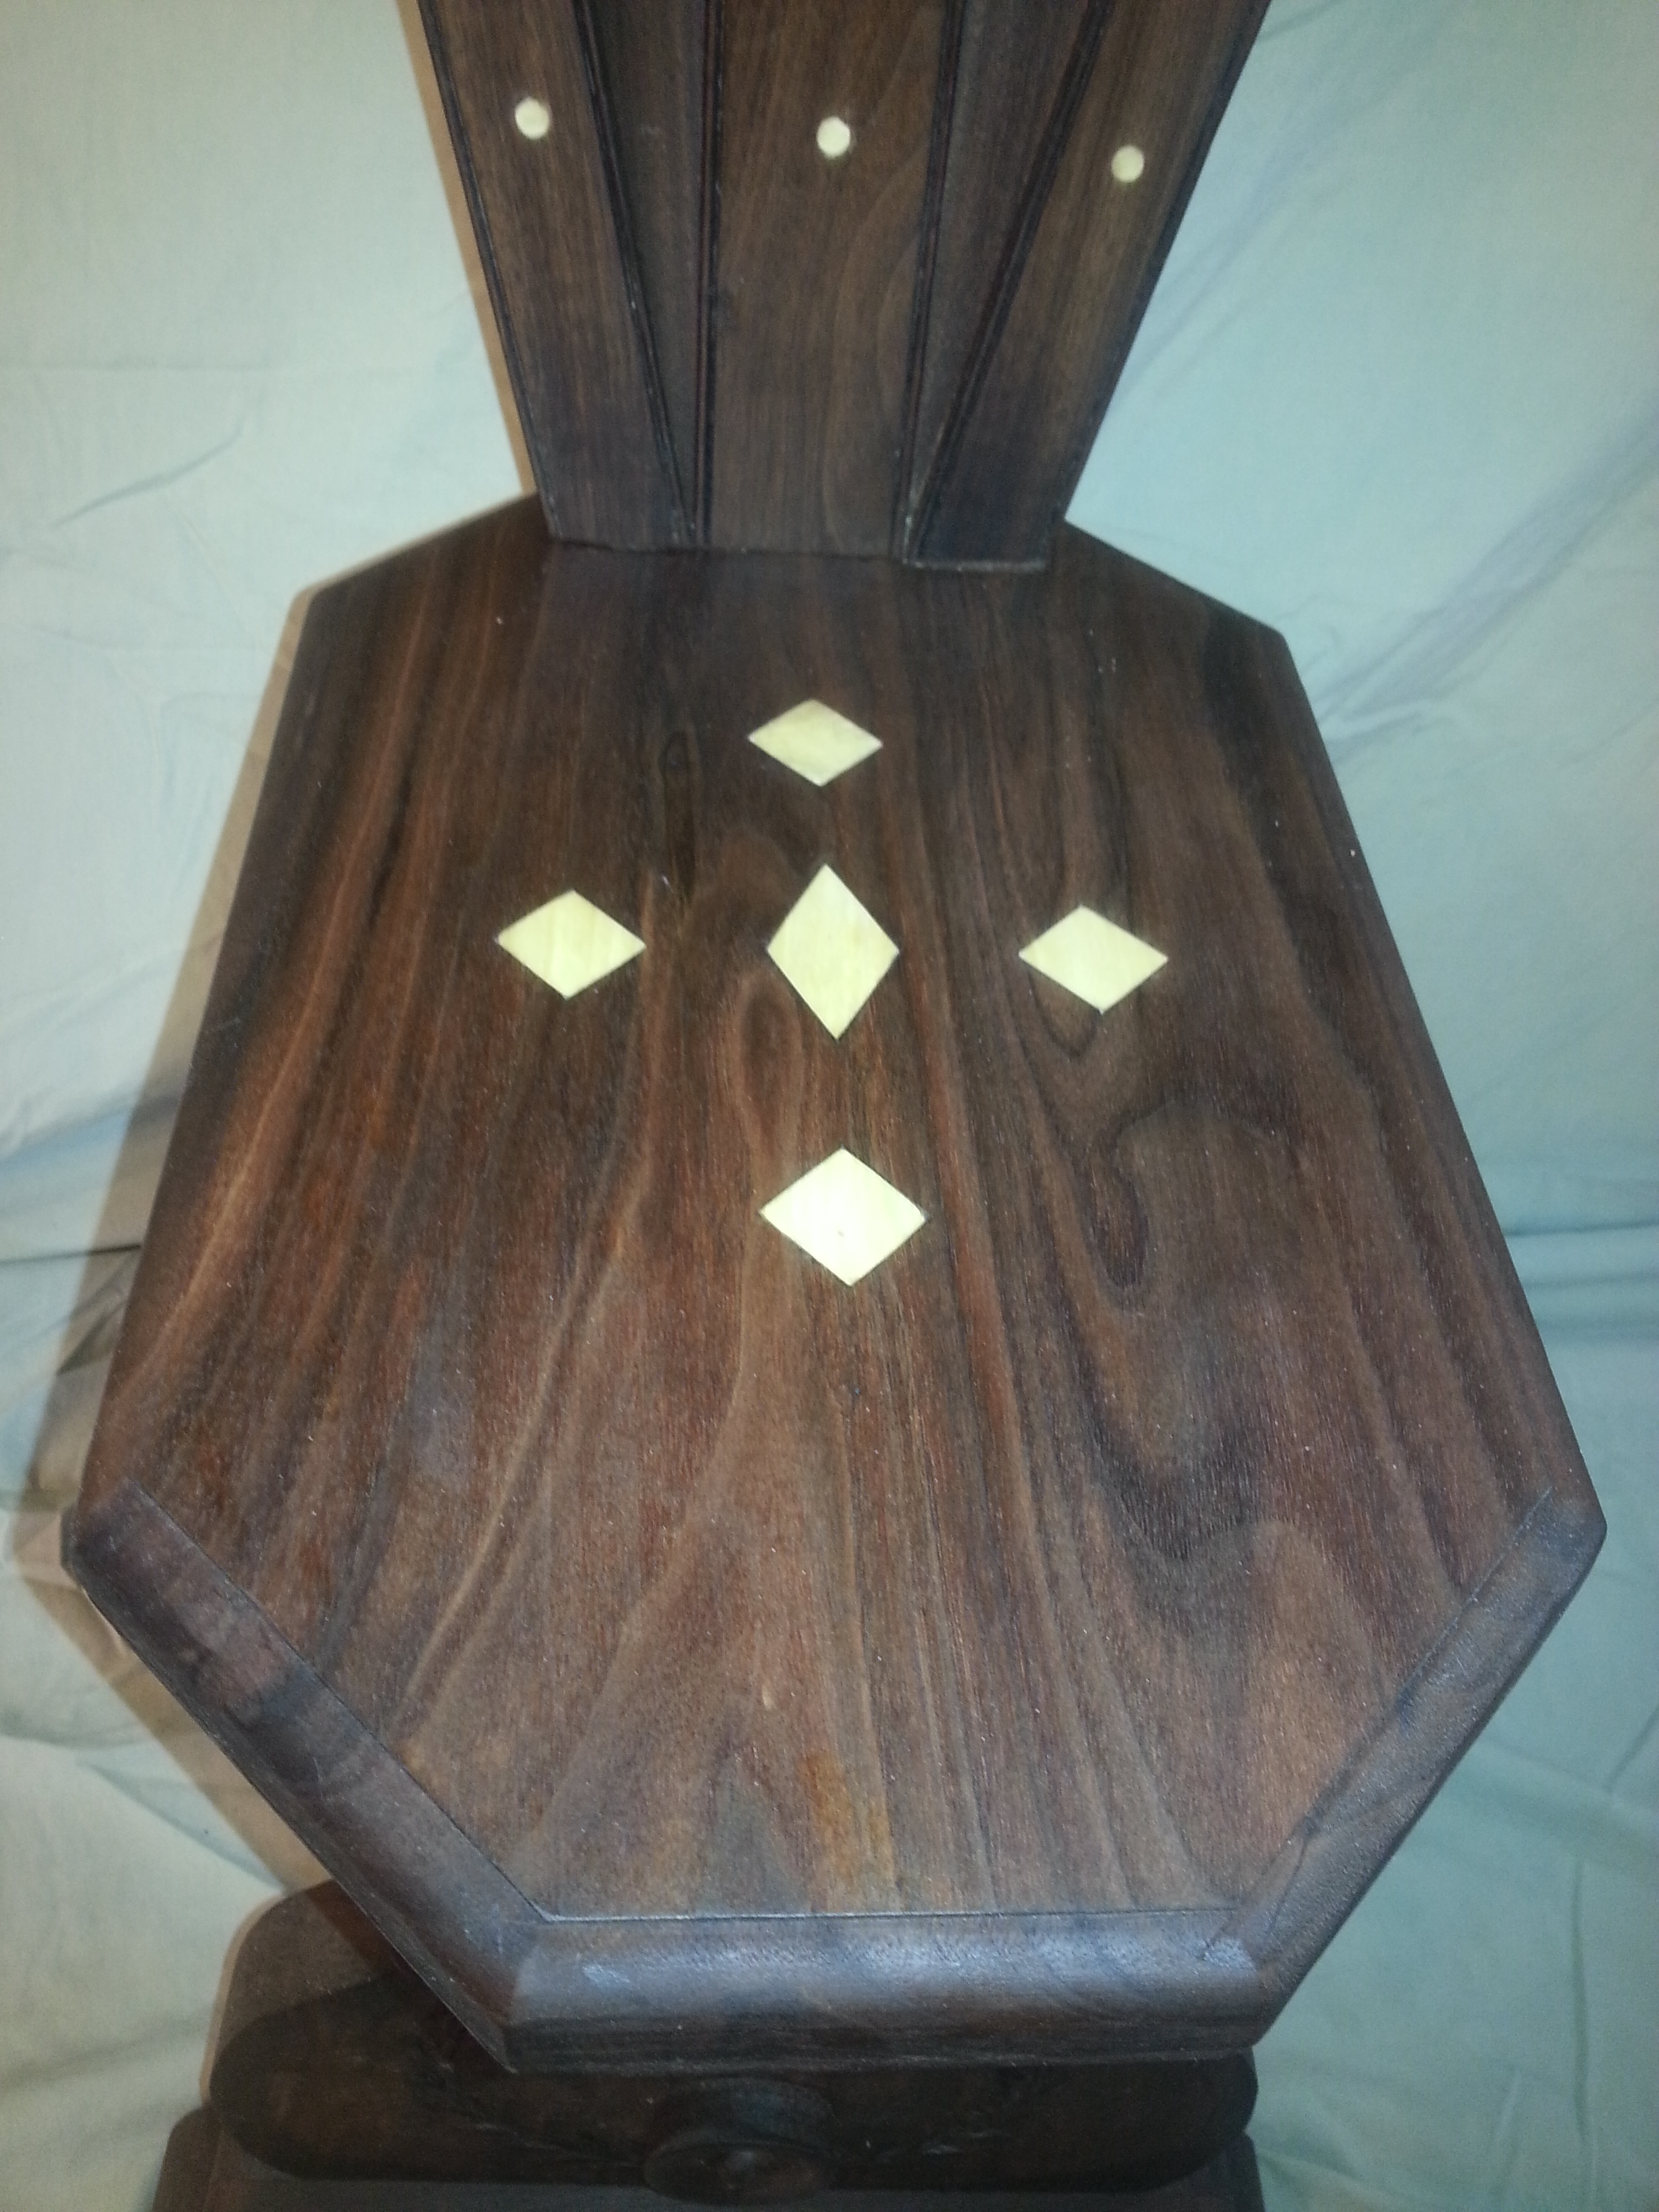
Finally, the inlay on the seat. Several of the museum pieces identify that these inlays covered nails which attach the seat to the box-apron. I found it logical to use those points to disguise metal fasteners as well. The holly inlay is almost dead-white with a nearly invisible grain structure once cut to size and burnished. Several successive coats of walnut oil (which is a traditional wood finishing oil appropriate to 15th and 16th century Italy) have yellowed the holly to appear like aged ivory. I did toy with the idea of tracking down actual ivory for the inlays. Fake ivory wasn’t acceptable for the level of authenticity intended in this piece. Reclaimed piano ivories were too small for the area of inlay I wanted to cover. Mammoth Ivory, which is completely legal to buy and sell on the open market, was a bit outside of my fiscal means.
There are forty to fifty hours of tools on wood working time in this piece. There has been at least another dozen hours in research. Seven hours in drafting the design and layout. There are maybe five tools I own that were not used in the production of this piece (travisher, bowl adze, circular saw, scroll arm saw, threading/tap and die set). I do not have a small tool set. There were several tools I did borrow to expedite certain aspects of this piece. Almost all of the rough milling and cutting was completed with powered tools. Final shaping, fitting and finishing came down to various hand tools in great quantity and variety. Using floats, chisels, files, gouges and rasps to ease the many contours of this chair were essential. I had to make two new tools for this project as well.
There is a plan to make another Sgabello in the very near future. It is my intent to document production of several of the individual parts, and the making of several tools which will make repeat productions much easier.
I think the last bit of the story behind this chair is also worth mentioning: the day I finished it. This chair took up much of my active and mental time over the course of three months. When I wasn’t actively working on some part, thoughts of how to make the next part were never far from the front of my mind. I started, seriously, reverse engineering the originals and developing the plans to build this chair the last half of April (2015). As I placed the last pieces of mouldings and reached for the walnut oil to start laying a protective finish, the sky was exploding. It was just after sunset, Friday 03 July 2015, and an early Independence Day celebration was going on.
The moment this chair was finished, fireworks were quite literally going off overhead.

It was very entertaining from my cheap seat, no pun intended
Gorgeous work and fantastic research. Thank you for sharing it! Derdriu
I wish I’d been able to see it first hand. The research alone is a wonder.
I’m amazed at your craftsmanship! You are way ahead of me in skill level. Thank you for sharing the amount of hours involved because it gives me an idea of how much time it will take when I get to that level.