And now we’re finally caught up to the end of the first decade of the 21st century… VIDEO!
We’ll be laying out a center line for marking a boot-jack on a pair of end boards, part of a Boarded Chest build that’s in the shop this week.

And now we’re finally caught up to the end of the first decade of the 21st century… VIDEO!
We’ll be laying out a center line for marking a boot-jack on a pair of end boards, part of a Boarded Chest build that’s in the shop this week.
In any endeavor we make use of certain skills within any one field. Sometimes we are required to use skill over multiple fields. Very rarely does a project come along that requires one to use almost every skill, and tool, they have developed to reach a goal.
A person whom I hold in very high esteem has been acknowledged very highly for their skills and abilities in Renaissance Italian Dance. Some time ago while visiting the Philadelphia Museum of Art we (this person and I) saw a Sgabello in the collection. This one, in fact:
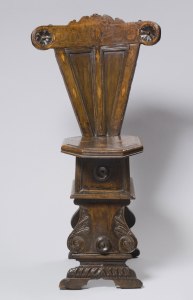
Photo from Philadelphia Museum of Art, Accession Number: 1949-9-1. Original Construction Dated 1500-1550
I was asked if I was able to produce a chair like this, and if so, what might it cost. Sadly I had to reply that I didn’t believe my skills were quite good enough to take on this project.
That was five years ago (2010).
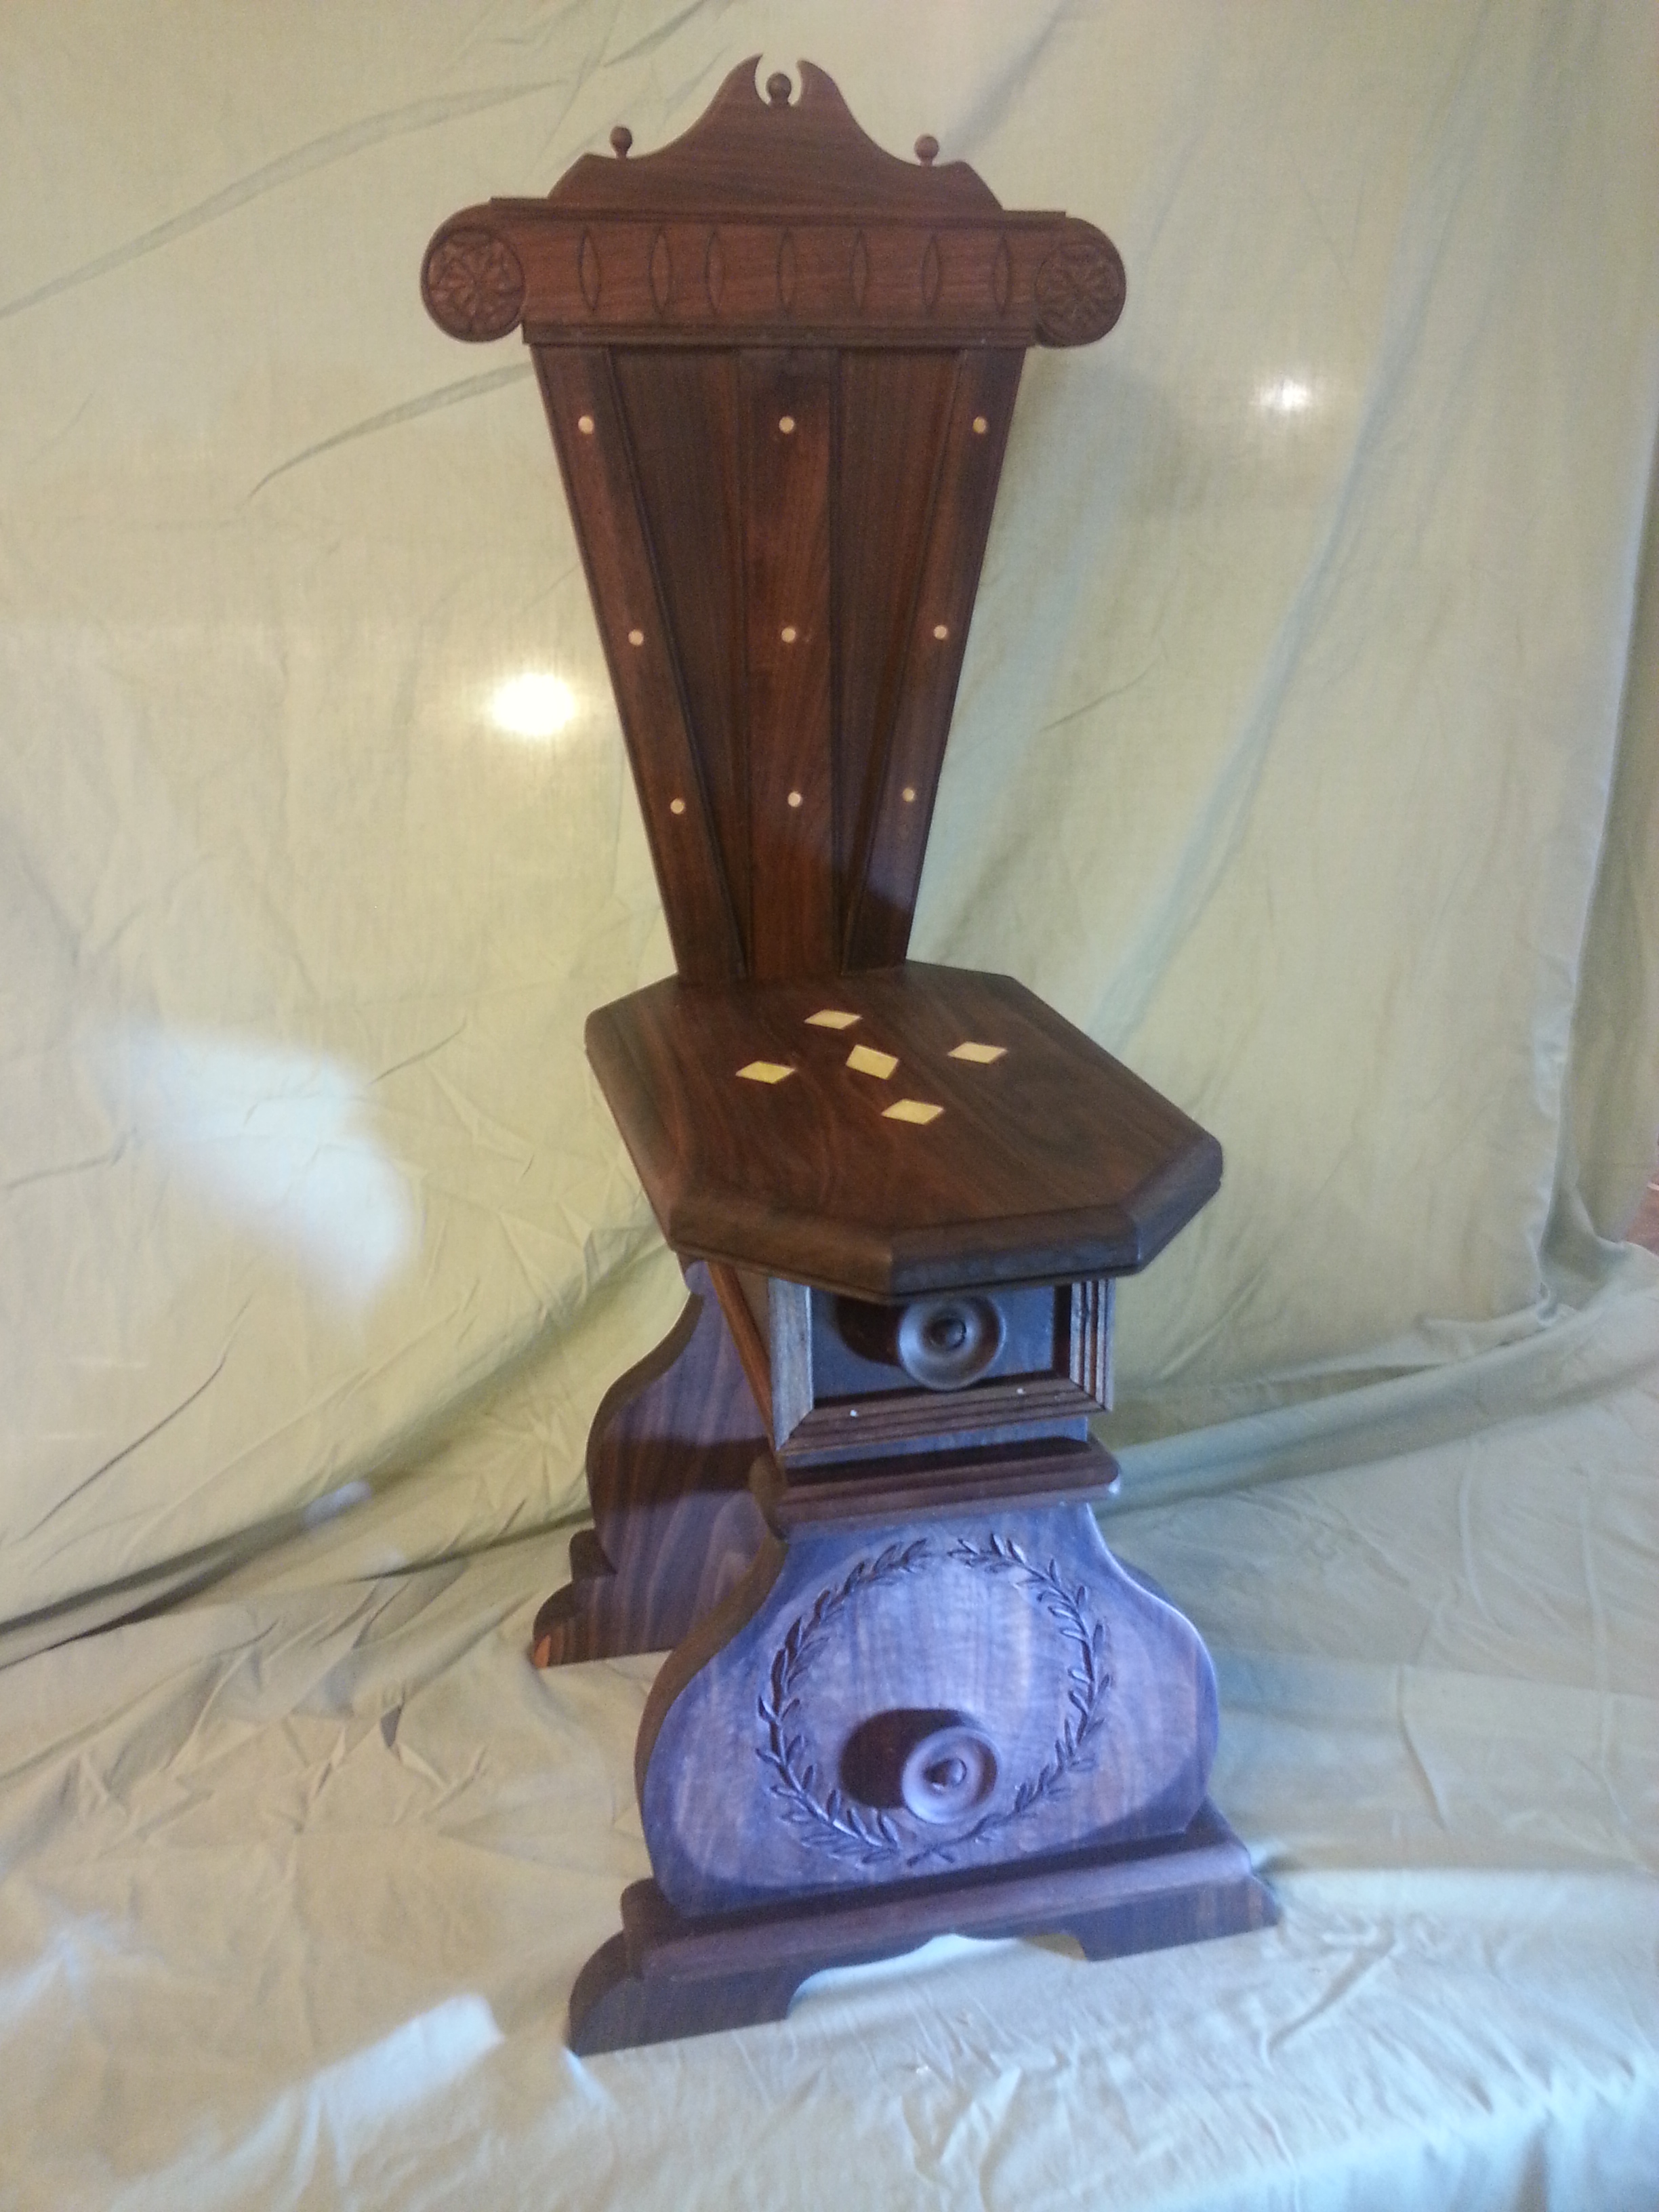
Obviously, this is not a 100% reproduction, but a piece inspired by and in the style of the 16th Century Sgabello. Before getting into the detailed views, here’s a few other pieces which were studied for inspiration and stylistic elements.

Sgabello, VAM, 1550-1570, Tuscany. The seat back (top horizontal rail of the triangular frame and panel) appears to have been a late 19th Century replacement. There was also some additional carving on the lower “leg” section that added to the original 16th century carvings at the same time.

Tuscan, 16th Century. Metropolitan Museum of Art, New York. Compared to other examples, this one is almost bereft of carving.

Late 16th Century, Rome or Florence. The Met. The seatback on this Sgabello is highly ornate and borders on Baroque Style carving. Meanwhile, the box-apron, applied mouldings, rondels, and urn-shaped legs are highly consistent with it’s contemporaries.
The form is generally constituted of an urn or vase shaped lower section, a box-shaped apron, rondels or rosettes on the “leg” faces, applied ornamental mouldings (uniformly attached with nails!), octagonal seat, a “V” shaped back, and carving, from minimal to extremely ornate. Quite a few Sgabelli in the collections of the VAM and Met have also been restored or modified in the 19th century, adding a dizzying level of details and decoration to the original 16th century pieces. But hey, this is about me crowing of my own successes, so lets get back to that.
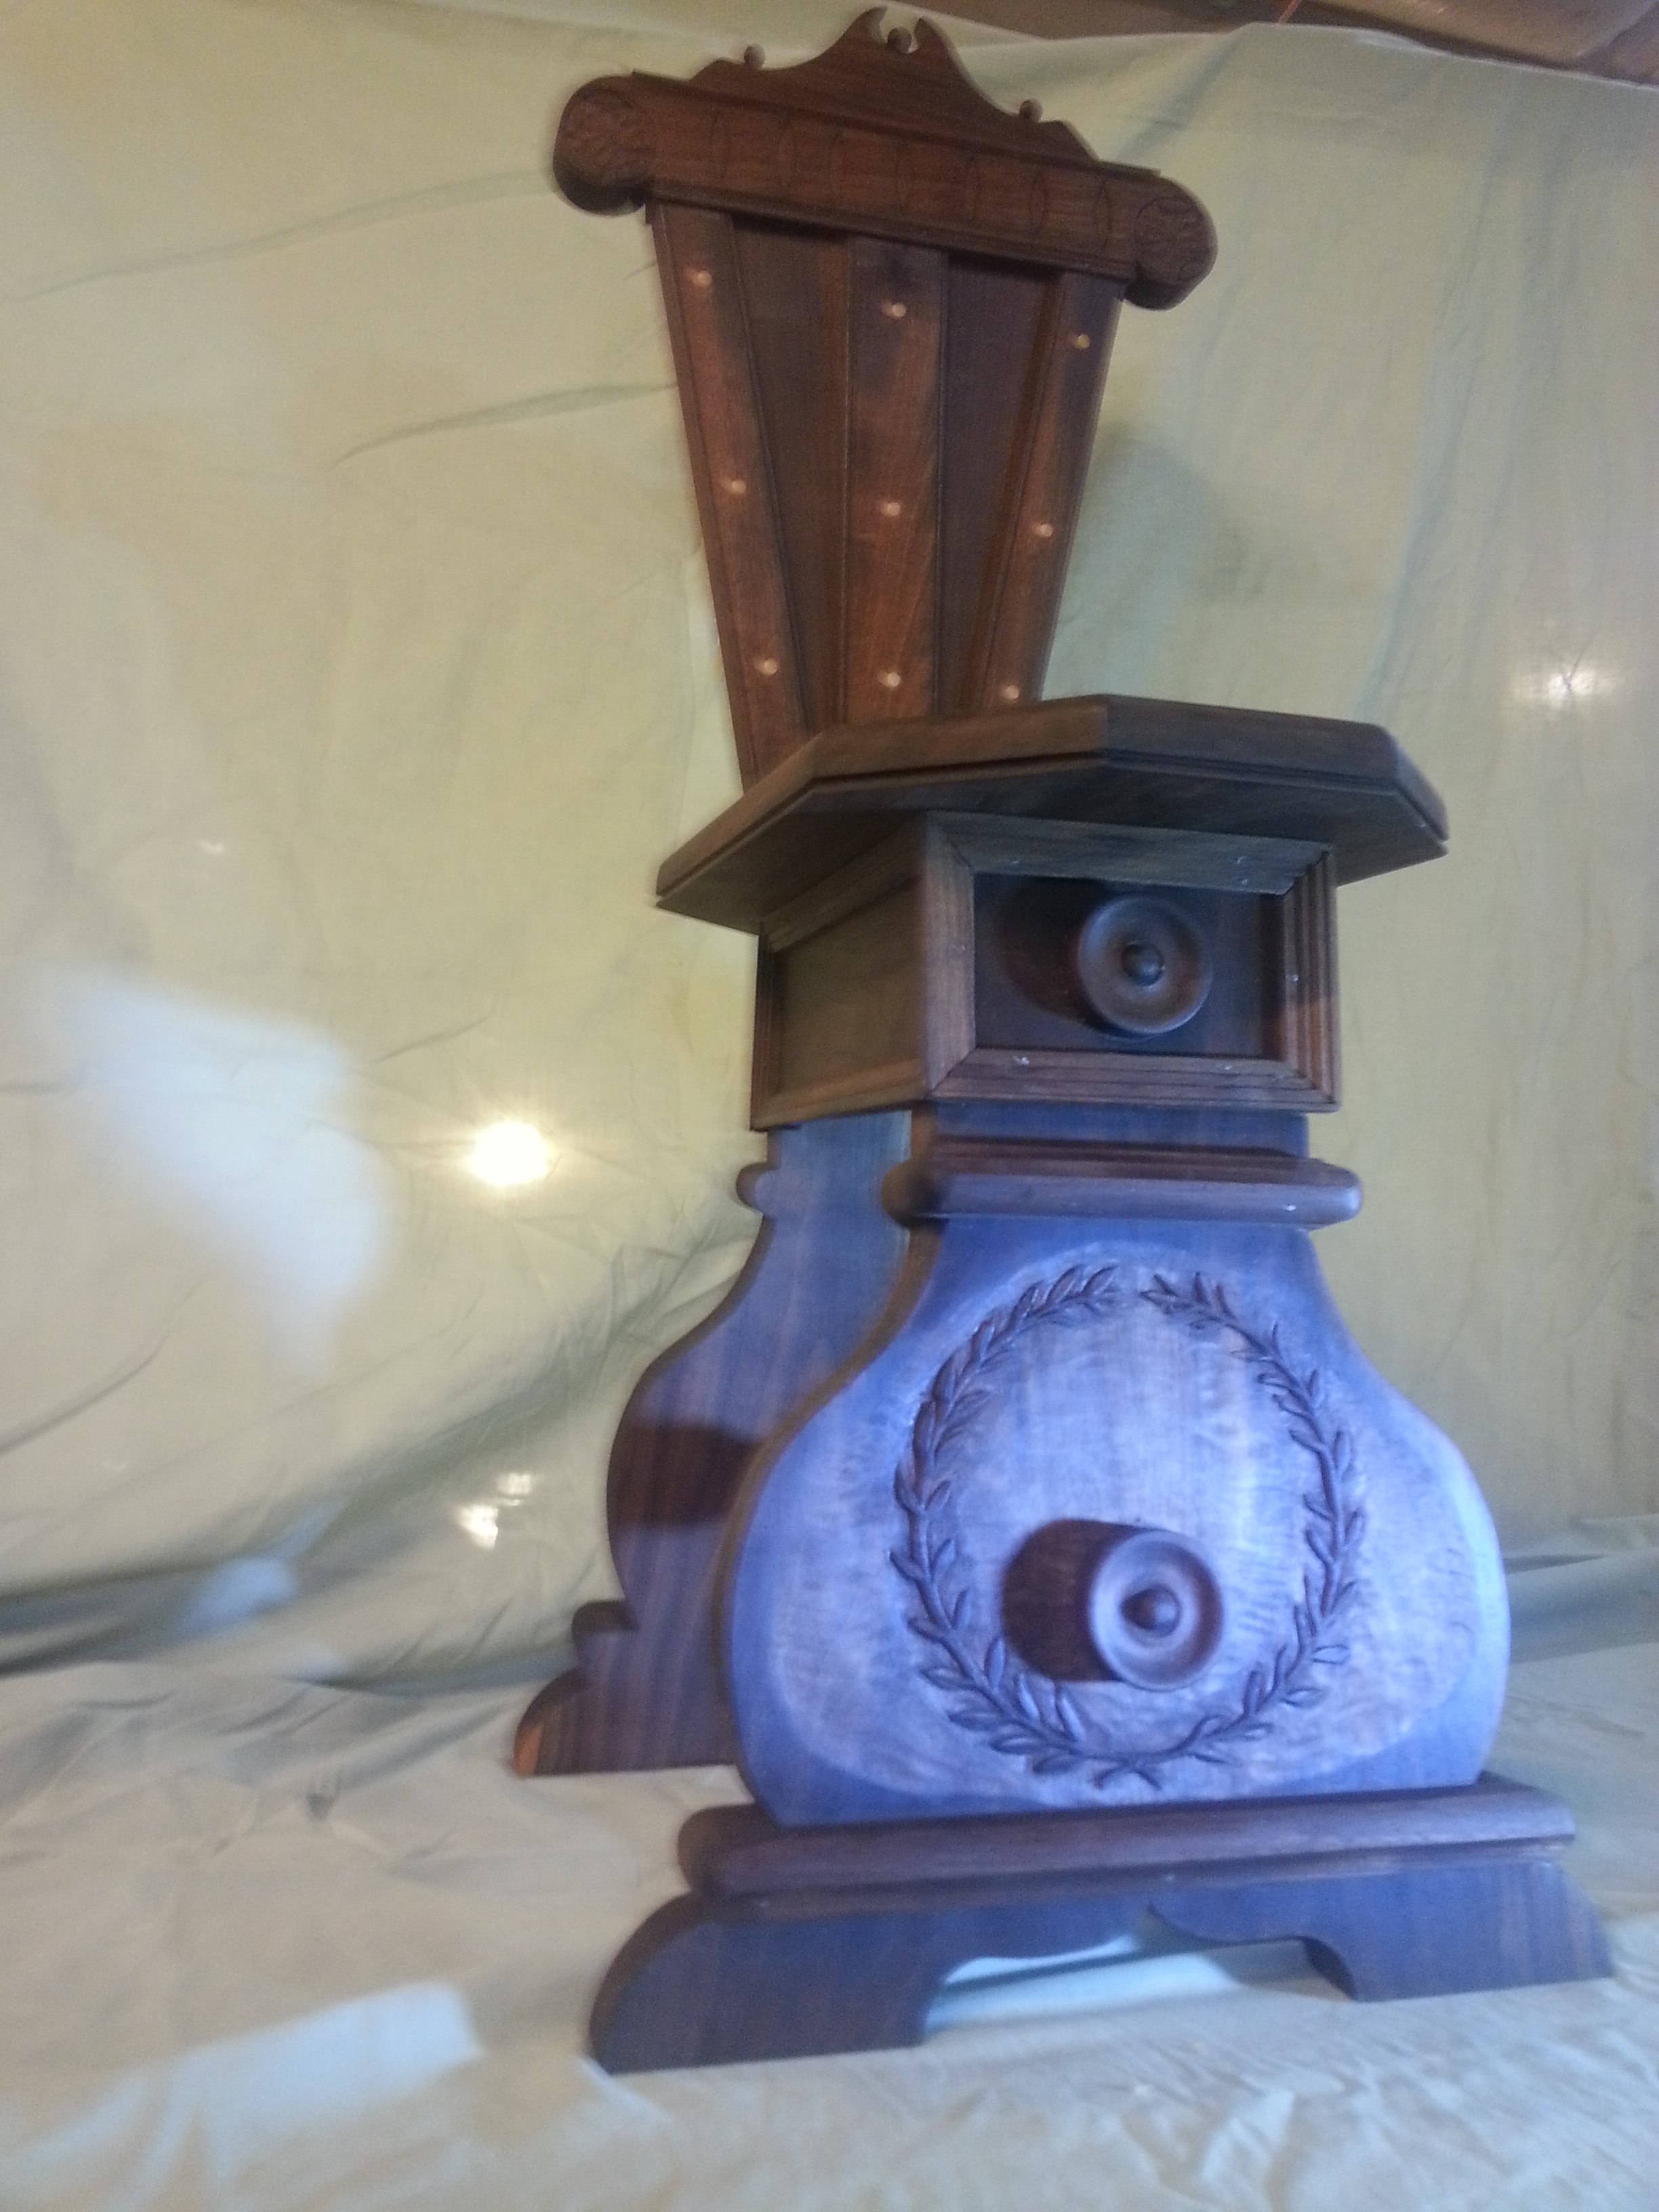
“Morning Dew” A slightly better look at the lower section of the chair, highlighting the laurel wreath carved around the lower rondel. Each of the four rondels (two front, two rear) on this piece were face turned by hand. The carving, quite obviously, was all handwork as well, laid out with a set of dividers around a central point.
The primary wood is Black Walnut with inlays of Holly. Were I able to acquire Italian Walnut, I would have used that instead as it gives a brighter, less imposing color. Given the available materials, the Holly inlay pops a lot more against the Black Walnut than does the Maple inlay in the primary inspiration piece.
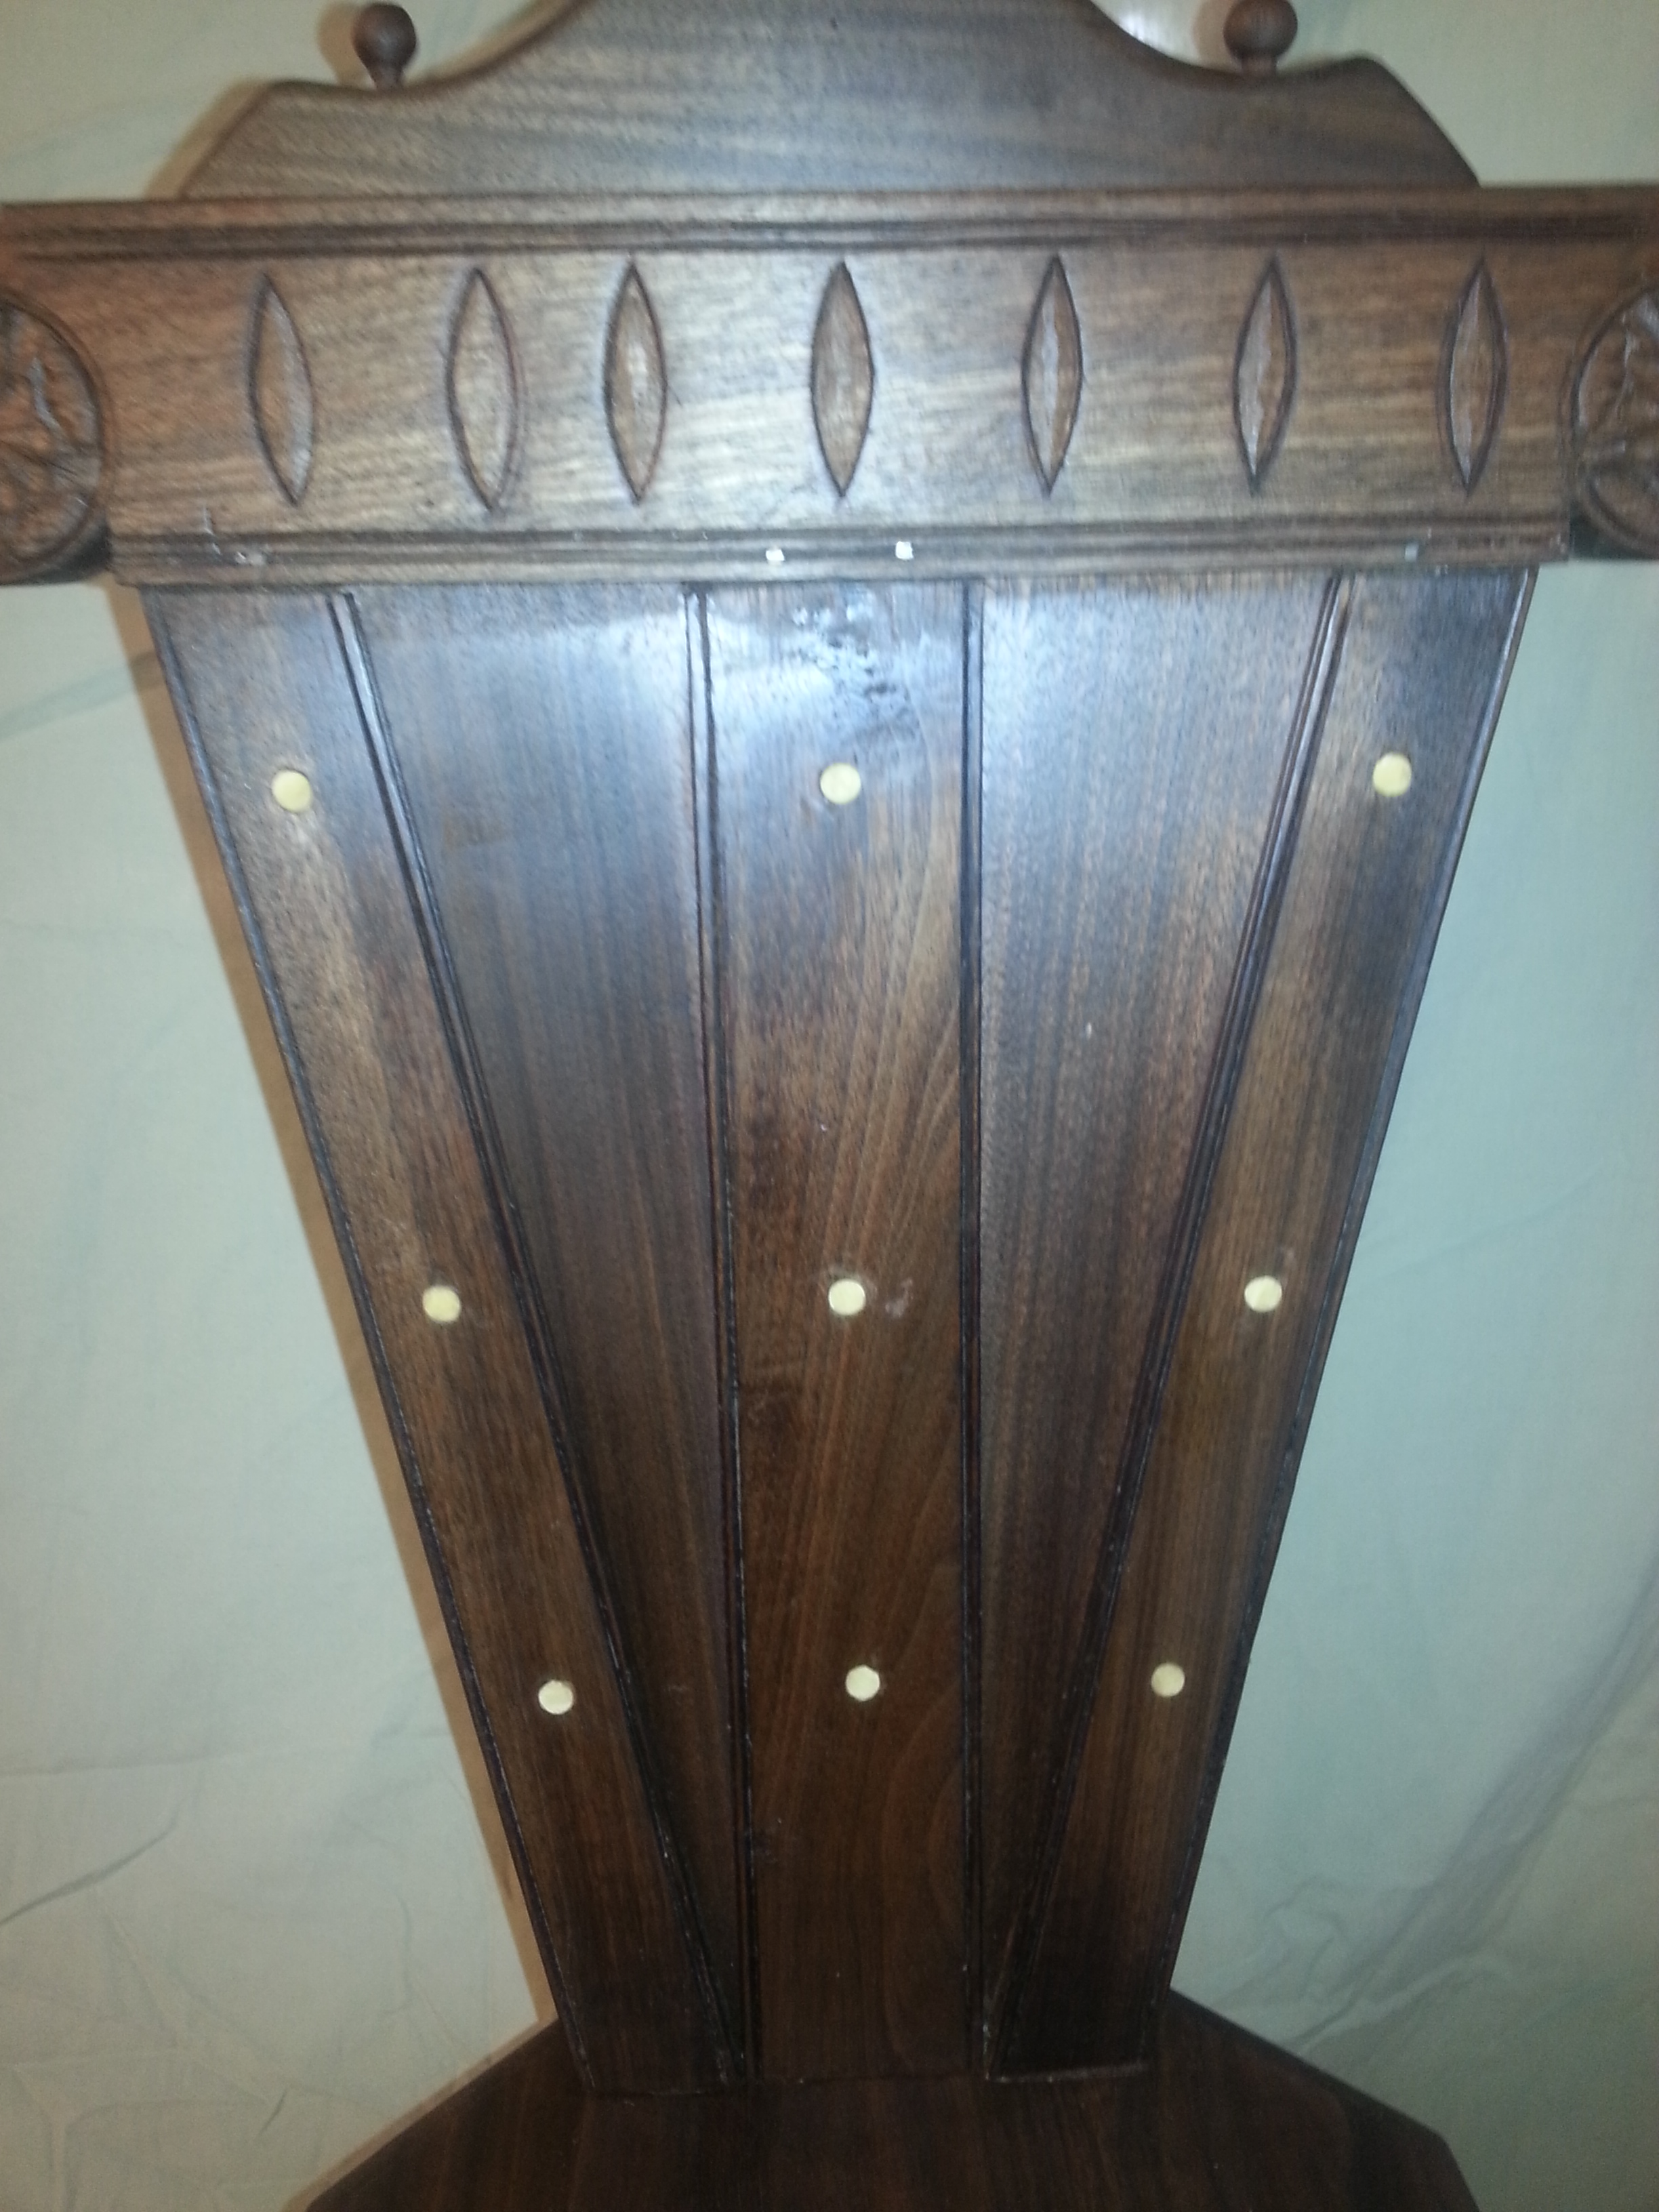
The triangular frame and panel backrest. The “white dots” are holly inlays set at an interval like the ivory dots in a modern guitar neck. That shadow line that runs along the stiles is somewhere about a 1/32″ quirk bead. That tiny profile is actually cut on all the corners of the stiles, including the two that are on the inside faces around the panels.
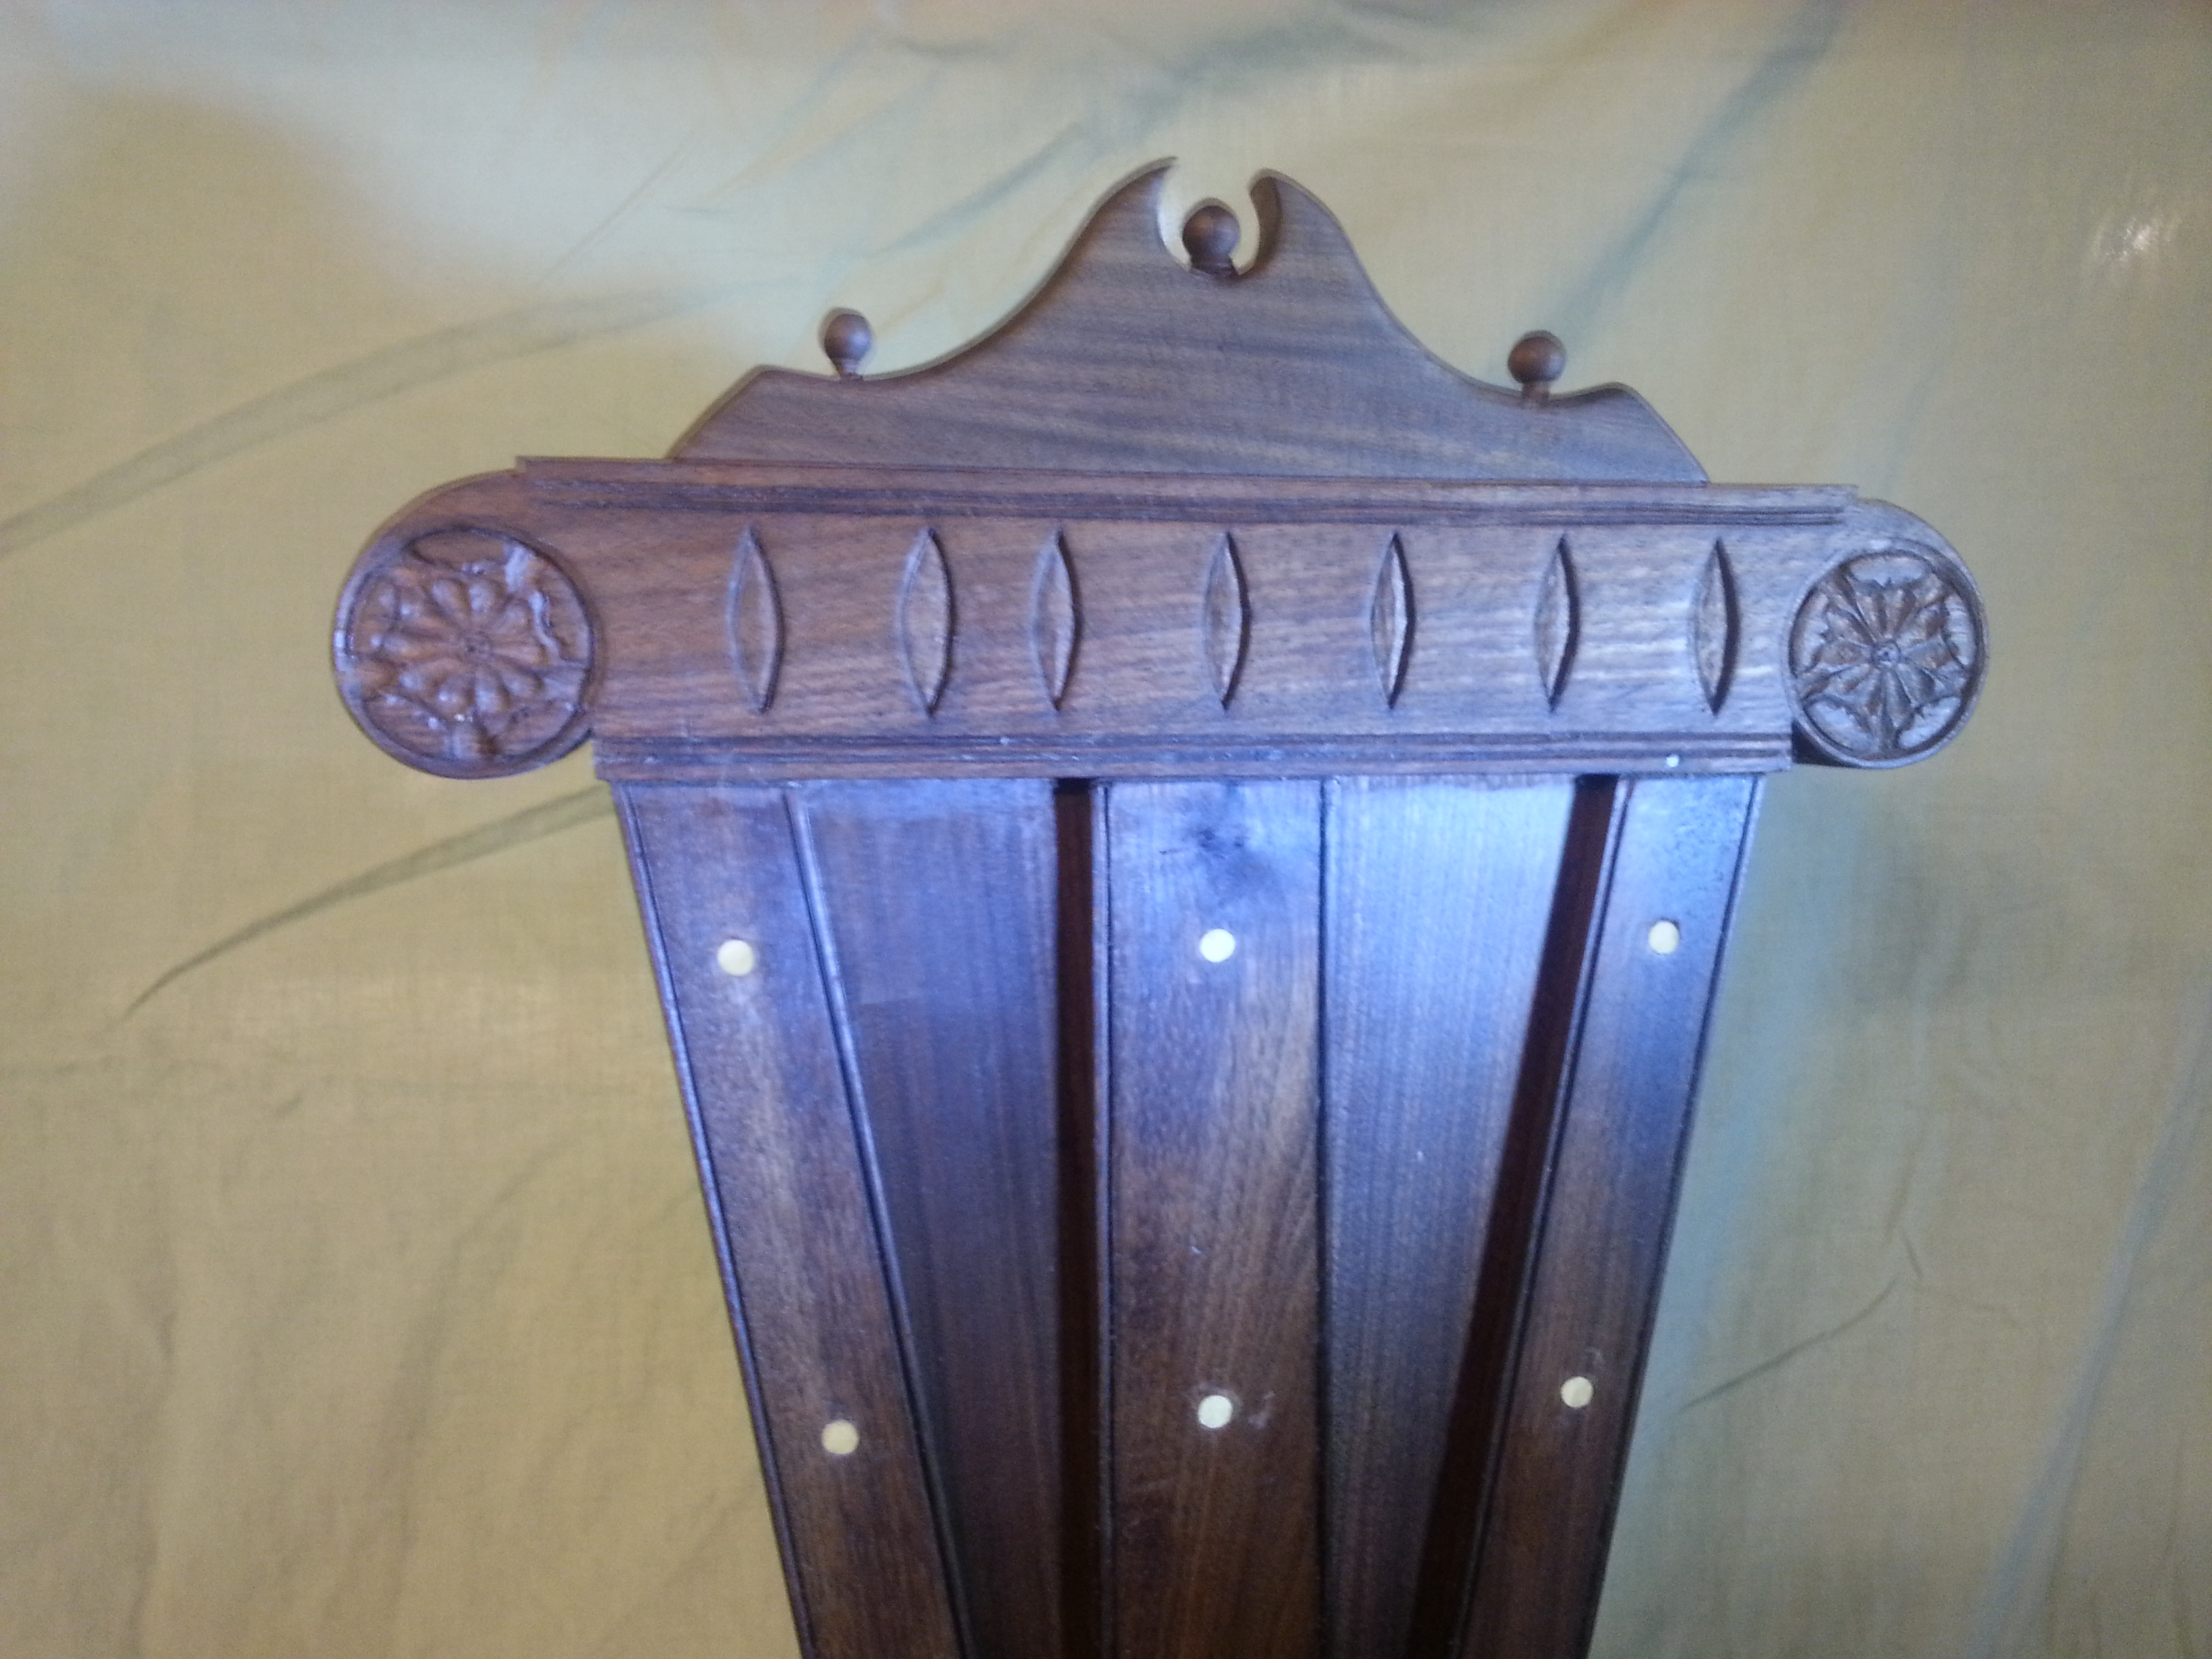
Then there are the carved roses. The Medici Sgabello (from the PMA) has roses in this same orientation. These are roses of five petals. Aside from the small scale carving of these pieces, the layout geometry for a five pointed object within a circle is exceptionally difficult. Grab a set of dividers and give it a try. Finding 1/4th of a circle is rather simple. Finding 1/6th of a circle is impossible to screw up. Getting an accurate 1/5th? Even the easy way is rather difficult. The finials at the top were individually turned and then with a tapering round tenon driven into the seatback to hold on the decorative compound ogee riser.
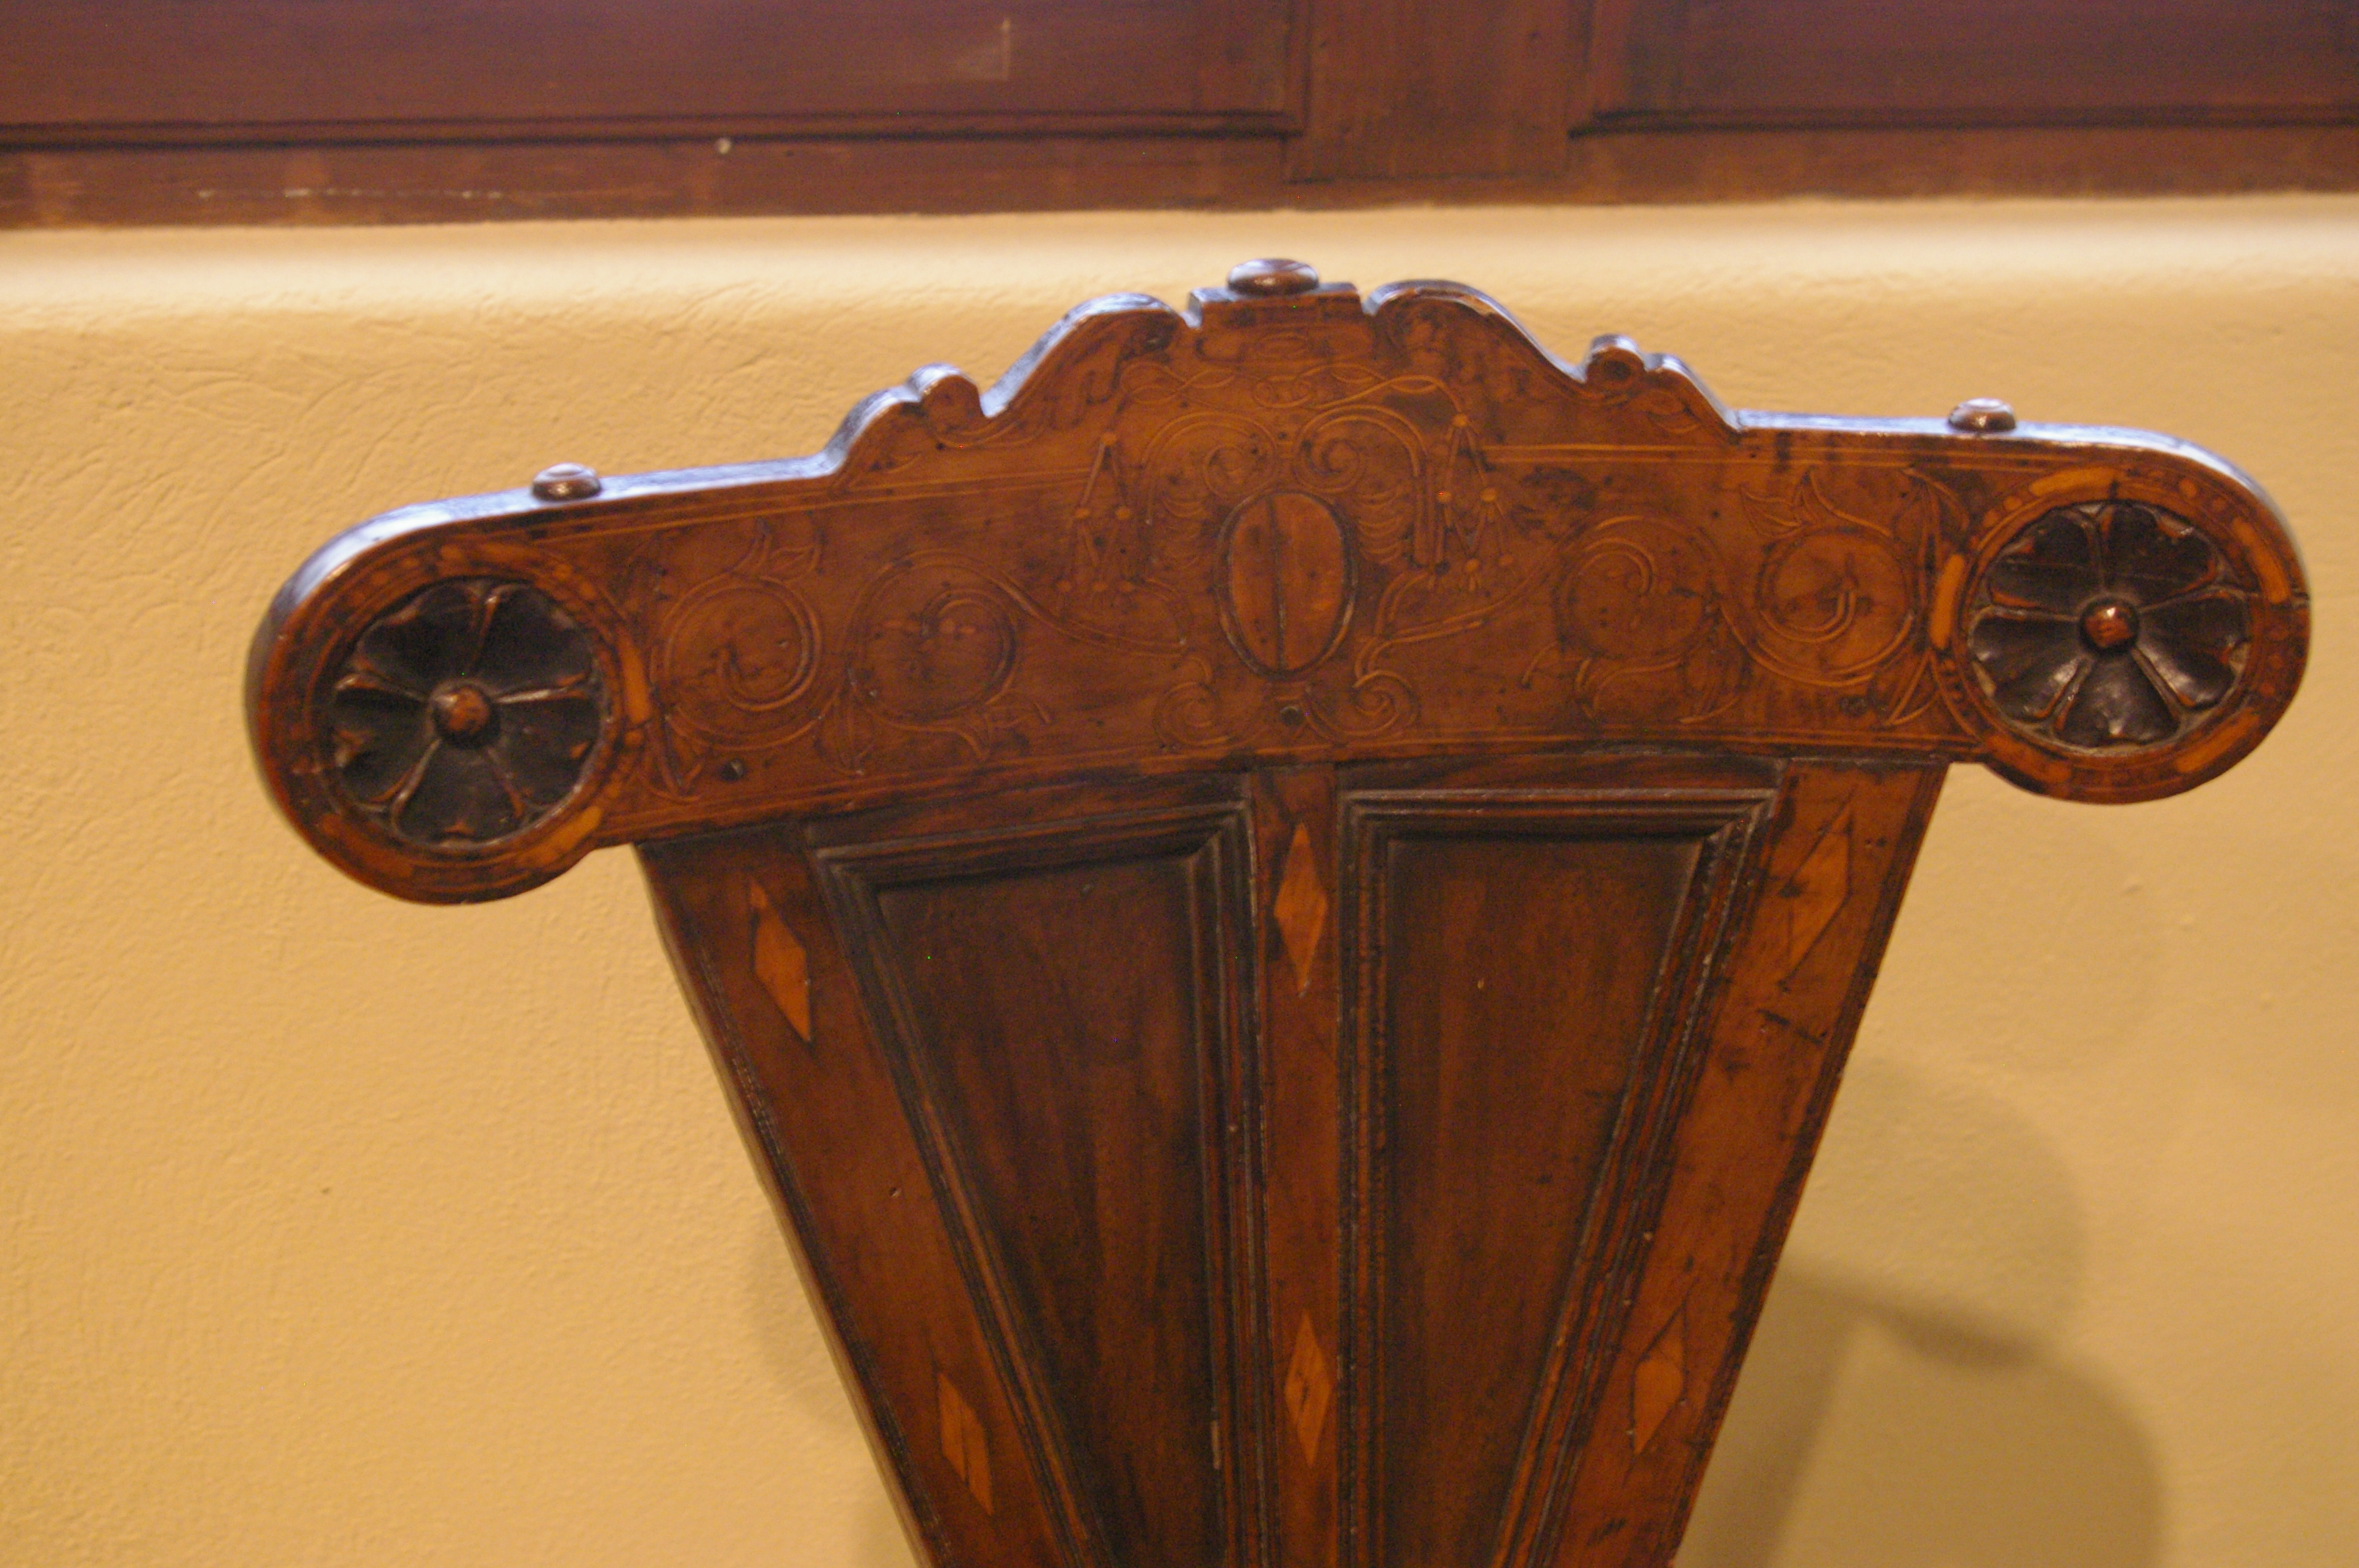
A detail photograph of the Medici extant in the PMA. This shows the far simpler rose pattern used in that example. Meanwhile, it also shows a very intricate string inlay pattern that I chose not to include on my piece. In part, it was lack of proper tooling. In the other, I have done string inlay and I really despise having thin filaments of wood explode when I touch them. We can also get a good look at the applied moulding profile that was added inside the frame and panels on the original chair. I pulled this element out of the the f&p and used the stepped profile instead on the box-apron. (Author’s photo)
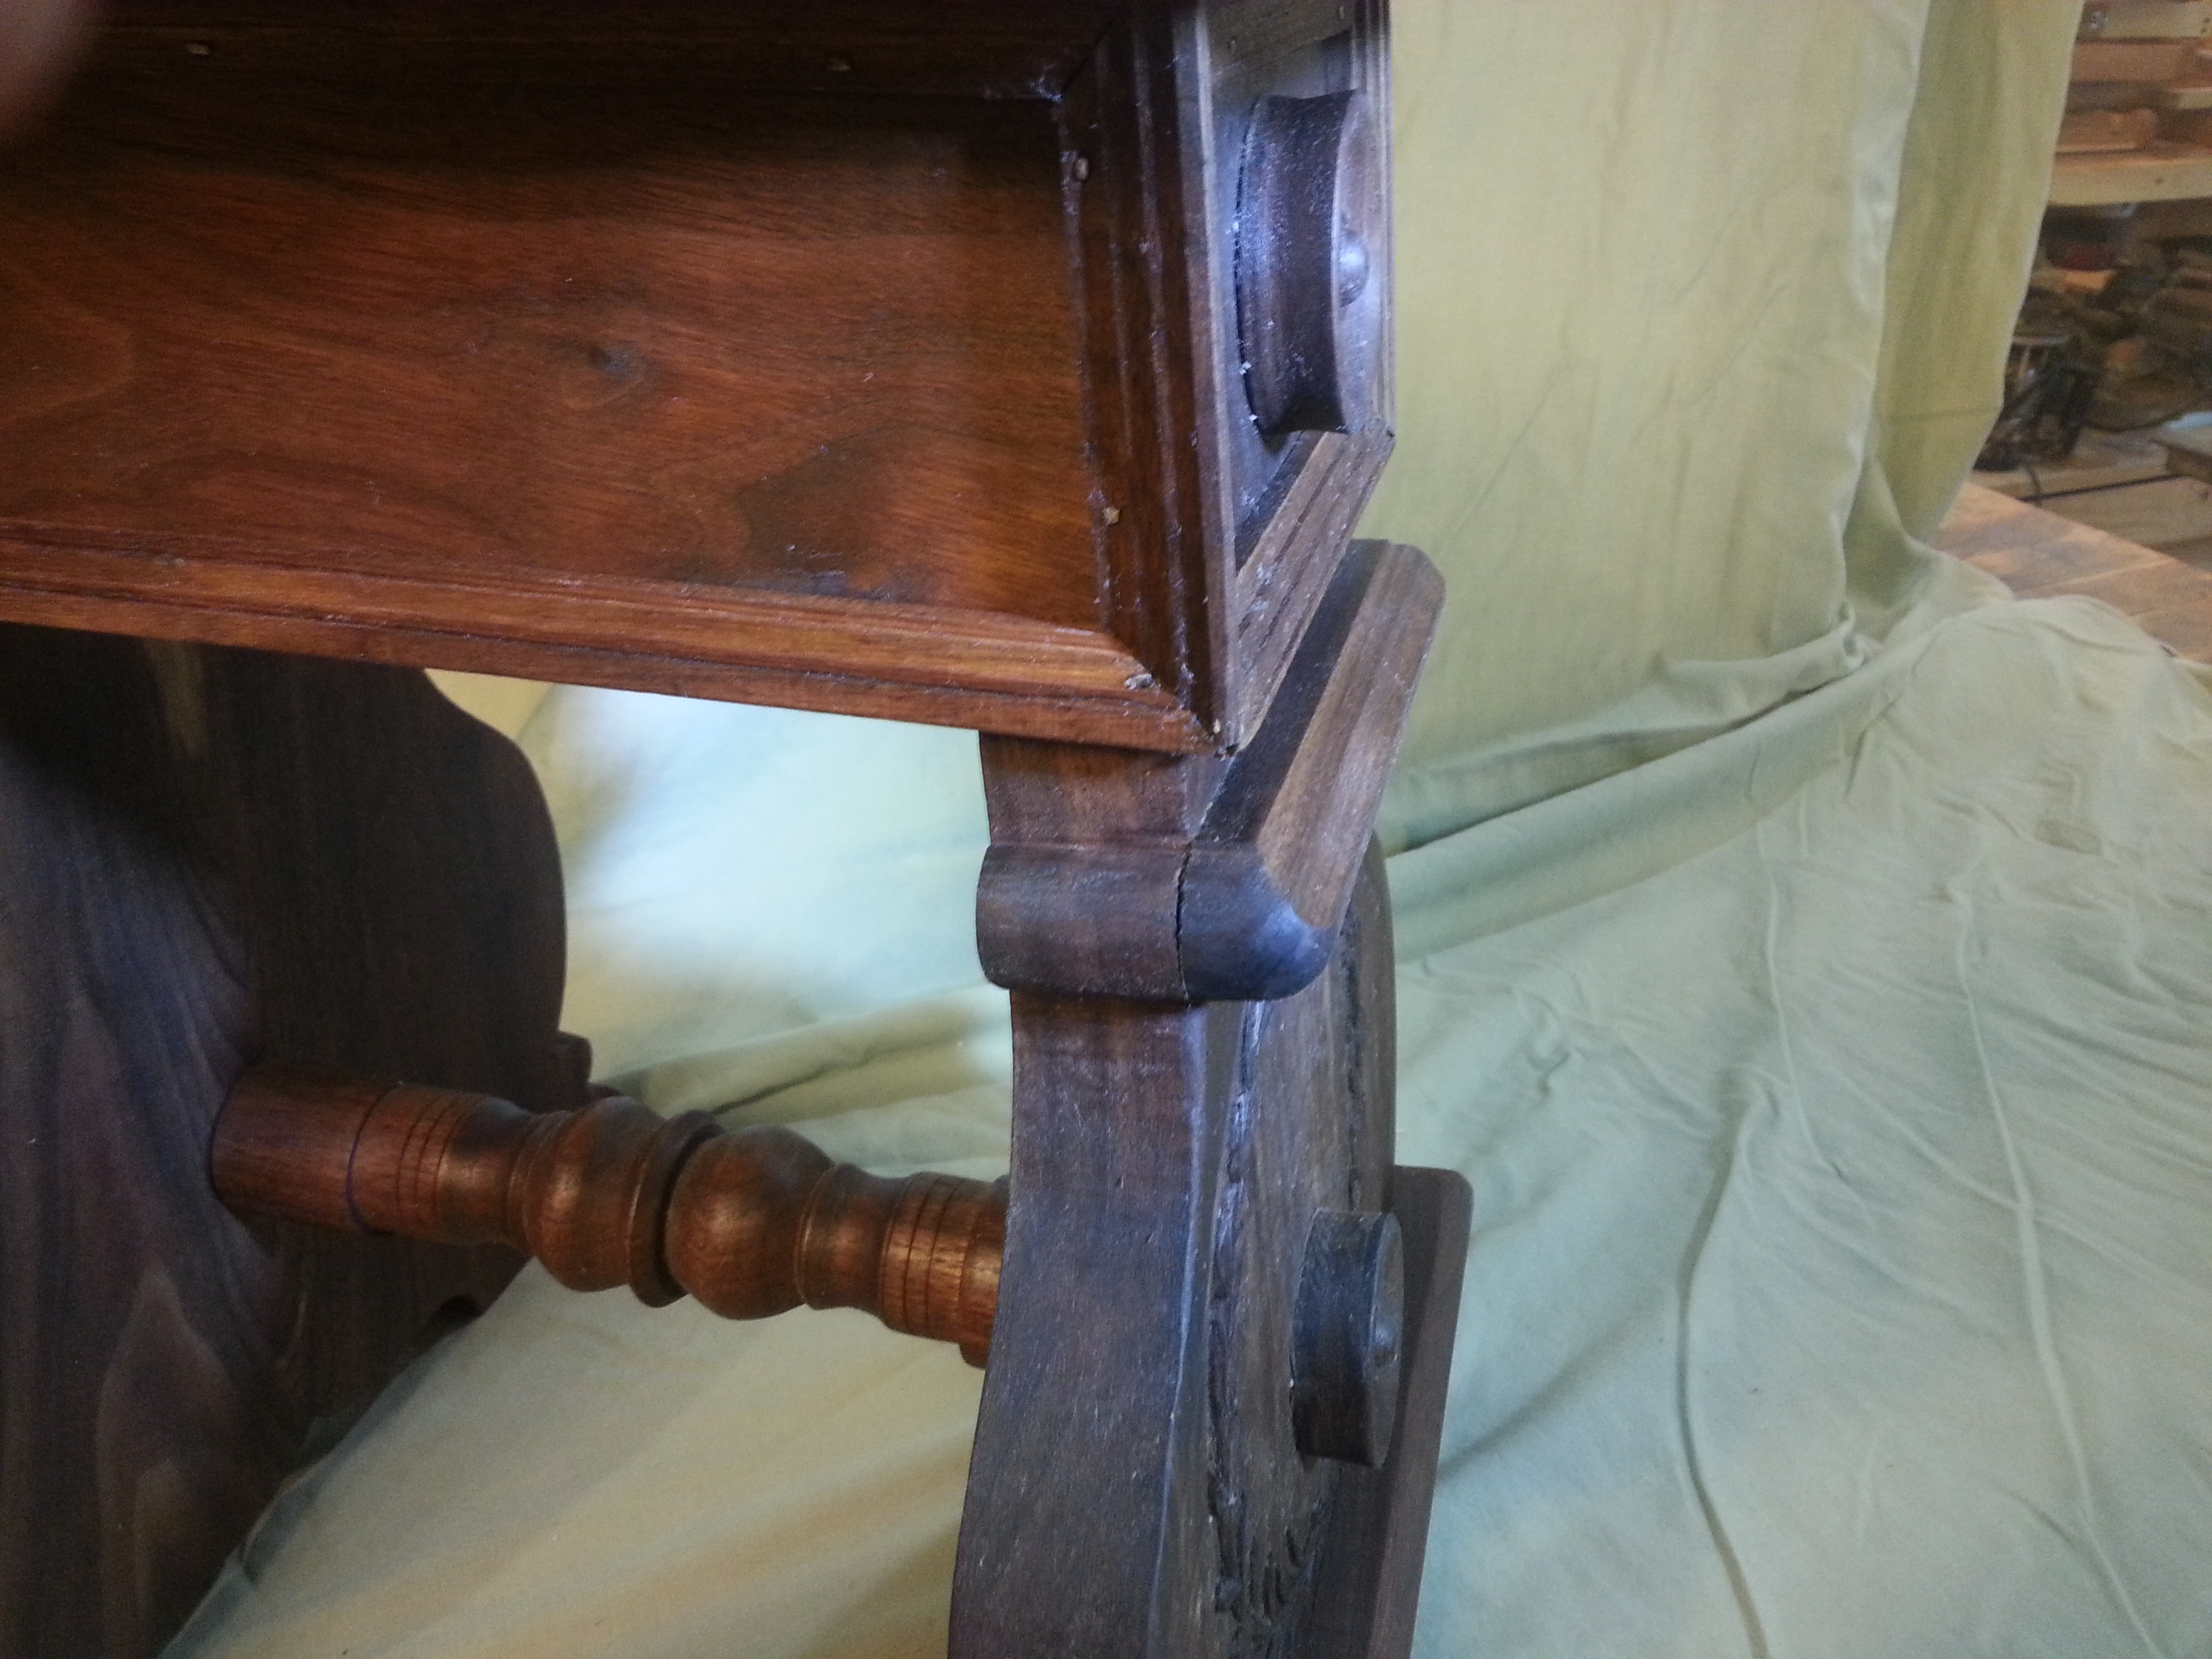
Speaking of the box-apron, here we have an oblique view. Also visible is a raised applied moulding on the front “leg” face, and the decorative spindle that acts as a stretcher between the front and rear “legs”. The urn shaped profile was derived by trial and error in the design phase, working different radii of compound arcs against one another until I found a pleasing shape. The stretcher is an off-set turning: the primary profile was turned over-long, then once completed the whole piece was offset by a touch, then the ends were re-turned to add to the feeling of thickness at the bottom of the chair and thinness in the middle. This picture barely captures that detail. Integral tenons were then turned off of the offset to mate into round mortises hidden behind the lower rondels on the front and rear assemblies. This picture barely captures that detail. Also, as noted in the original examples, all the mouldings and applied decorations are nailed into place– here, using 1.25″ square cut headless brads from Tremont Nail. Note specifically that the profiled mouldings that wrap the vertical corners of the box are not mitered together or spliced. The profile is cut into two adjacent faces, the highest faces of the profile being the outside arisses. On the back side of the stuck mouldings is a square rabbet which faces the joined corners of the box-apron. Matching the profile on these faces, aligning on the rake of the box, and mitering the corners of these compound mouldings was a very painstaking process. The difficulty involved in “nailing on a moulding” was surprising.
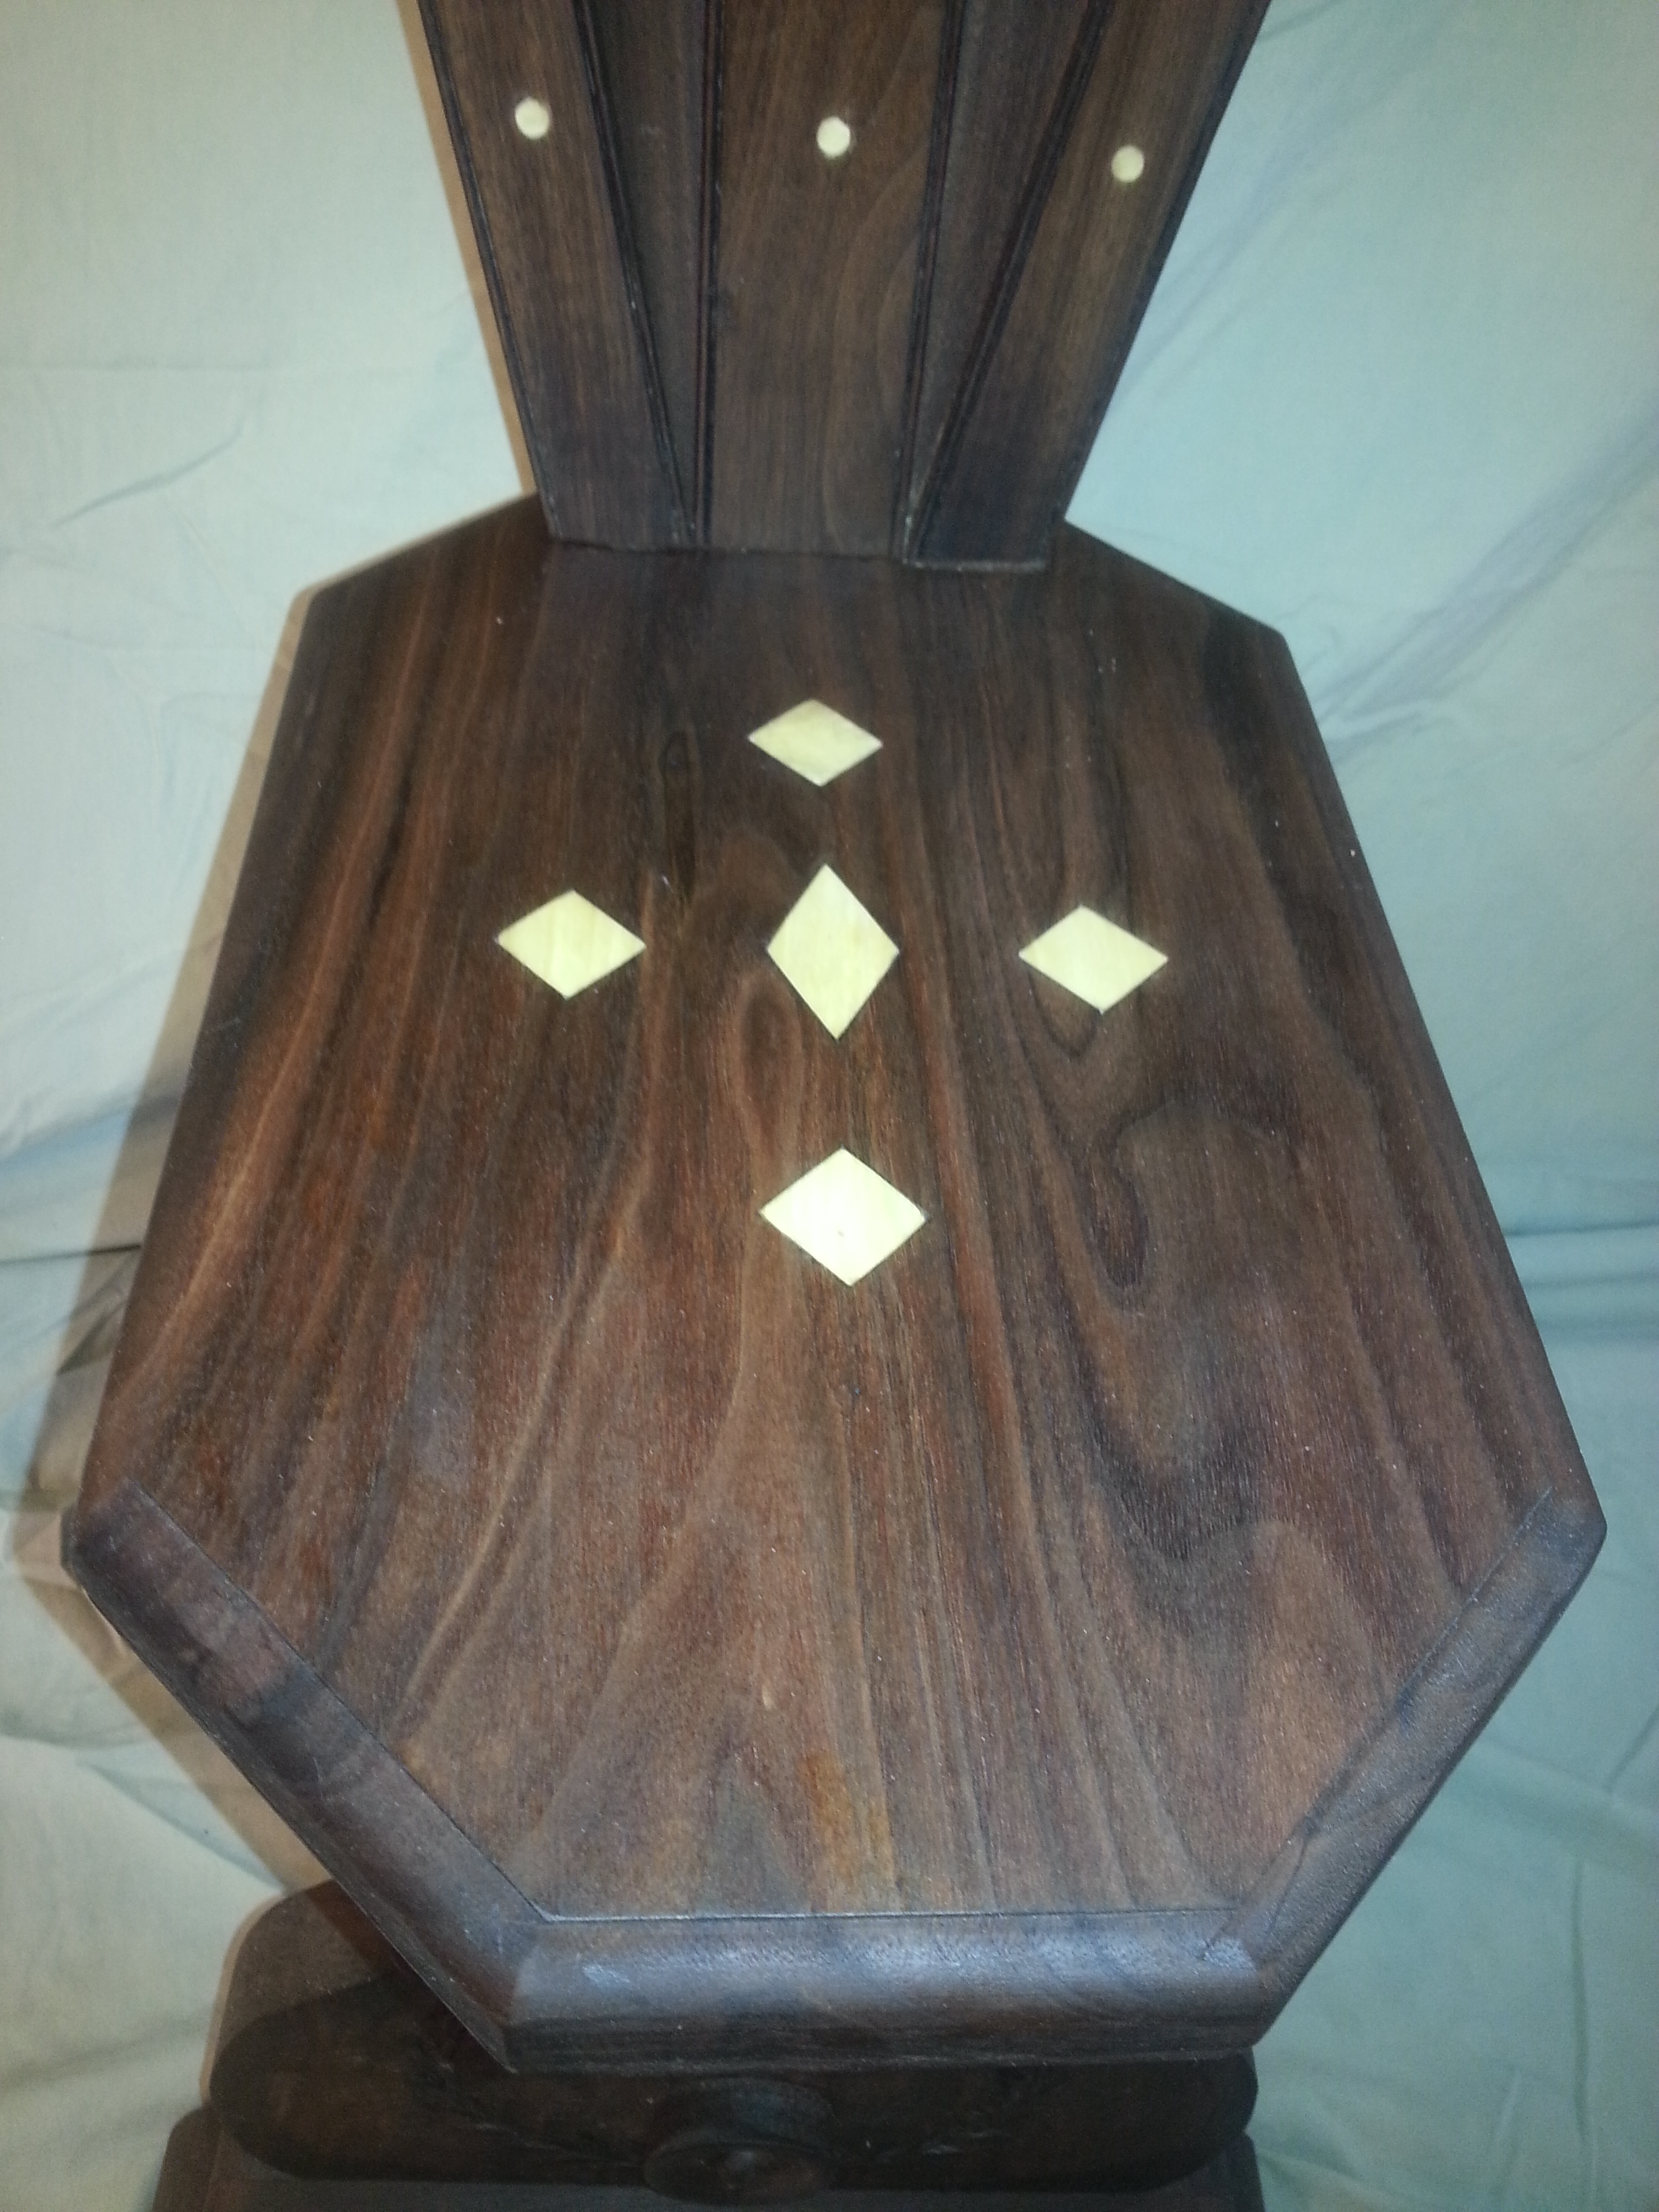
Finally, the inlay on the seat. Several of the museum pieces identify that these inlays covered nails which attach the seat to the box-apron. I found it logical to use those points to disguise metal fasteners as well. The holly inlay is almost dead-white with a nearly invisible grain structure once cut to size and burnished. Several successive coats of walnut oil (which is a traditional wood finishing oil appropriate to 15th and 16th century Italy) have yellowed the holly to appear like aged ivory. I did toy with the idea of tracking down actual ivory for the inlays. Fake ivory wasn’t acceptable for the level of authenticity intended in this piece. Reclaimed piano ivories were too small for the area of inlay I wanted to cover. Mammoth Ivory, which is completely legal to buy and sell on the open market, was a bit outside of my fiscal means.
There are forty to fifty hours of tools on wood working time in this piece. There has been at least another dozen hours in research. Seven hours in drafting the design and layout. There are maybe five tools I own that were not used in the production of this piece (travisher, bowl adze, circular saw, scroll arm saw, threading/tap and die set). I do not have a small tool set. There were several tools I did borrow to expedite certain aspects of this piece. Almost all of the rough milling and cutting was completed with powered tools. Final shaping, fitting and finishing came down to various hand tools in great quantity and variety. Using floats, chisels, files, gouges and rasps to ease the many contours of this chair were essential. I had to make two new tools for this project as well.
There is a plan to make another Sgabello in the very near future. It is my intent to document production of several of the individual parts, and the making of several tools which will make repeat productions much easier.
I think the last bit of the story behind this chair is also worth mentioning: the day I finished it. This chair took up much of my active and mental time over the course of three months. When I wasn’t actively working on some part, thoughts of how to make the next part were never far from the front of my mind. I started, seriously, reverse engineering the originals and developing the plans to build this chair the last half of April (2015). As I placed the last pieces of mouldings and reached for the walnut oil to start laying a protective finish, the sky was exploding. It was just after sunset, Friday 03 July 2015, and an early Independence Day celebration was going on.
The moment this chair was finished, fireworks were quite literally going off overhead.
Since most of the actual work was done during the initial construction of this pair of chests, repairs were relatively simple. Had I known to do these things right the first time, rather than following the good-intentioned but ill-informed suggestions of others, these repairs wouldn’t have been necessary in the first place.
Let’s have a quick look.
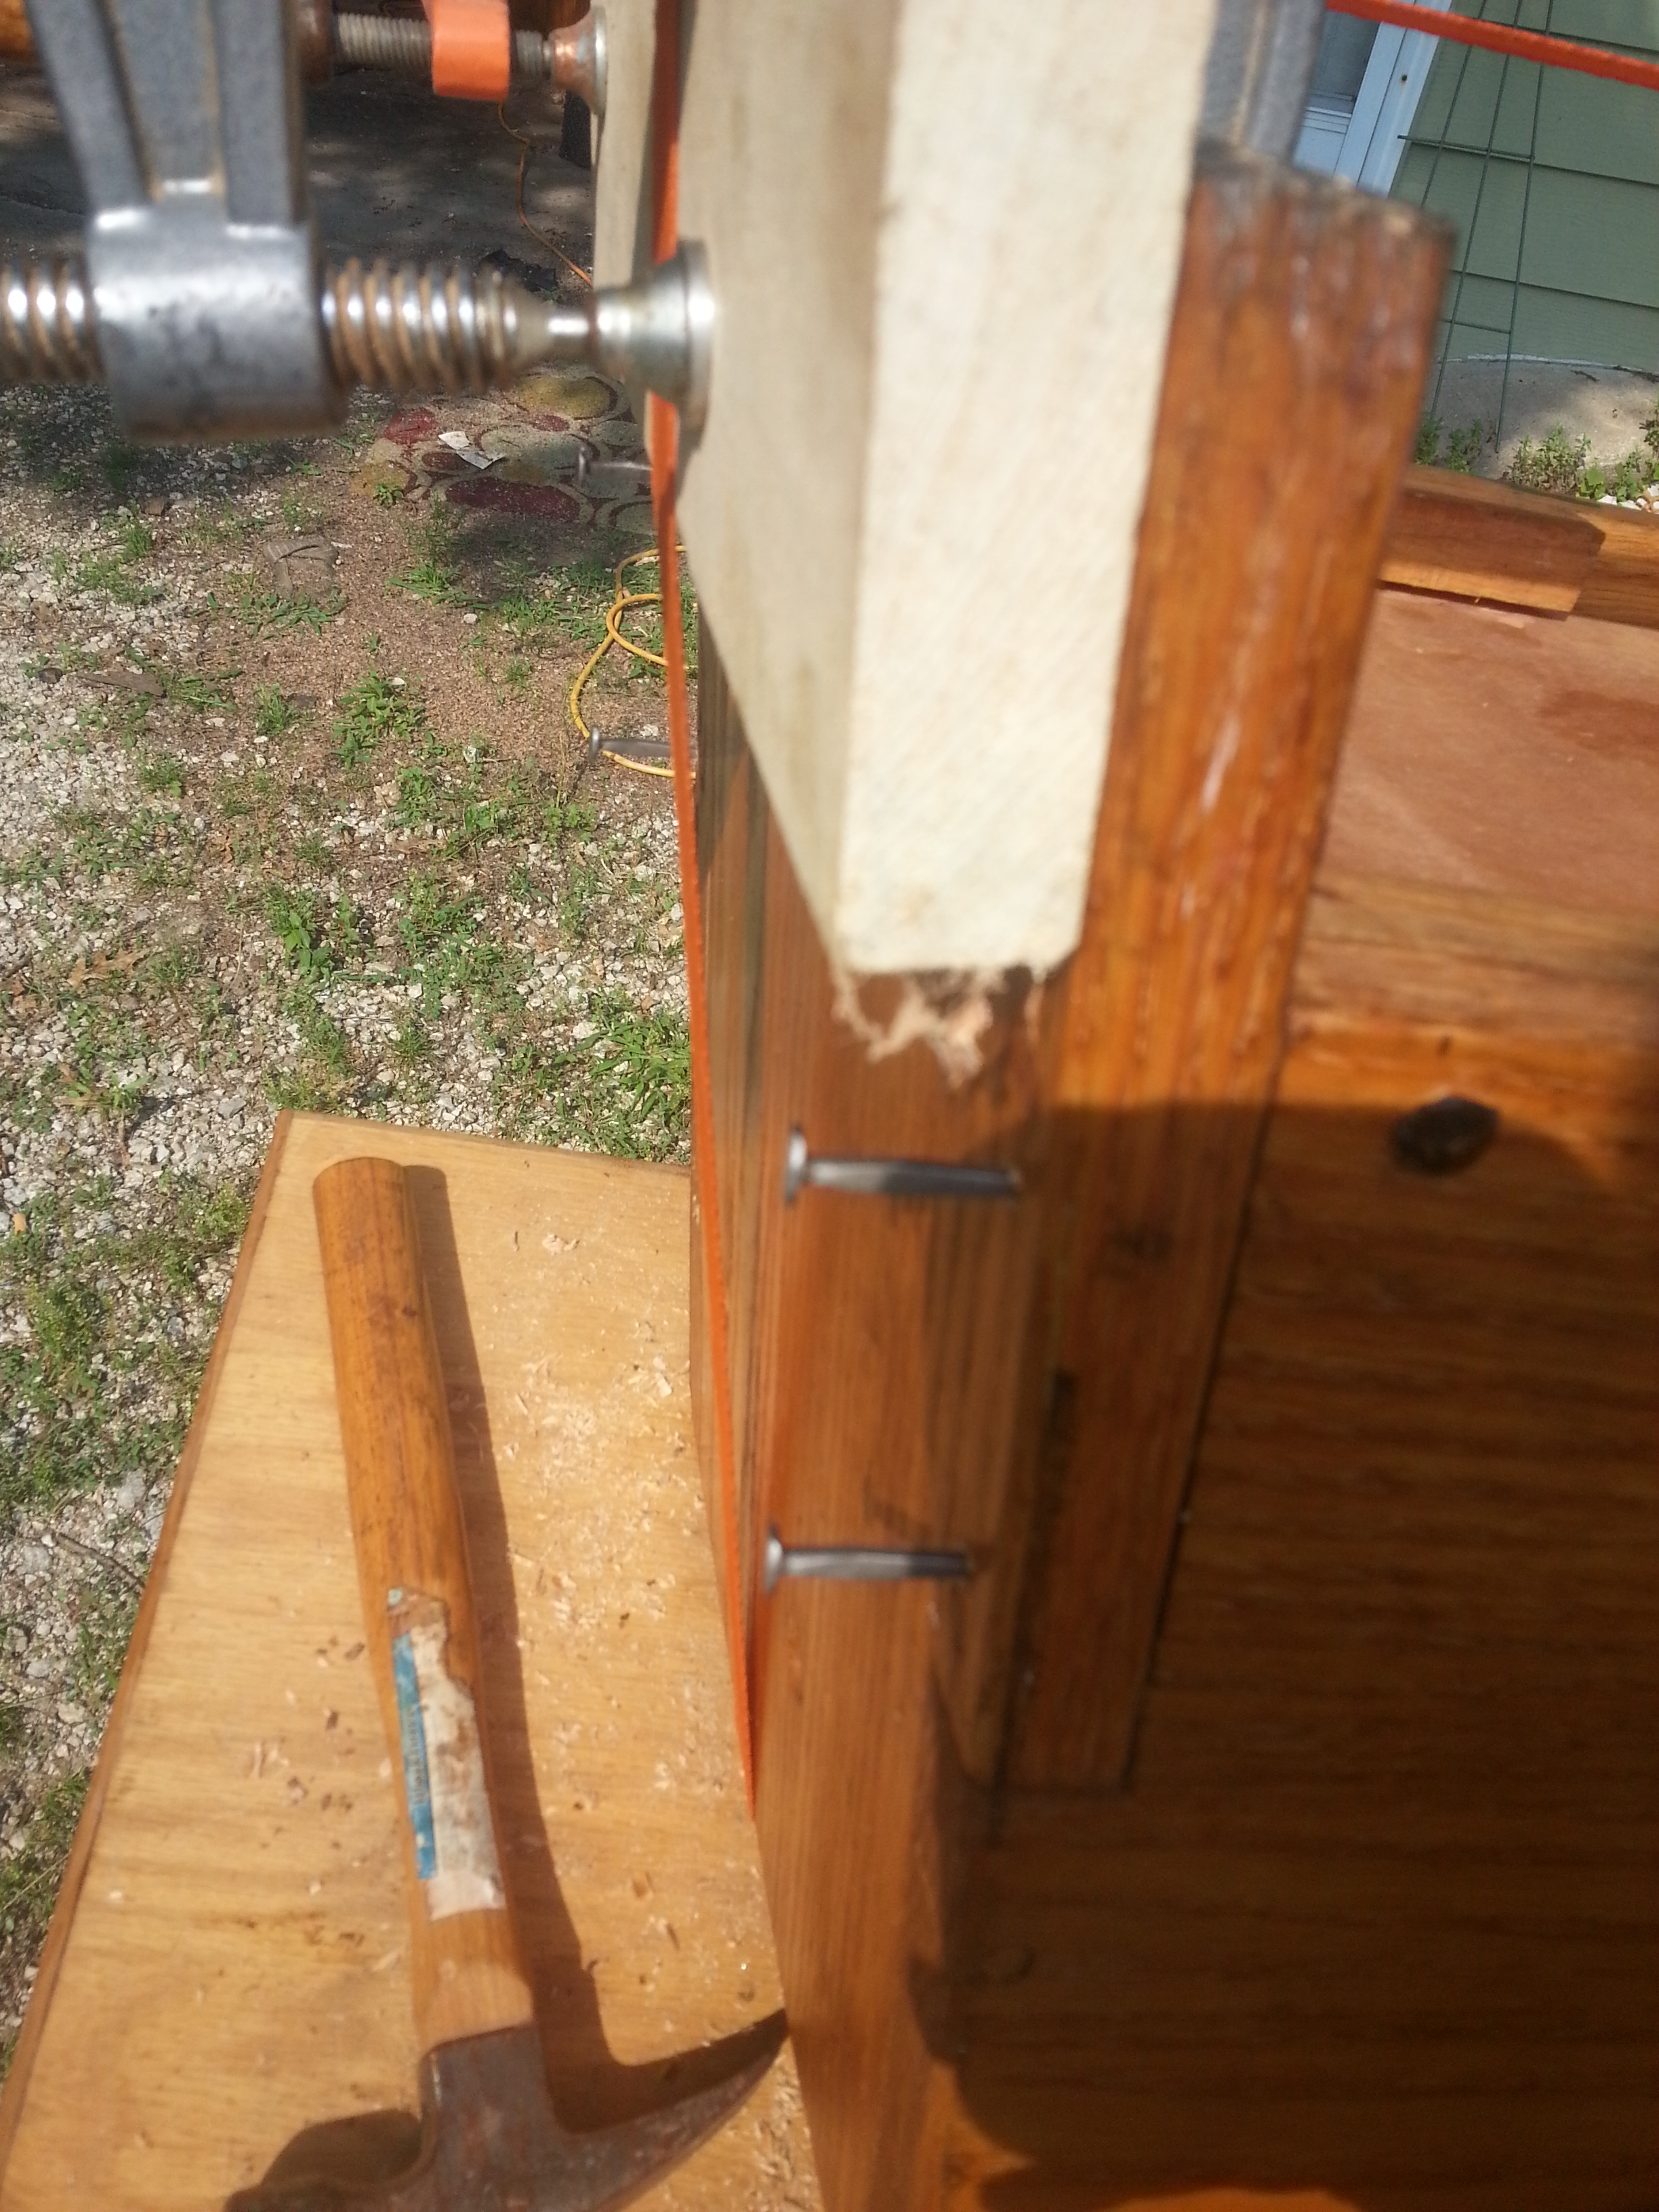
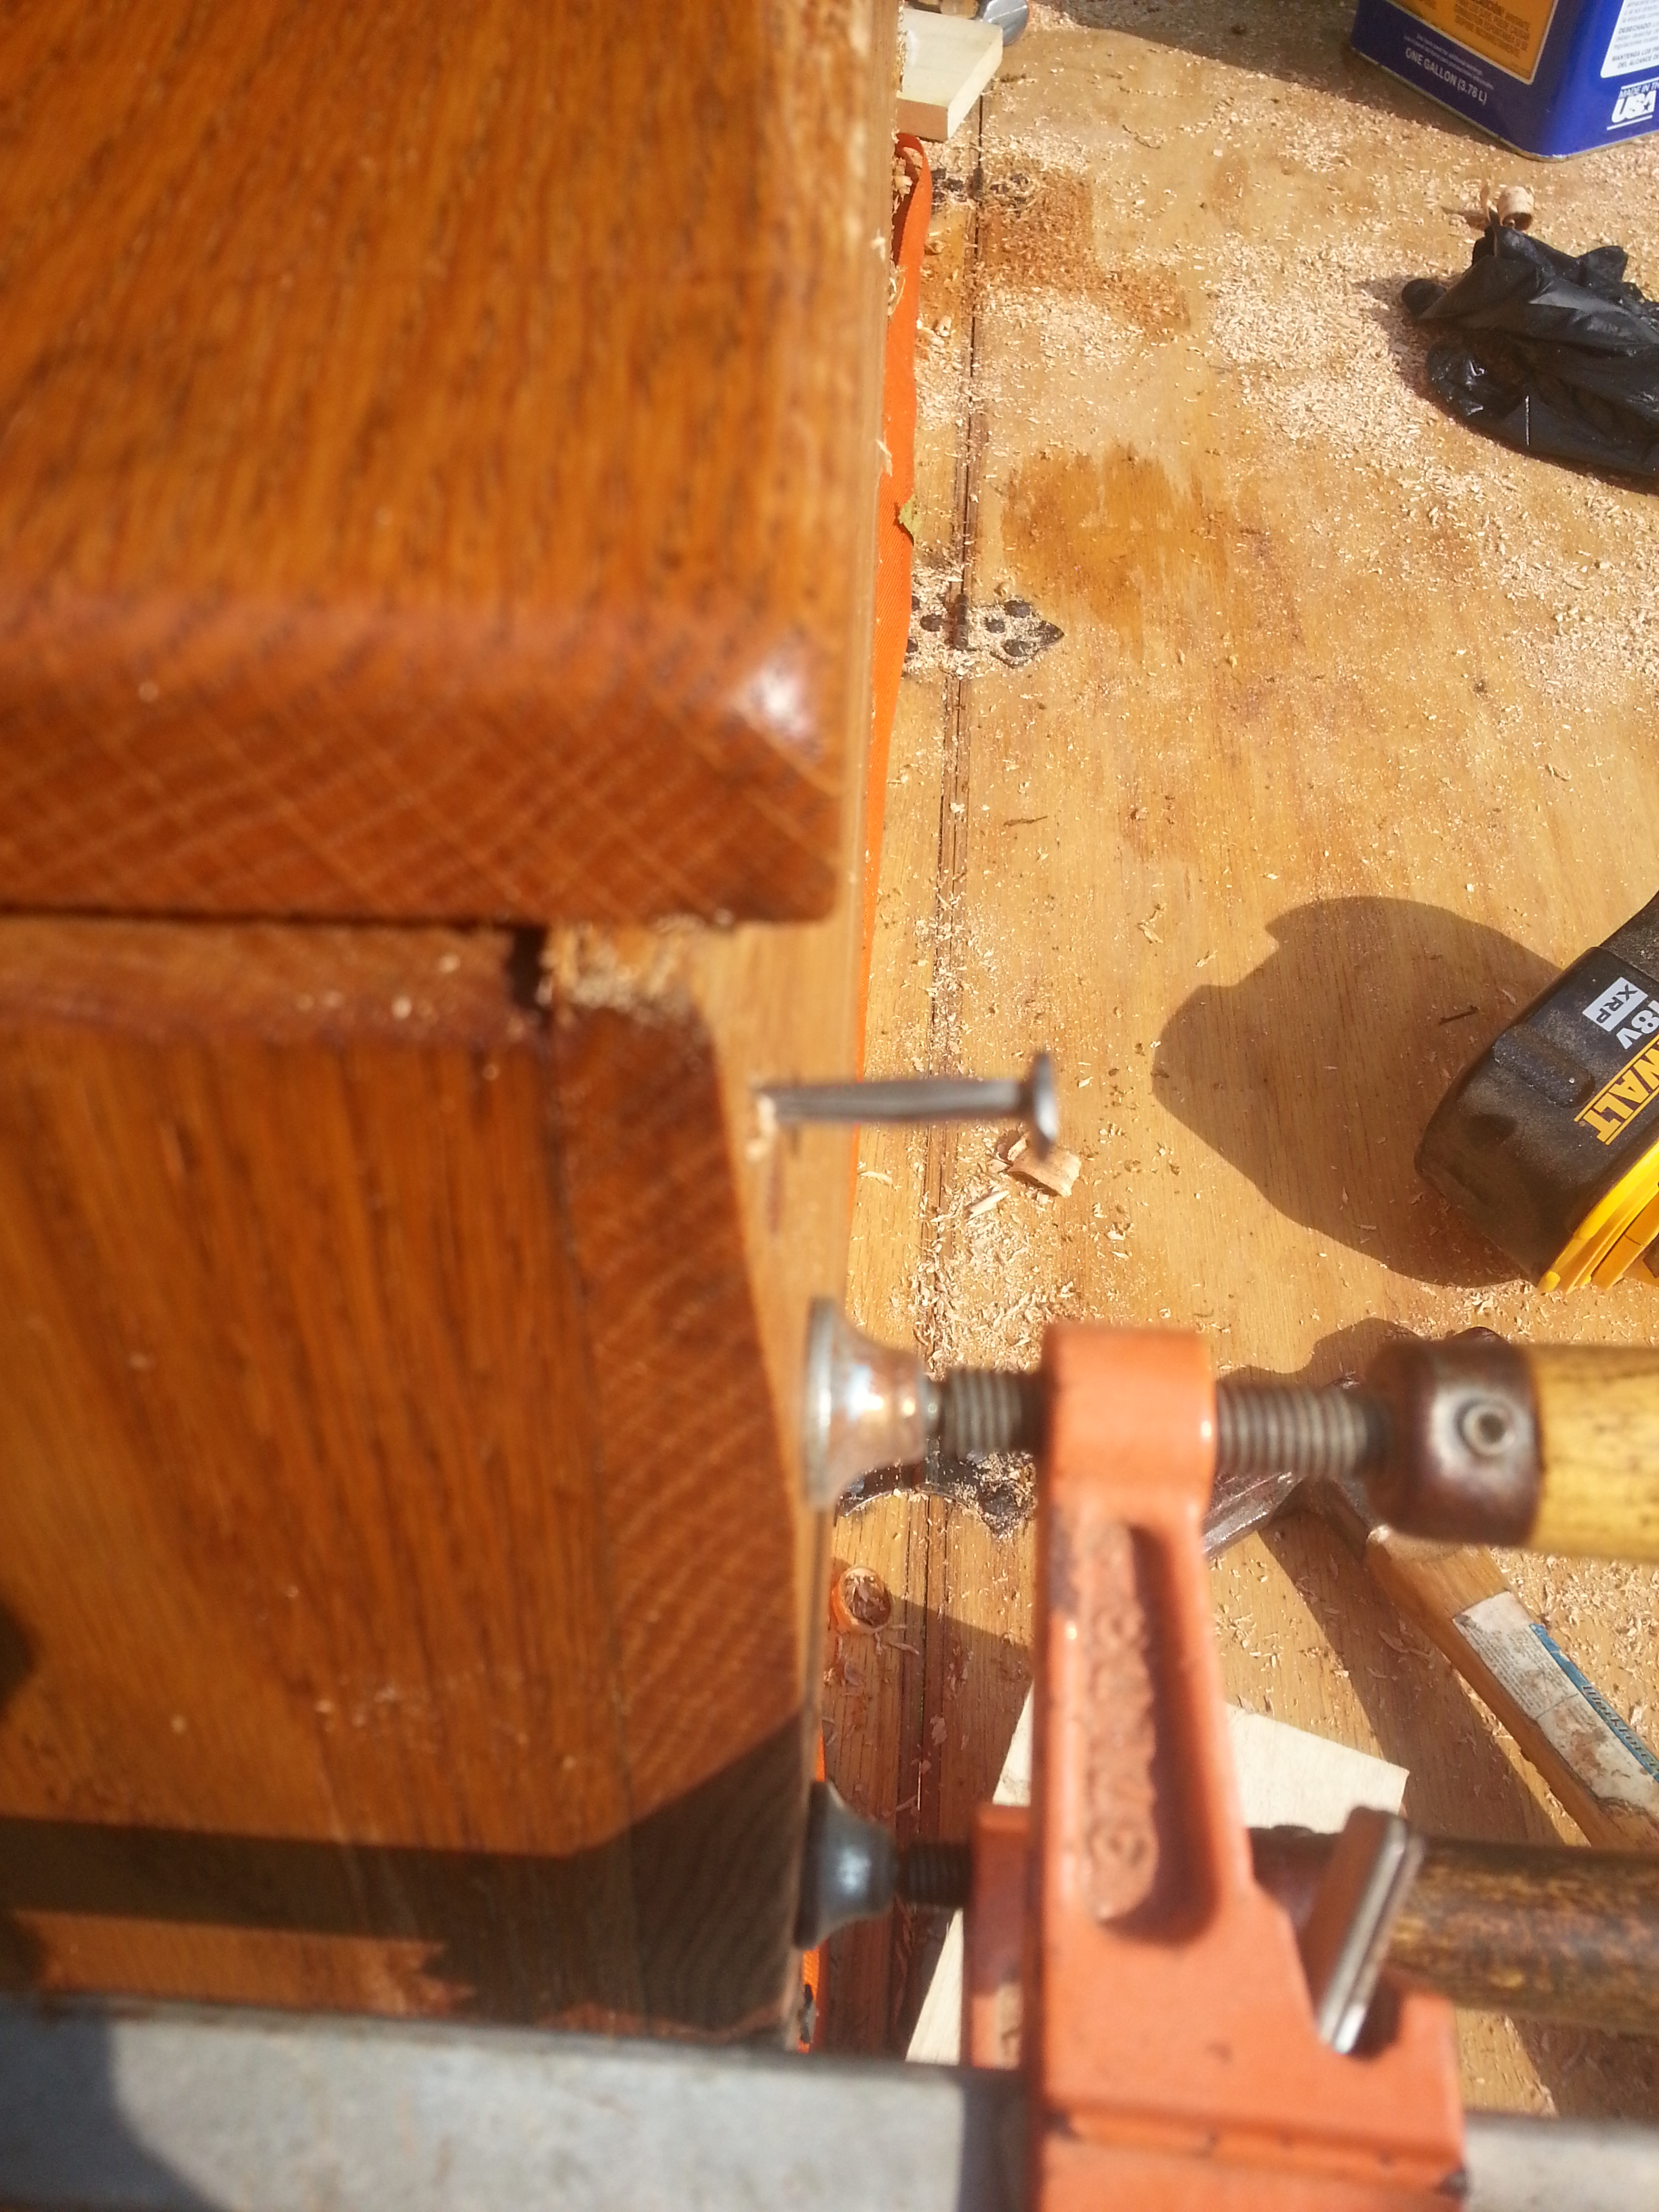
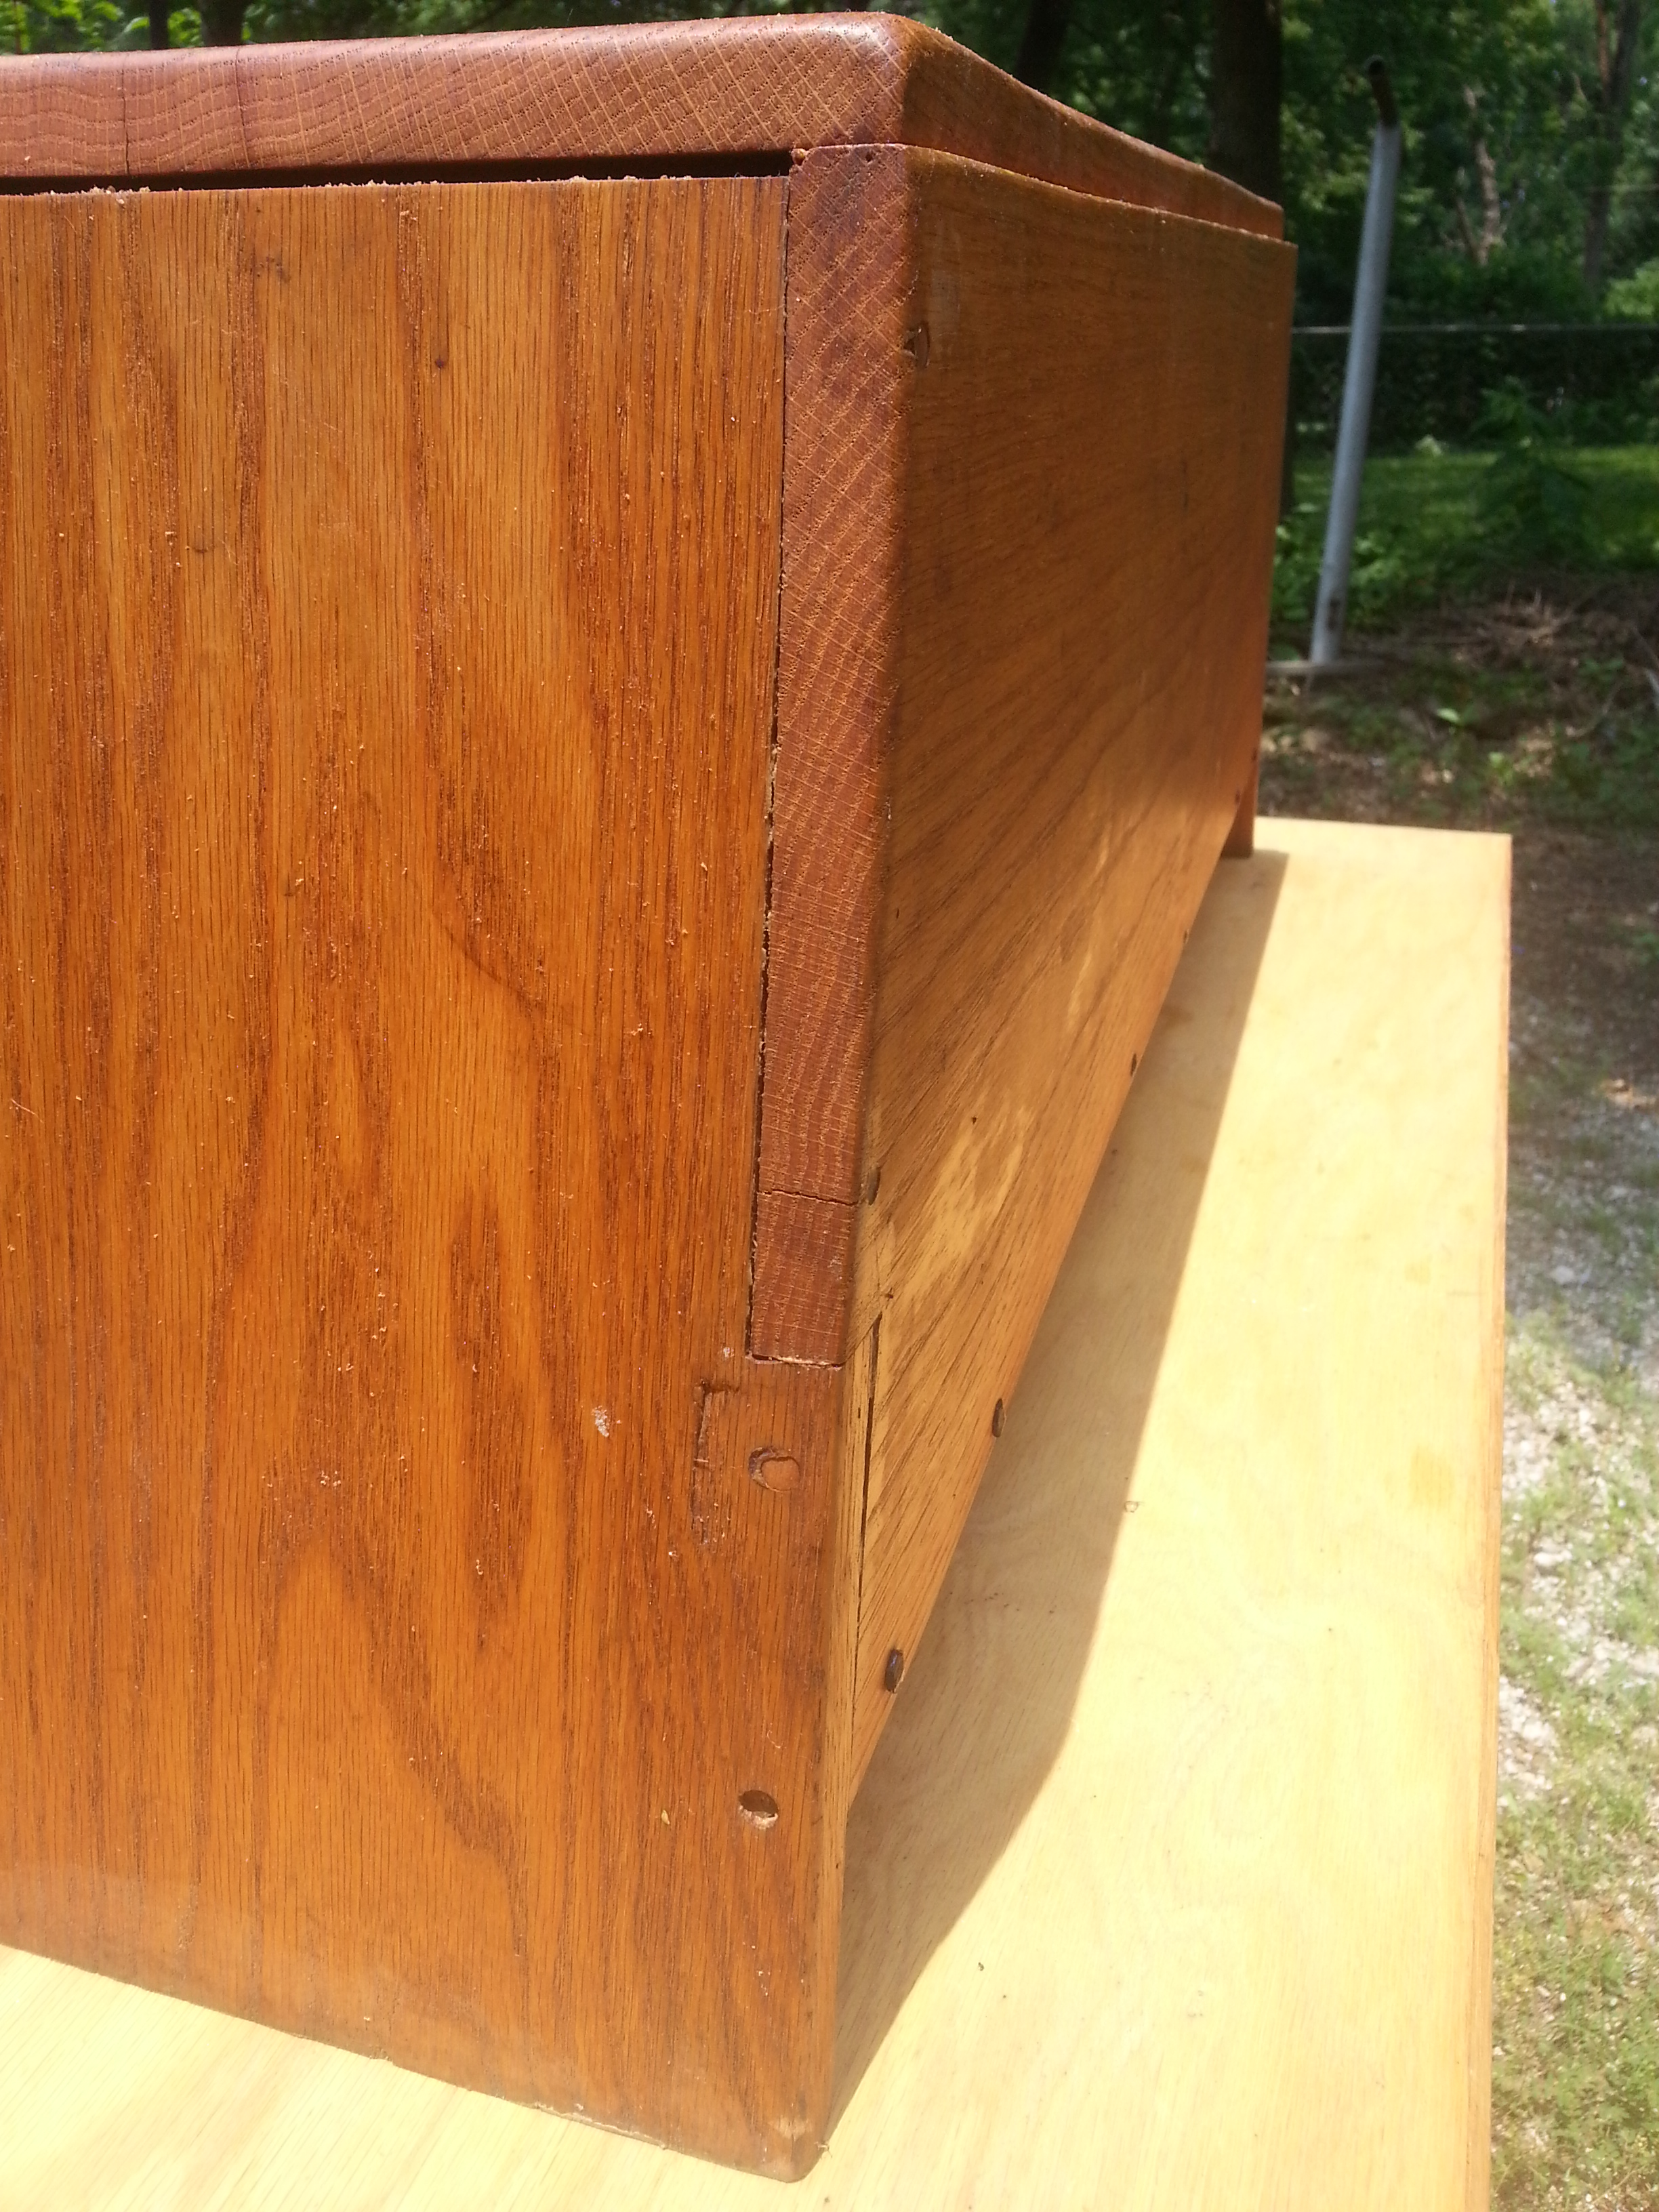
Thing 2 already had some nails added to reinforce the floor. With a couple good clamps I was able to draw the joints back together and pre-bore for new nails under the shoulder, bringing the “feet” of the end boards back in tight.
Then it was onto the face boards for the same treatment.
On the left, there is a good view of the correct orientation of the cut nail. The wedging action of the tapered nail is in line with the wood grain. On the right, the wedge is perpendicular to the wood grain. If the nail on the right is driven into the wood, the wedge will split out the board as the wedge forces the grain apart. The correct orientation (left) doesn’t put pressure across the grain, and the wedge will shear with the grain, creating a nearly microscopic “featherboard” effect. This will keep the nails from working loose as the wood moves, and assist in keeping the joints flush.
I think this shot of Thing 1 demonstrates more than I could ever say about the long-term effects of improper grain orientation, and the forces that are exerted when wood moved. This board was “flat” when the chest was assembled initially, and the steel bands were in a single plane. The wood has flexed enough to not only bow and bend the metal straps on the top of the board, but has even been able to stretch the perpendicular straps on the end grain so they bow as well. It was a slow process, but is a great example of how much internal stress wood actually contains.
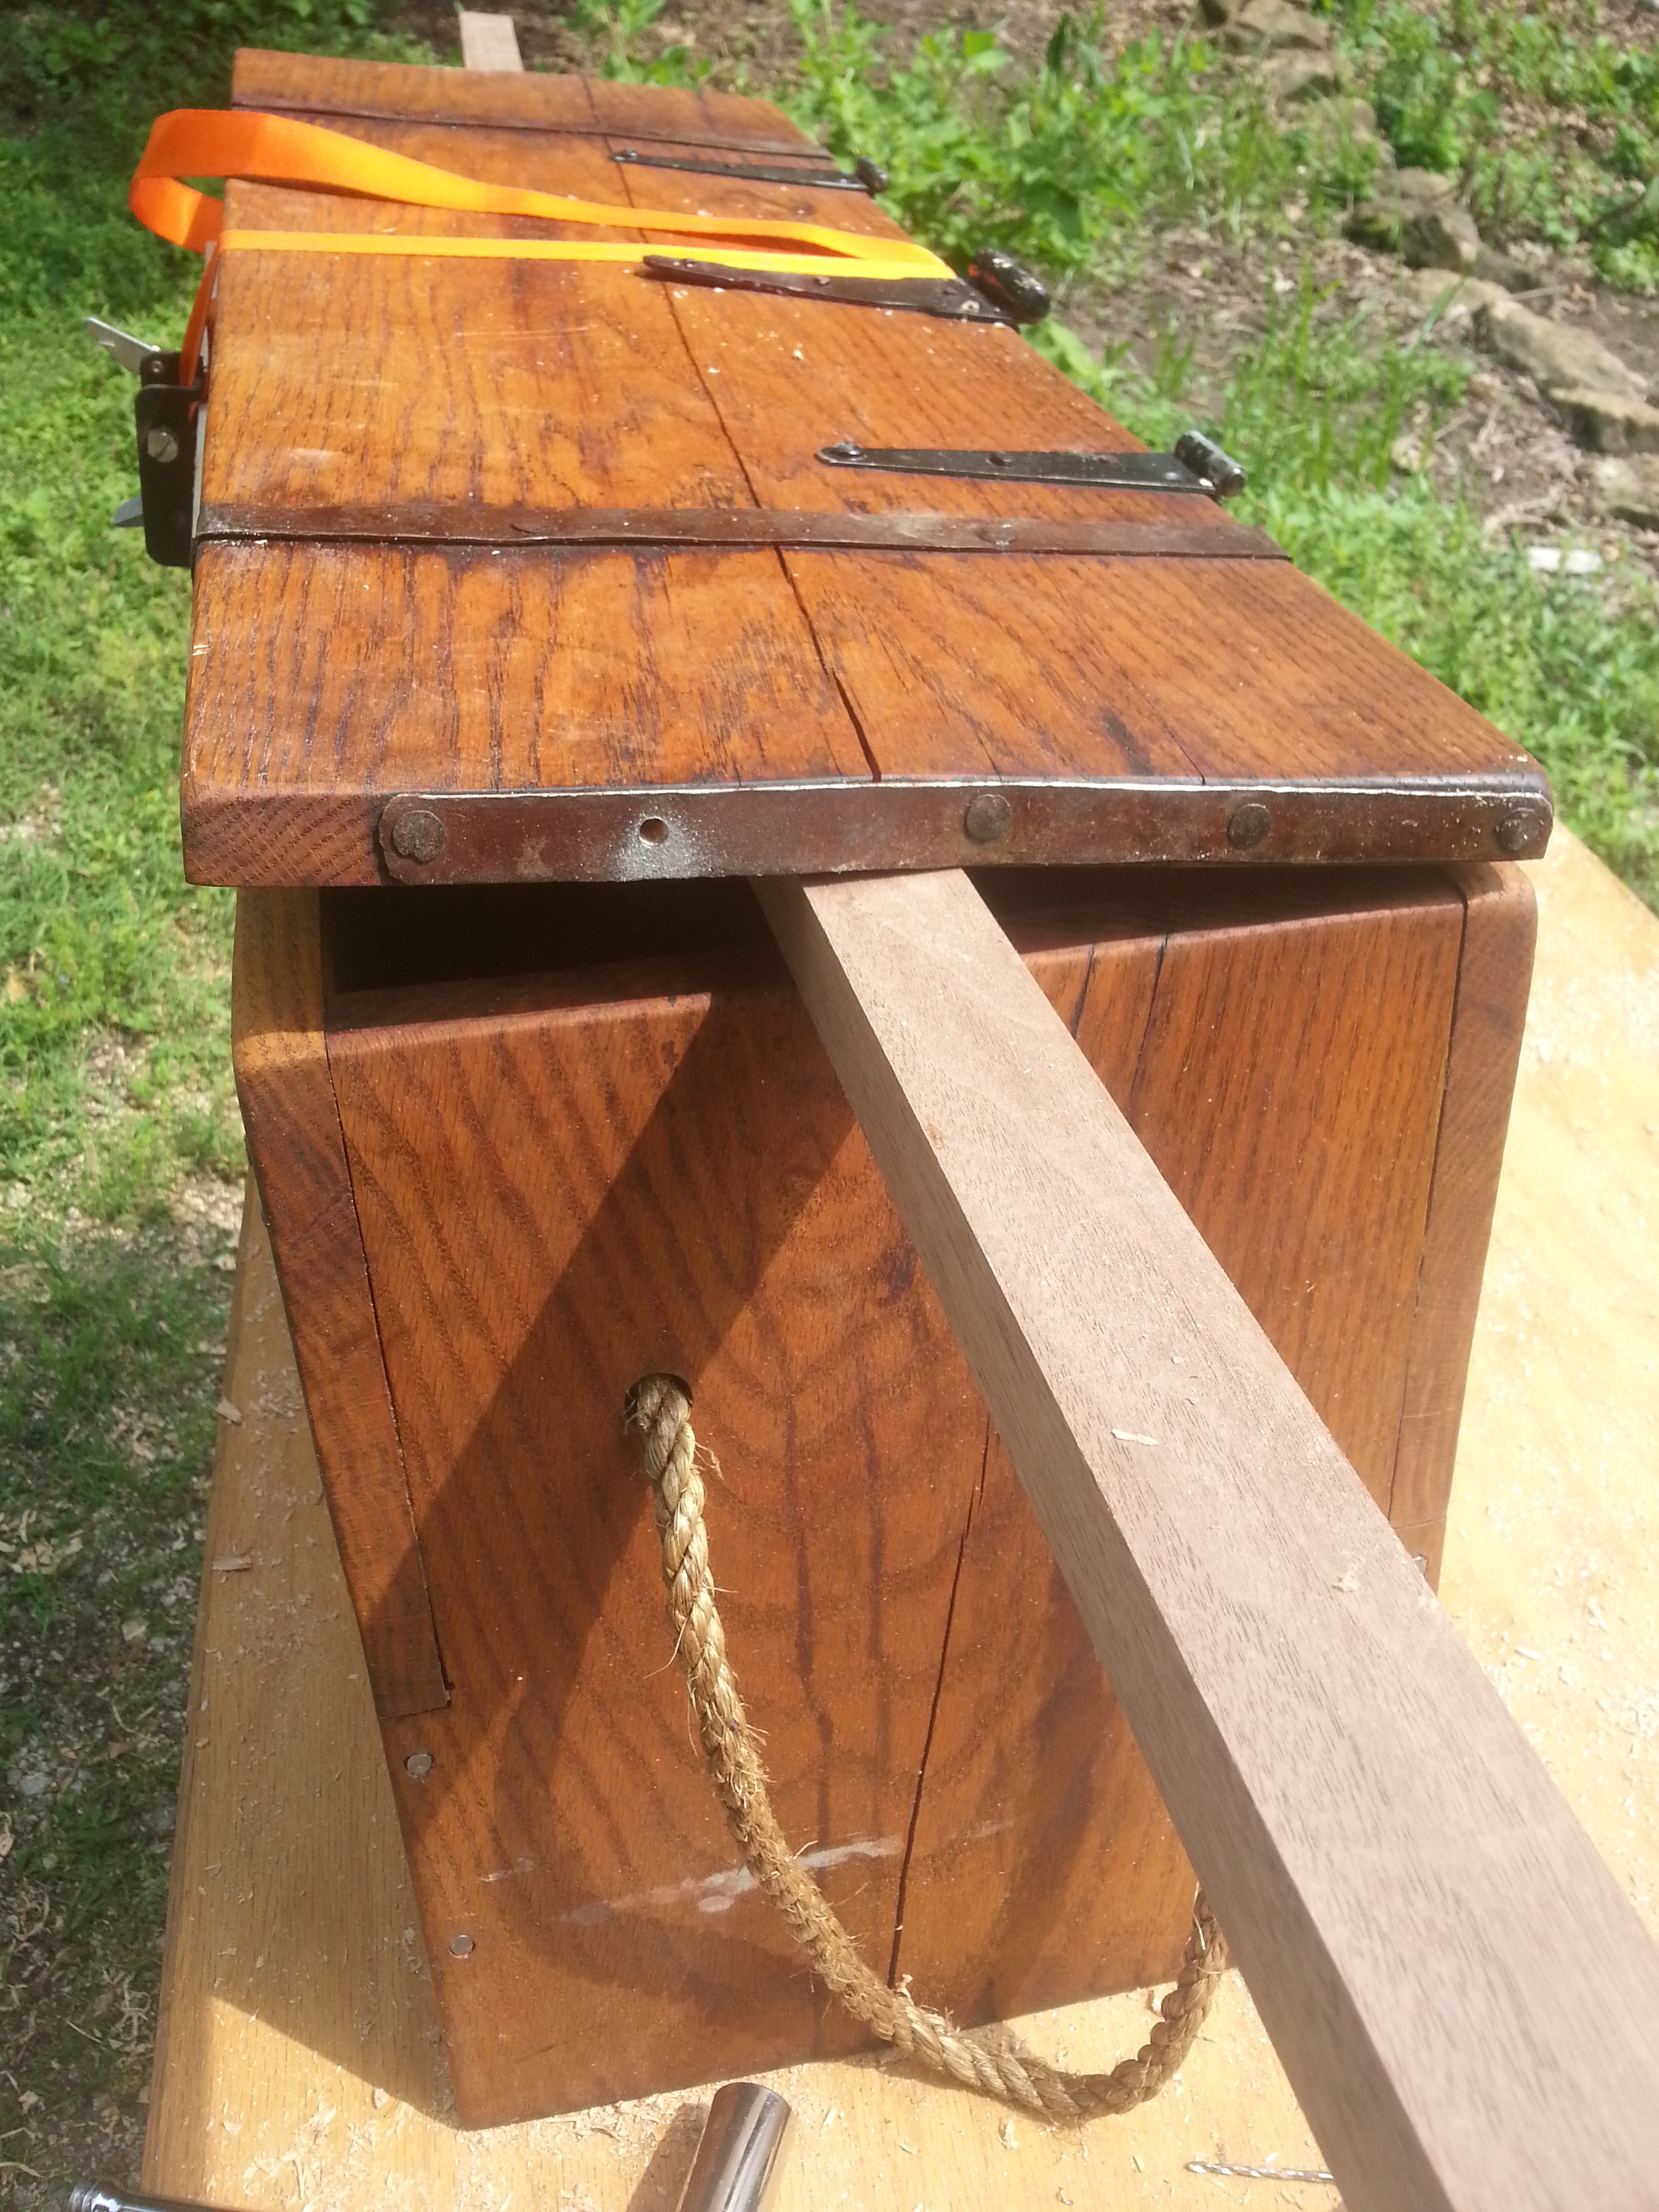
Correcting that bow completed the split across the top of the board. Here again we can see exactly now much the steel strapping on the endgrain of the boards has been stretched. That buckle was a fat sixteenth of an inch. I bored a new hole for another cut nail to hold things “flat” again after flattening the buckle out of the steel strap. That is a ratchet strap around the chest, with a hefty piece of walnut as a fulcrum being used to bring the front and back corners of the lid back into the same plane, and being in coplanar at or below the center of the board.
Alas, the split is so severe the lid is now essentially compromised. After pulling the strap, the lid is only held together by the steel banding. To keep the lid from just leaking like a sieve when caught in the rain, I did run a line of blue-tape on the underside of the lid before pouring in a heavy bead of glue to take up the space. Structurally, there is very little to be done to fix this problem. Better knowledge of the materials I was purchasing would have eliminated this problem at the source. Lesson learned: don’t buy Home Center hardwoods if it can be at all helped.
Speaking of- A lot of people don’t know where to even start looking for good lumber in their areas. If you are in the Continental United States, check out Woodfinder.com
Not only can you premium hardwood dealers in your area, but local lumber mills, sawyers, and recovered/urban reclaimed lumber sources are also listed.
Despite my preferred desire, my longest running series and most references articles have been on Boarded Chests. Two summers ago that was what I spent time and energy expounding upon, hence, those articles have gathered quite a bit of attention.
During the course of discussing the “right way” to build boarded chests, I mentioned a number of methods that reenactors thought to be “improvements” and rightly maligned those suggestions. While quite a few people have taken my word for the better way of doing things, I figured it might be prudent to show why those are the better methods.
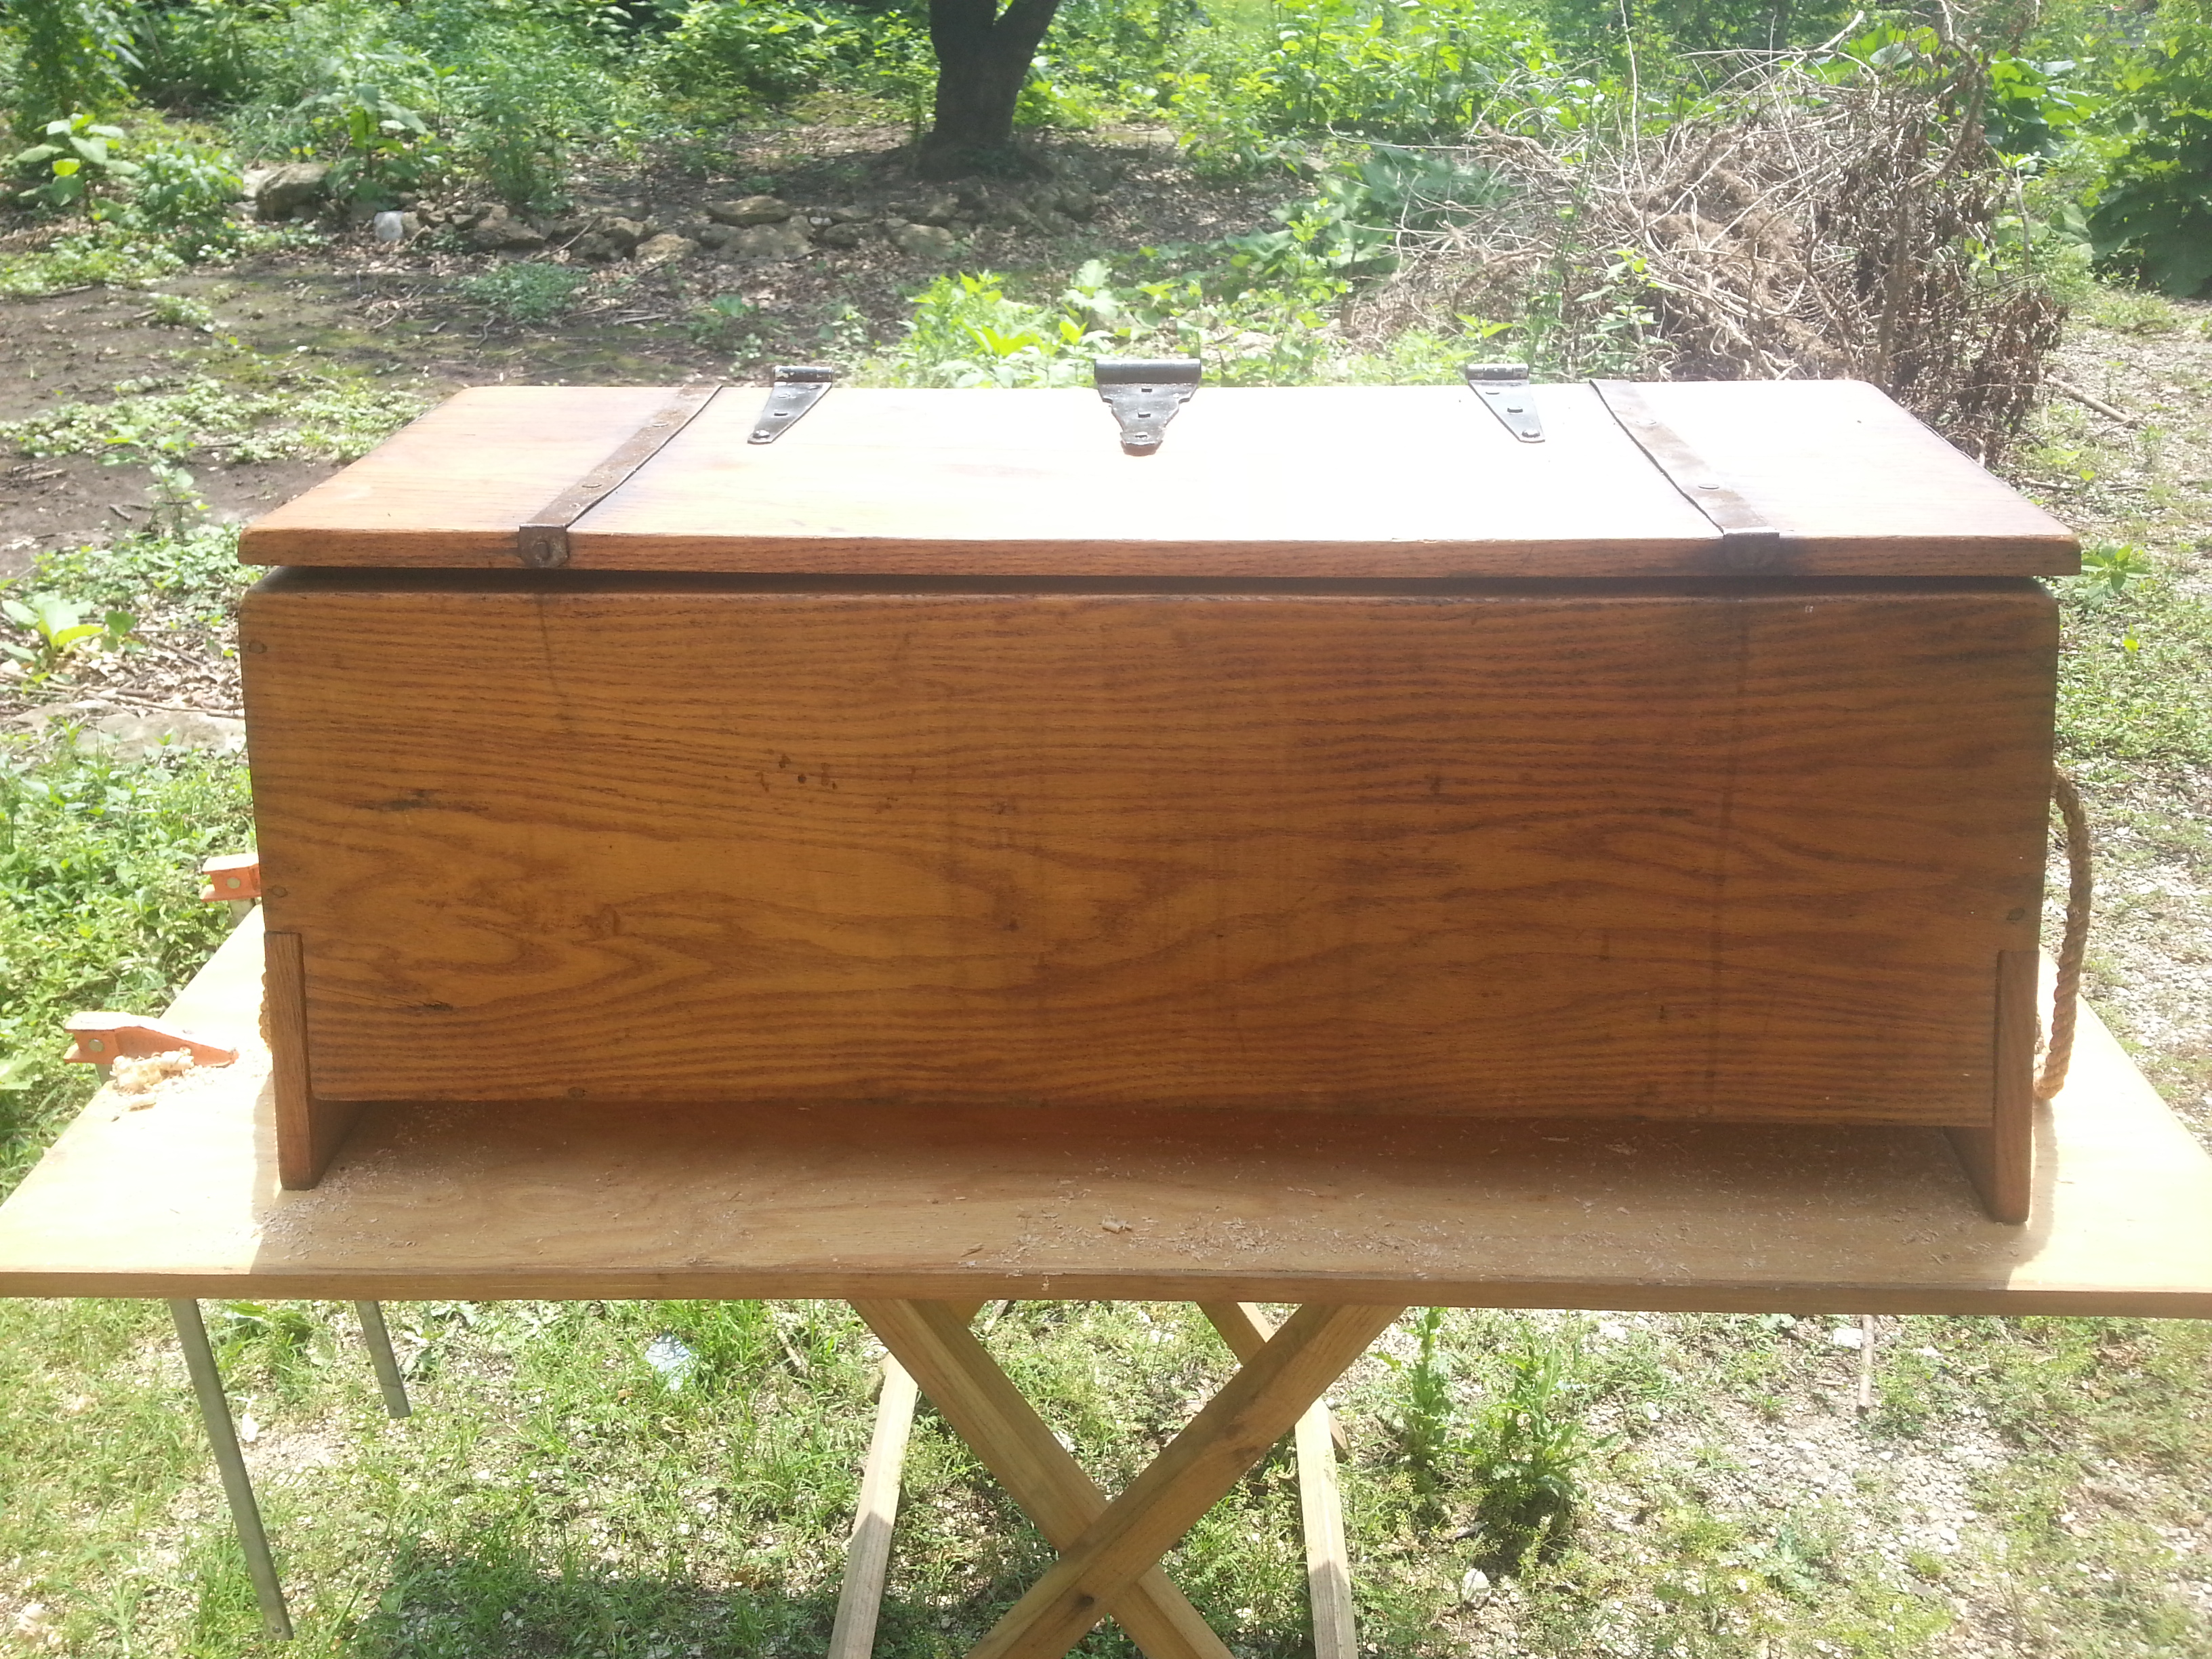
Thing 1
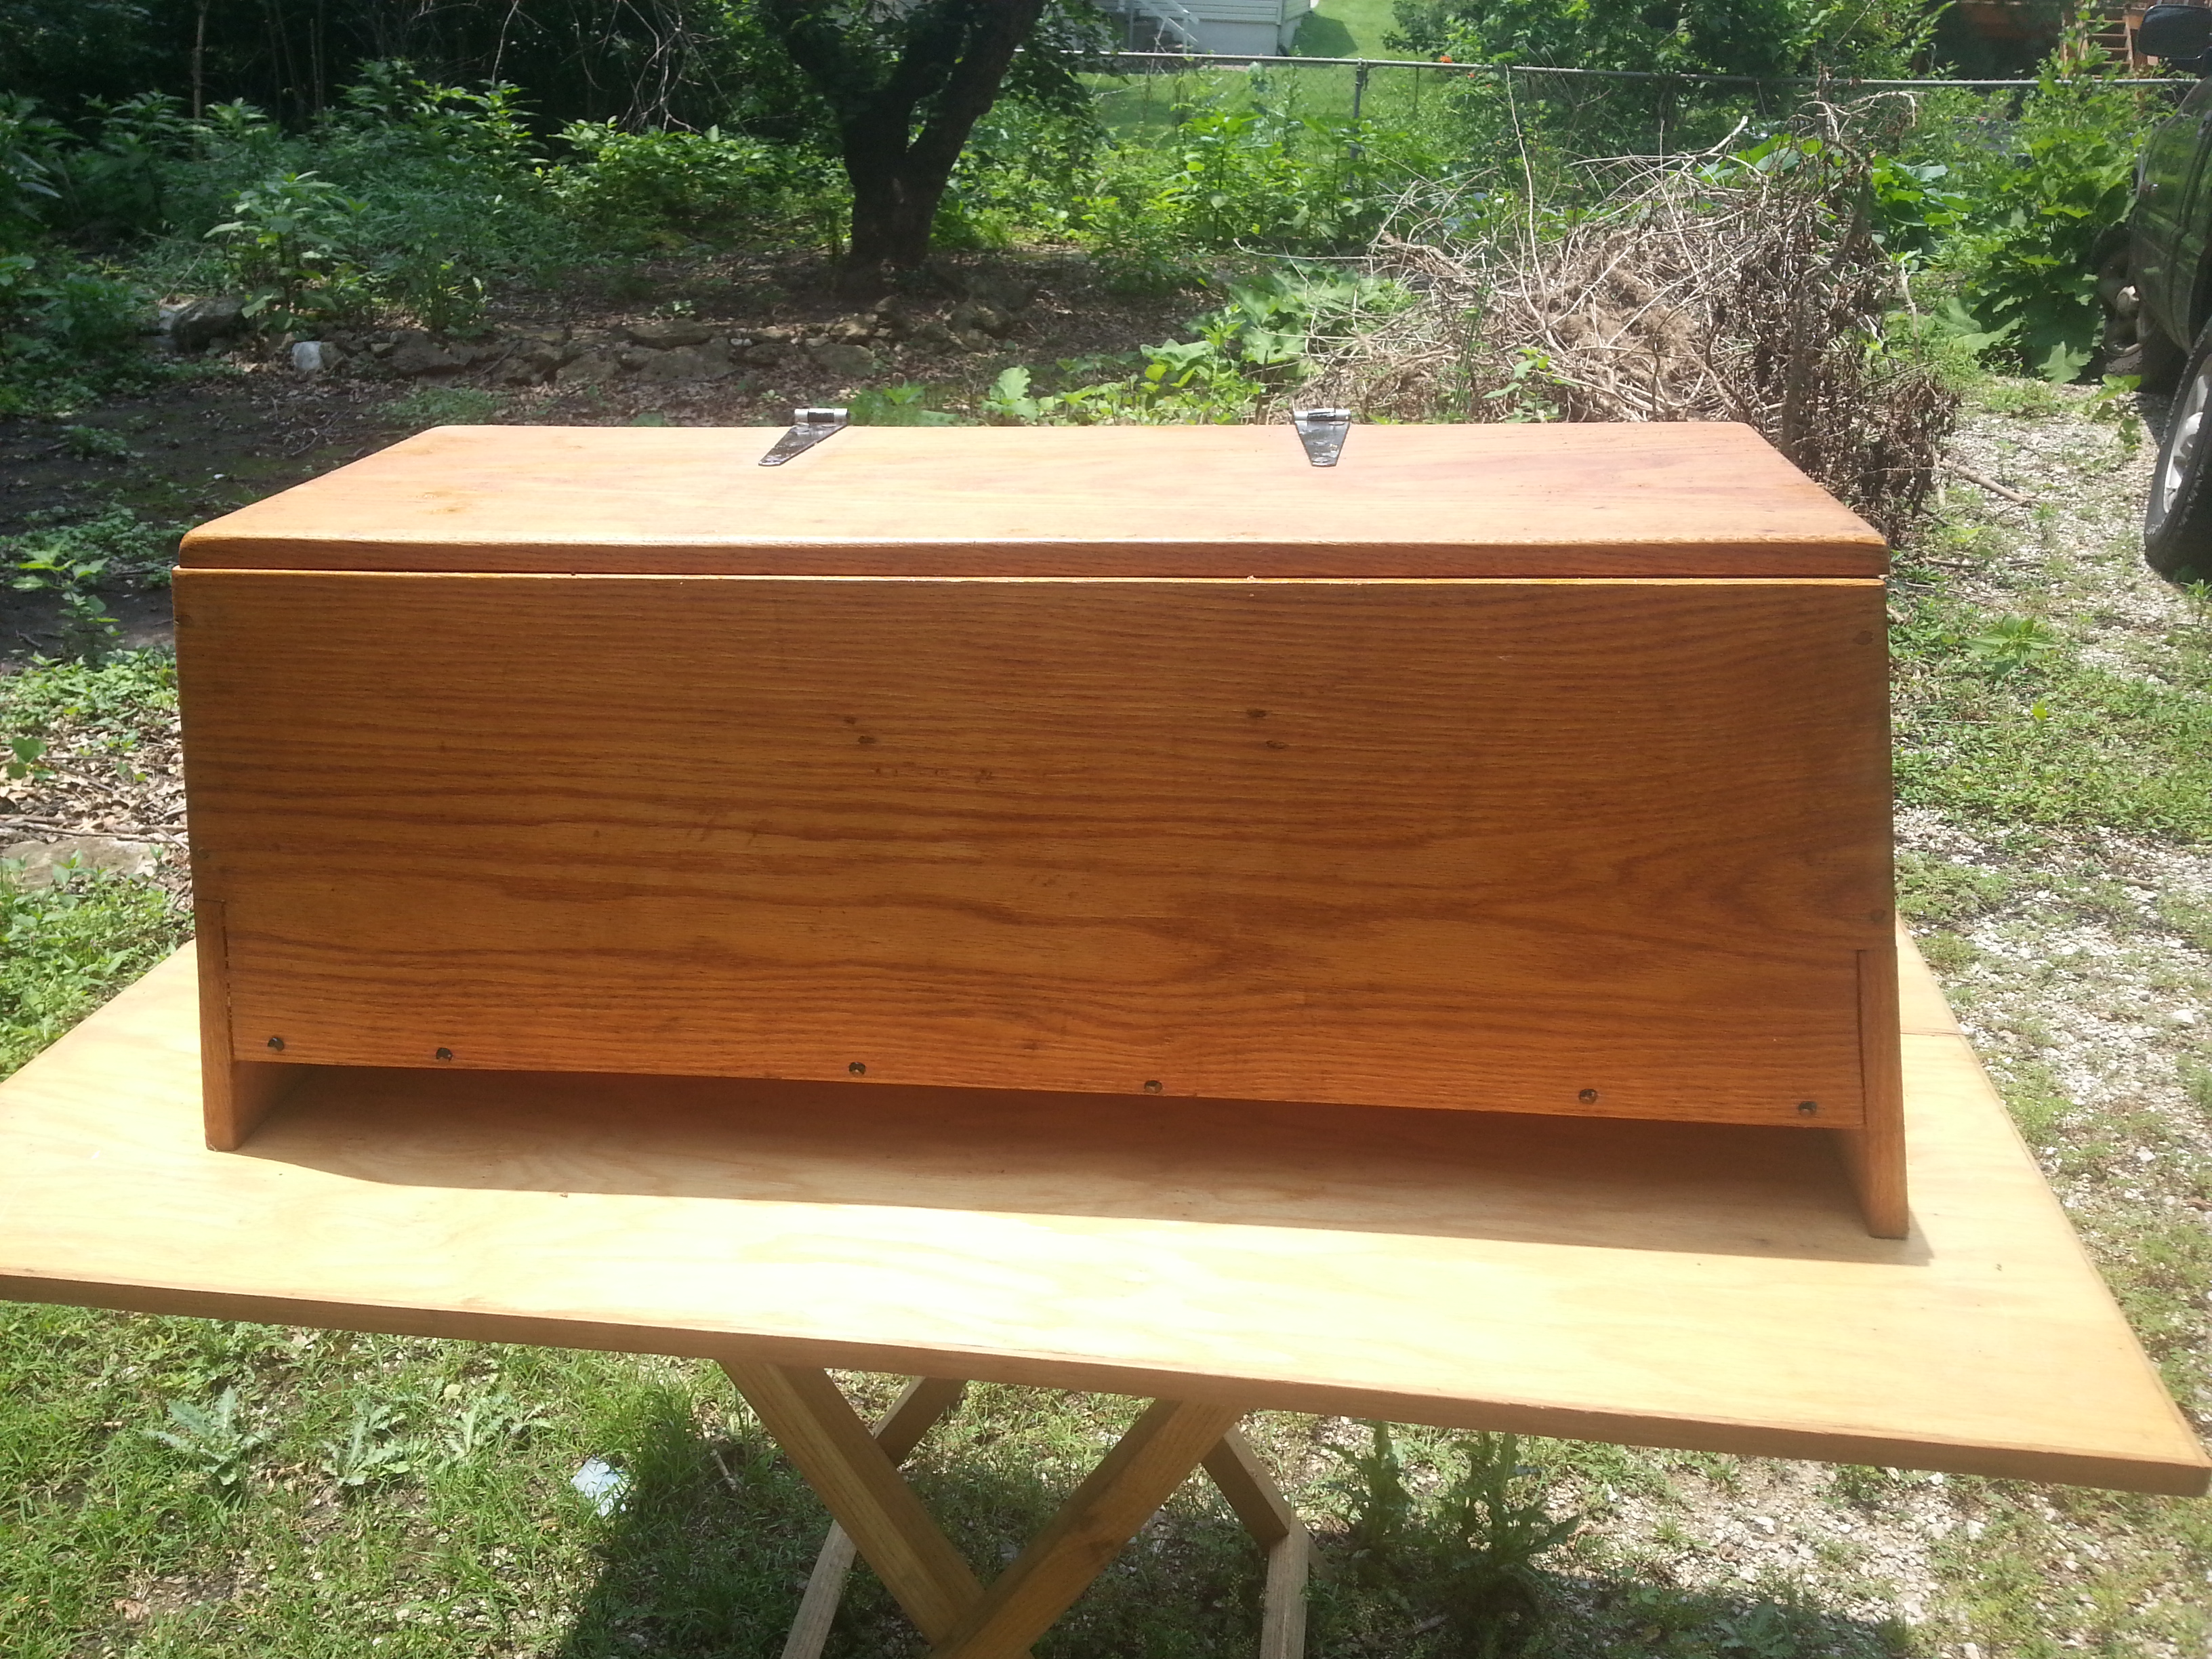
Thing 2
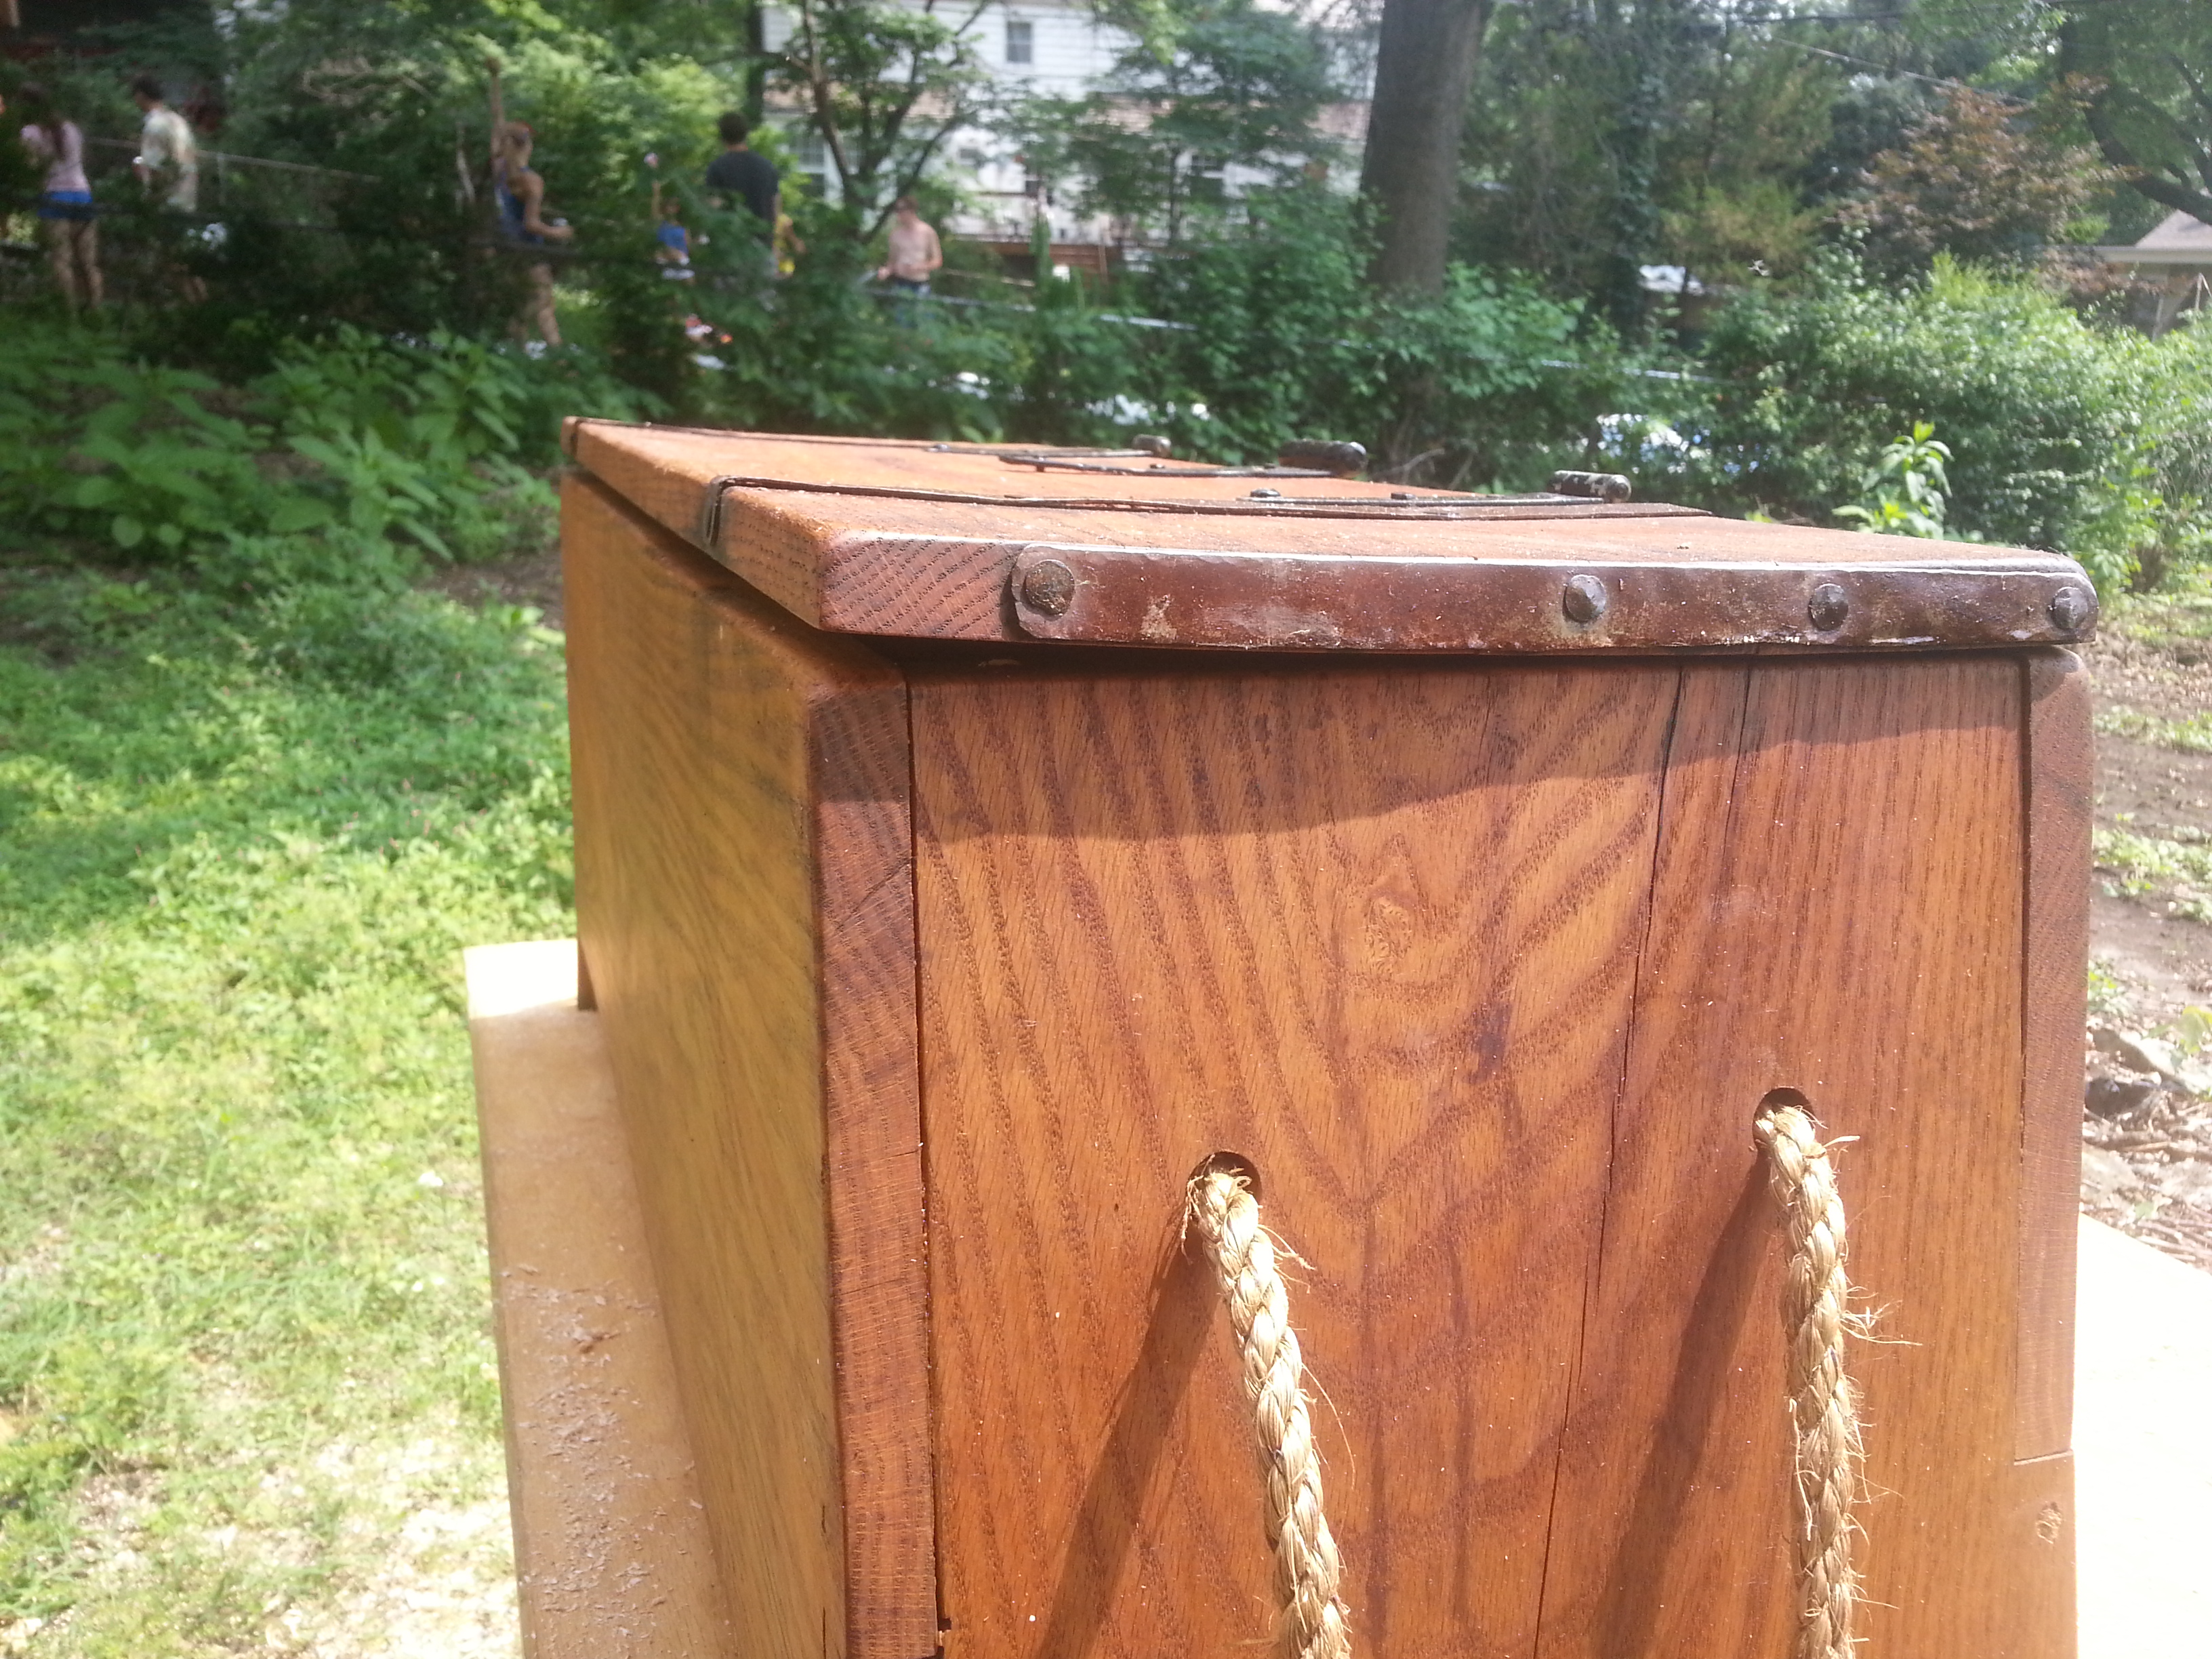
For your consideration: Thing 1 and Thing 2. These are a pair of chests I made circa 2006. They are badly in need of repair, and have been so for several years. The abomination, it which shall not be named, was my first boarded chest. These were third and fourth. The second didn’t survive infancy. Sometime between these and now I have made more boarded chests than I can recall, and learned quite a few things on the way. It is a step back to simpler things to review and repair these old workhorses of mine.
Thing 1 had several steel straps added to it during initial construction because the wood was splitting out on the lid and back panel. Thing 2 did not have such poor luck as being made of boards from a Big Box store that had conspicuous cracks, because had I known then what I know now, I wouldn’t have even bought that board. Matter of fact, I wouldn’t have been buying my lumber at a big box and wondering why things were falling apart…
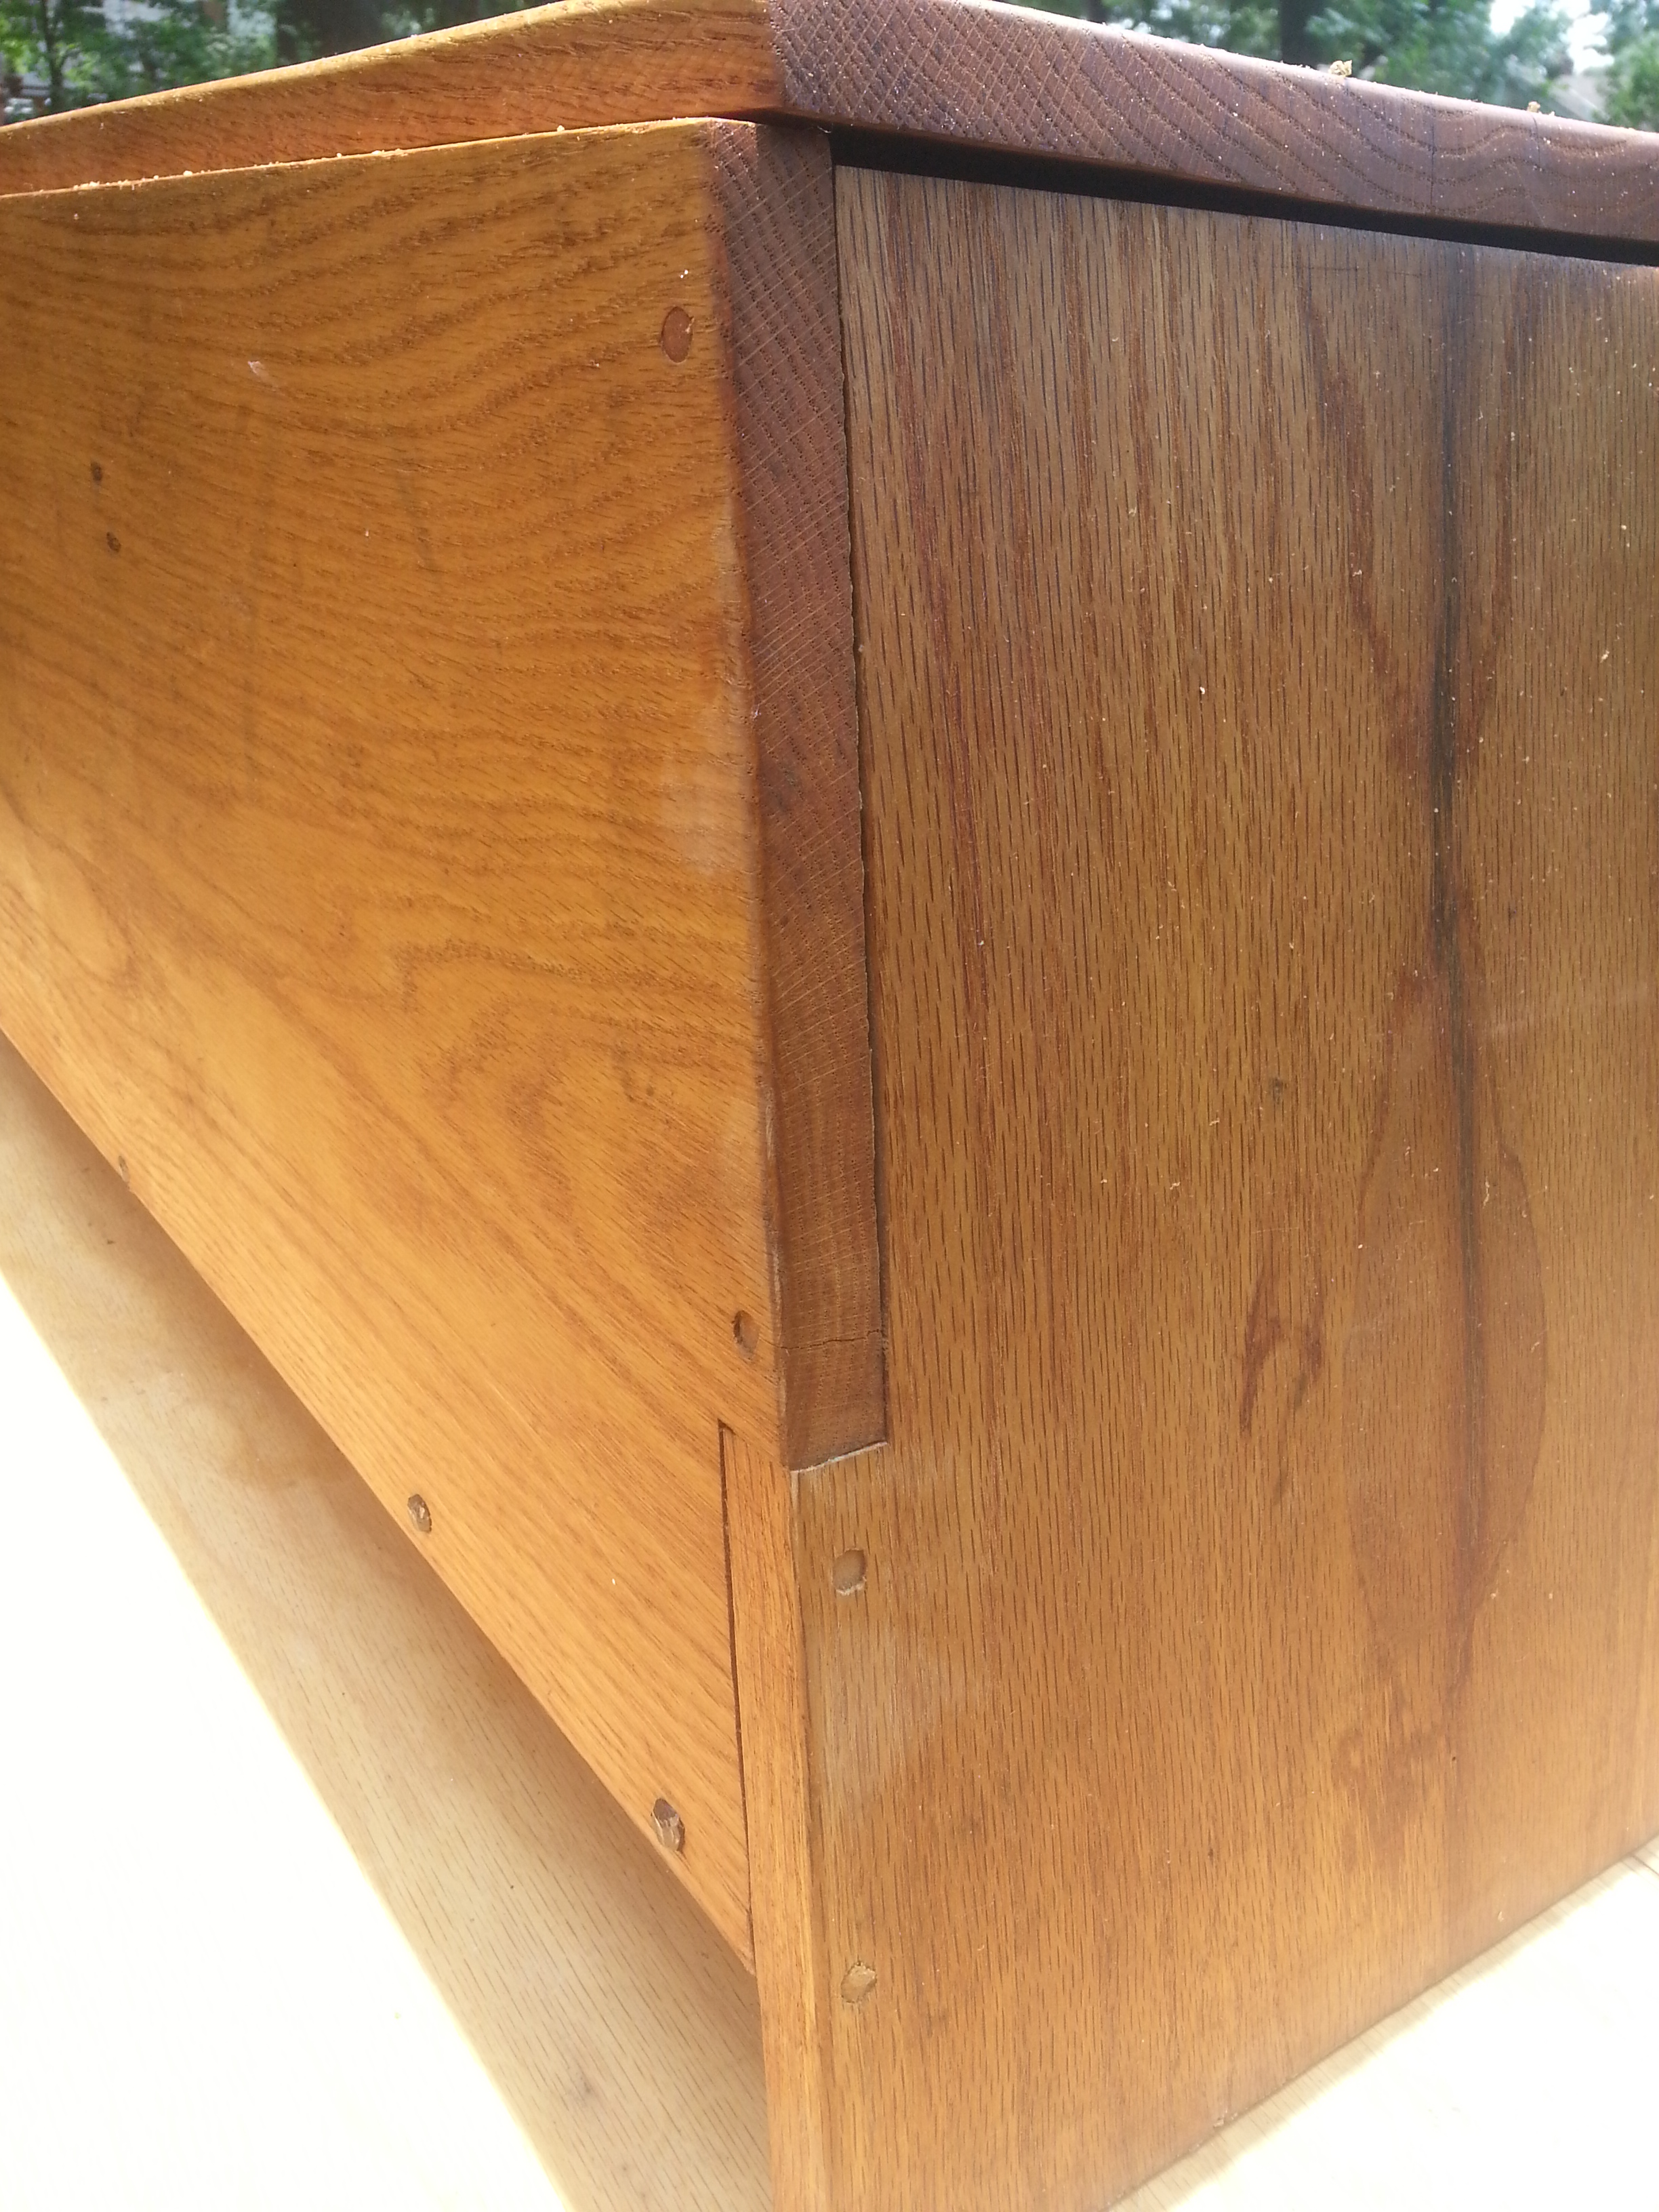
Still, Thing 2 lost it’s floor earlier this spring because the glue joint that was the only thing holding in the bottom gave up. More to the point, the wood on either side of the glue joint gave up. The glue held on just fine — the wood around it split away after nearly a decade of humidity changes and rough handling. I had already repaired the bottom, and as can be seen, nailed the hell out of it. Also, that replacement was the impetus for the essential rebuilds that went on this July Fourth weekend.
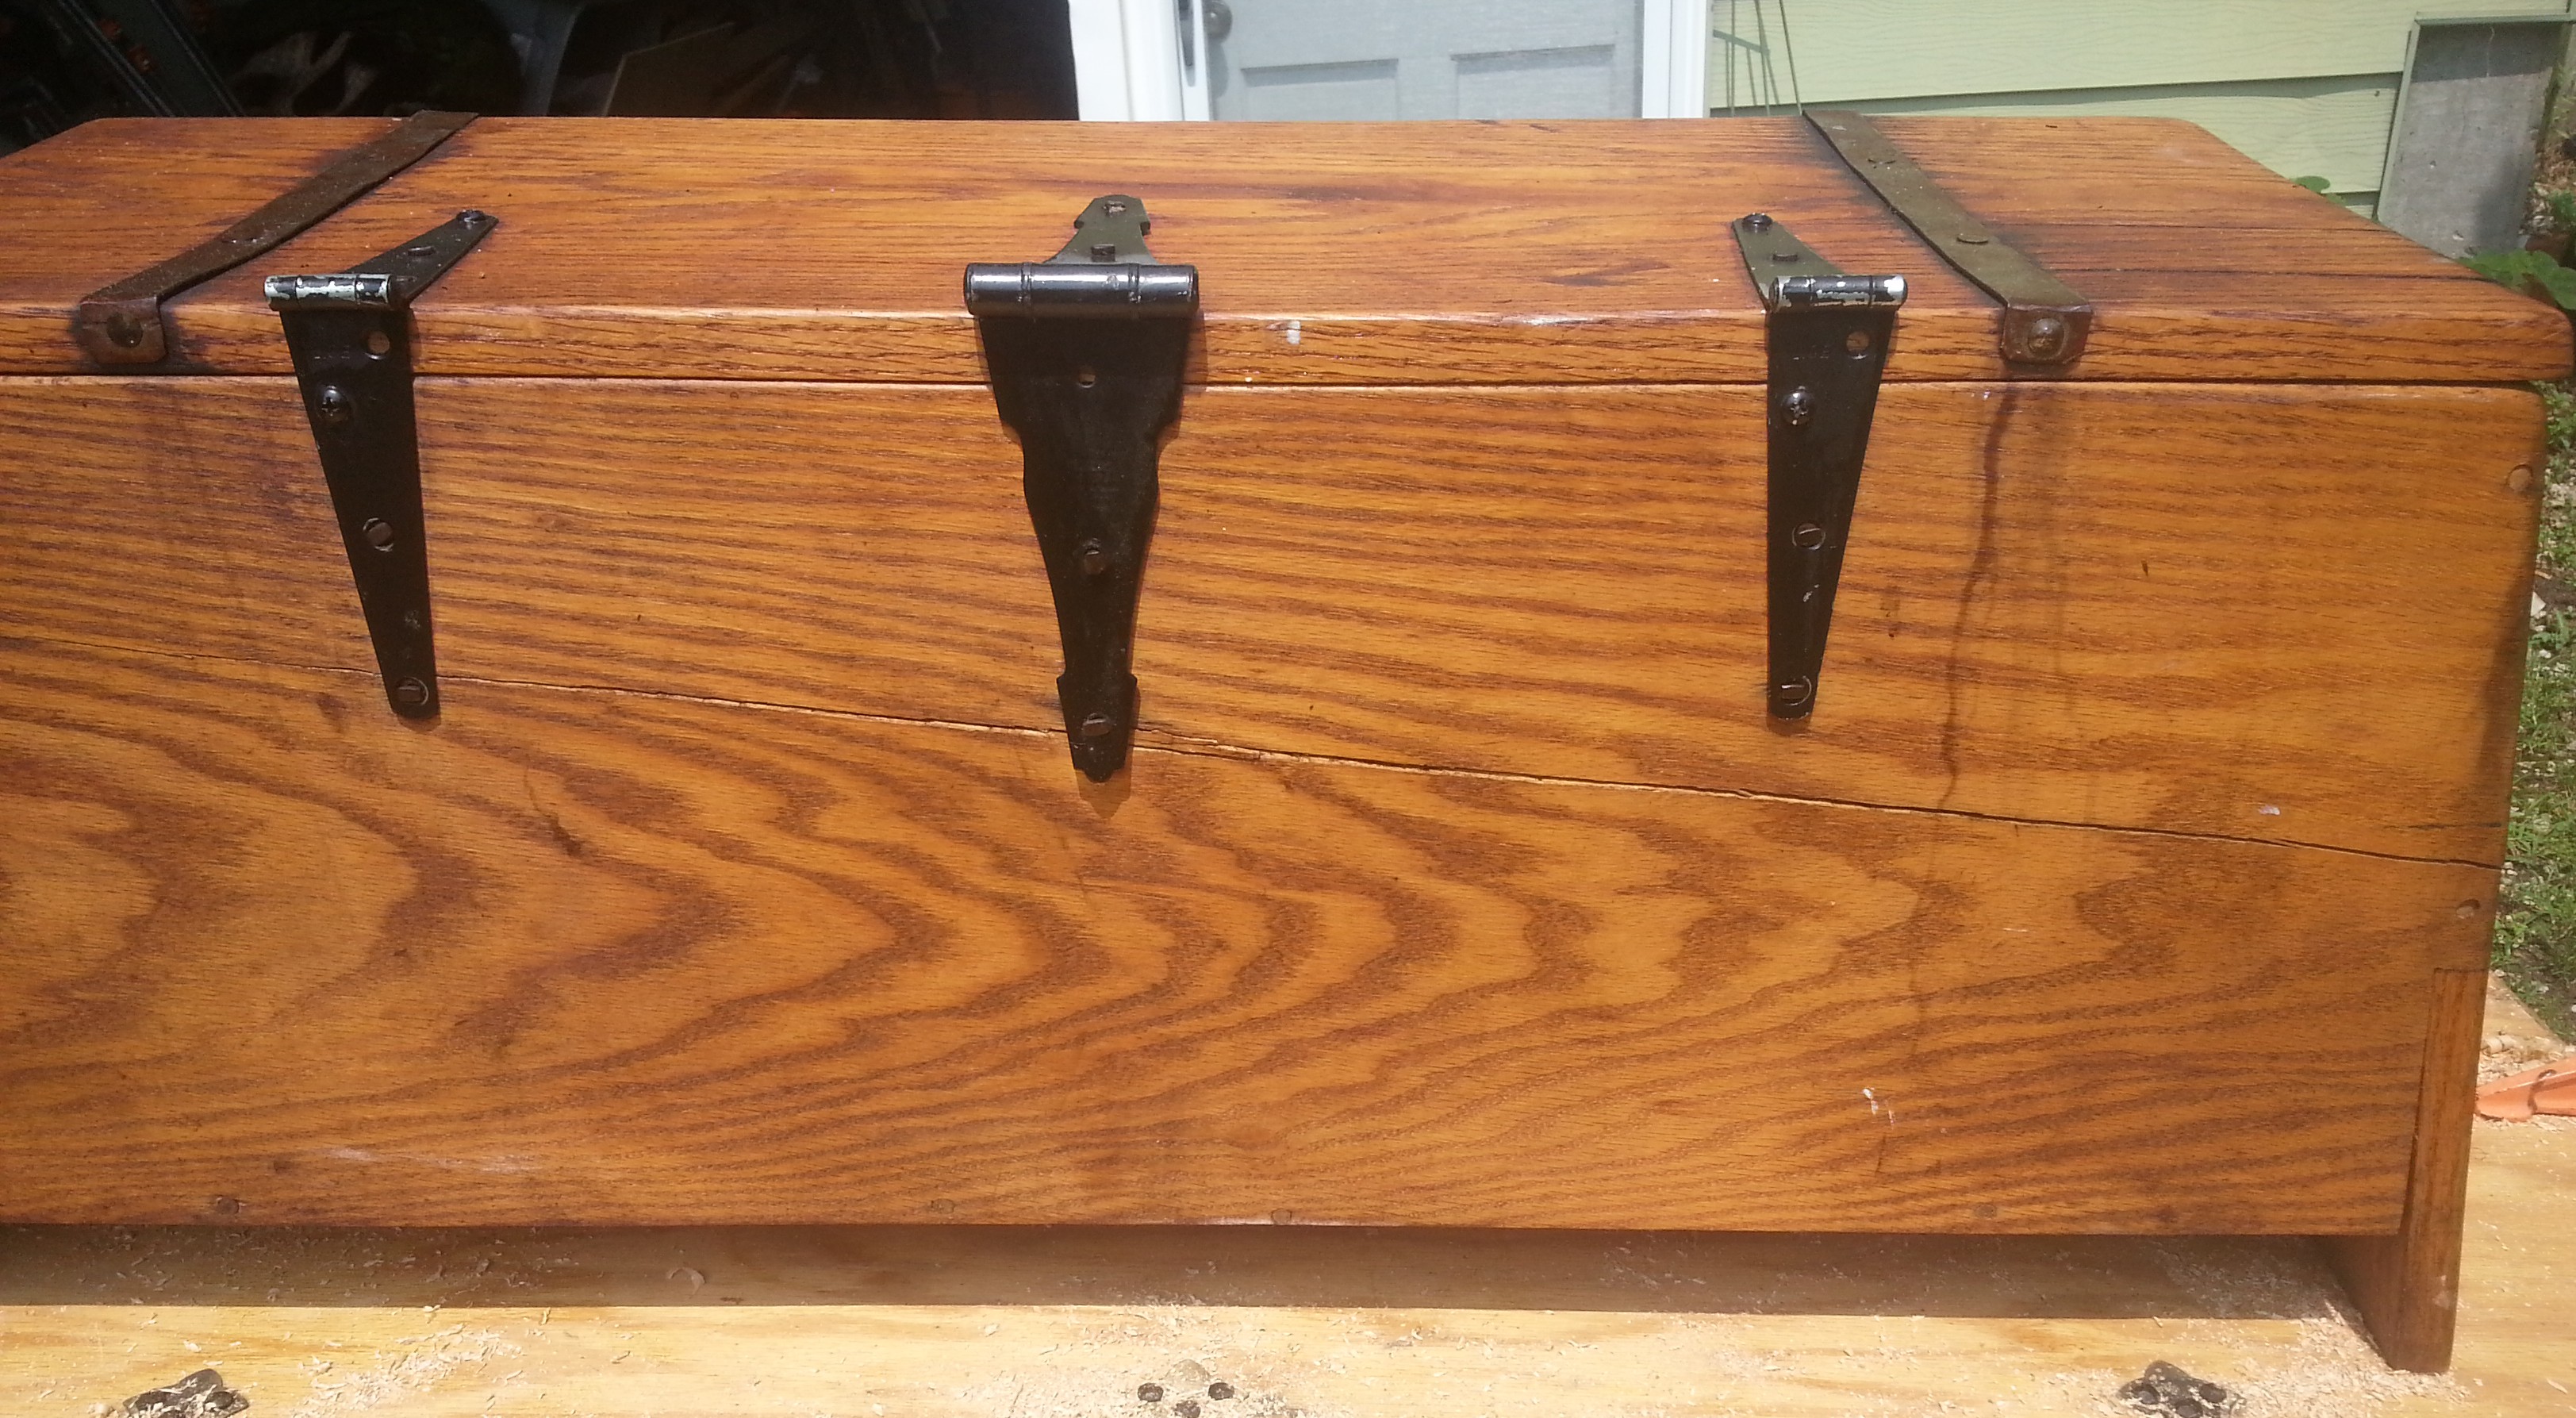
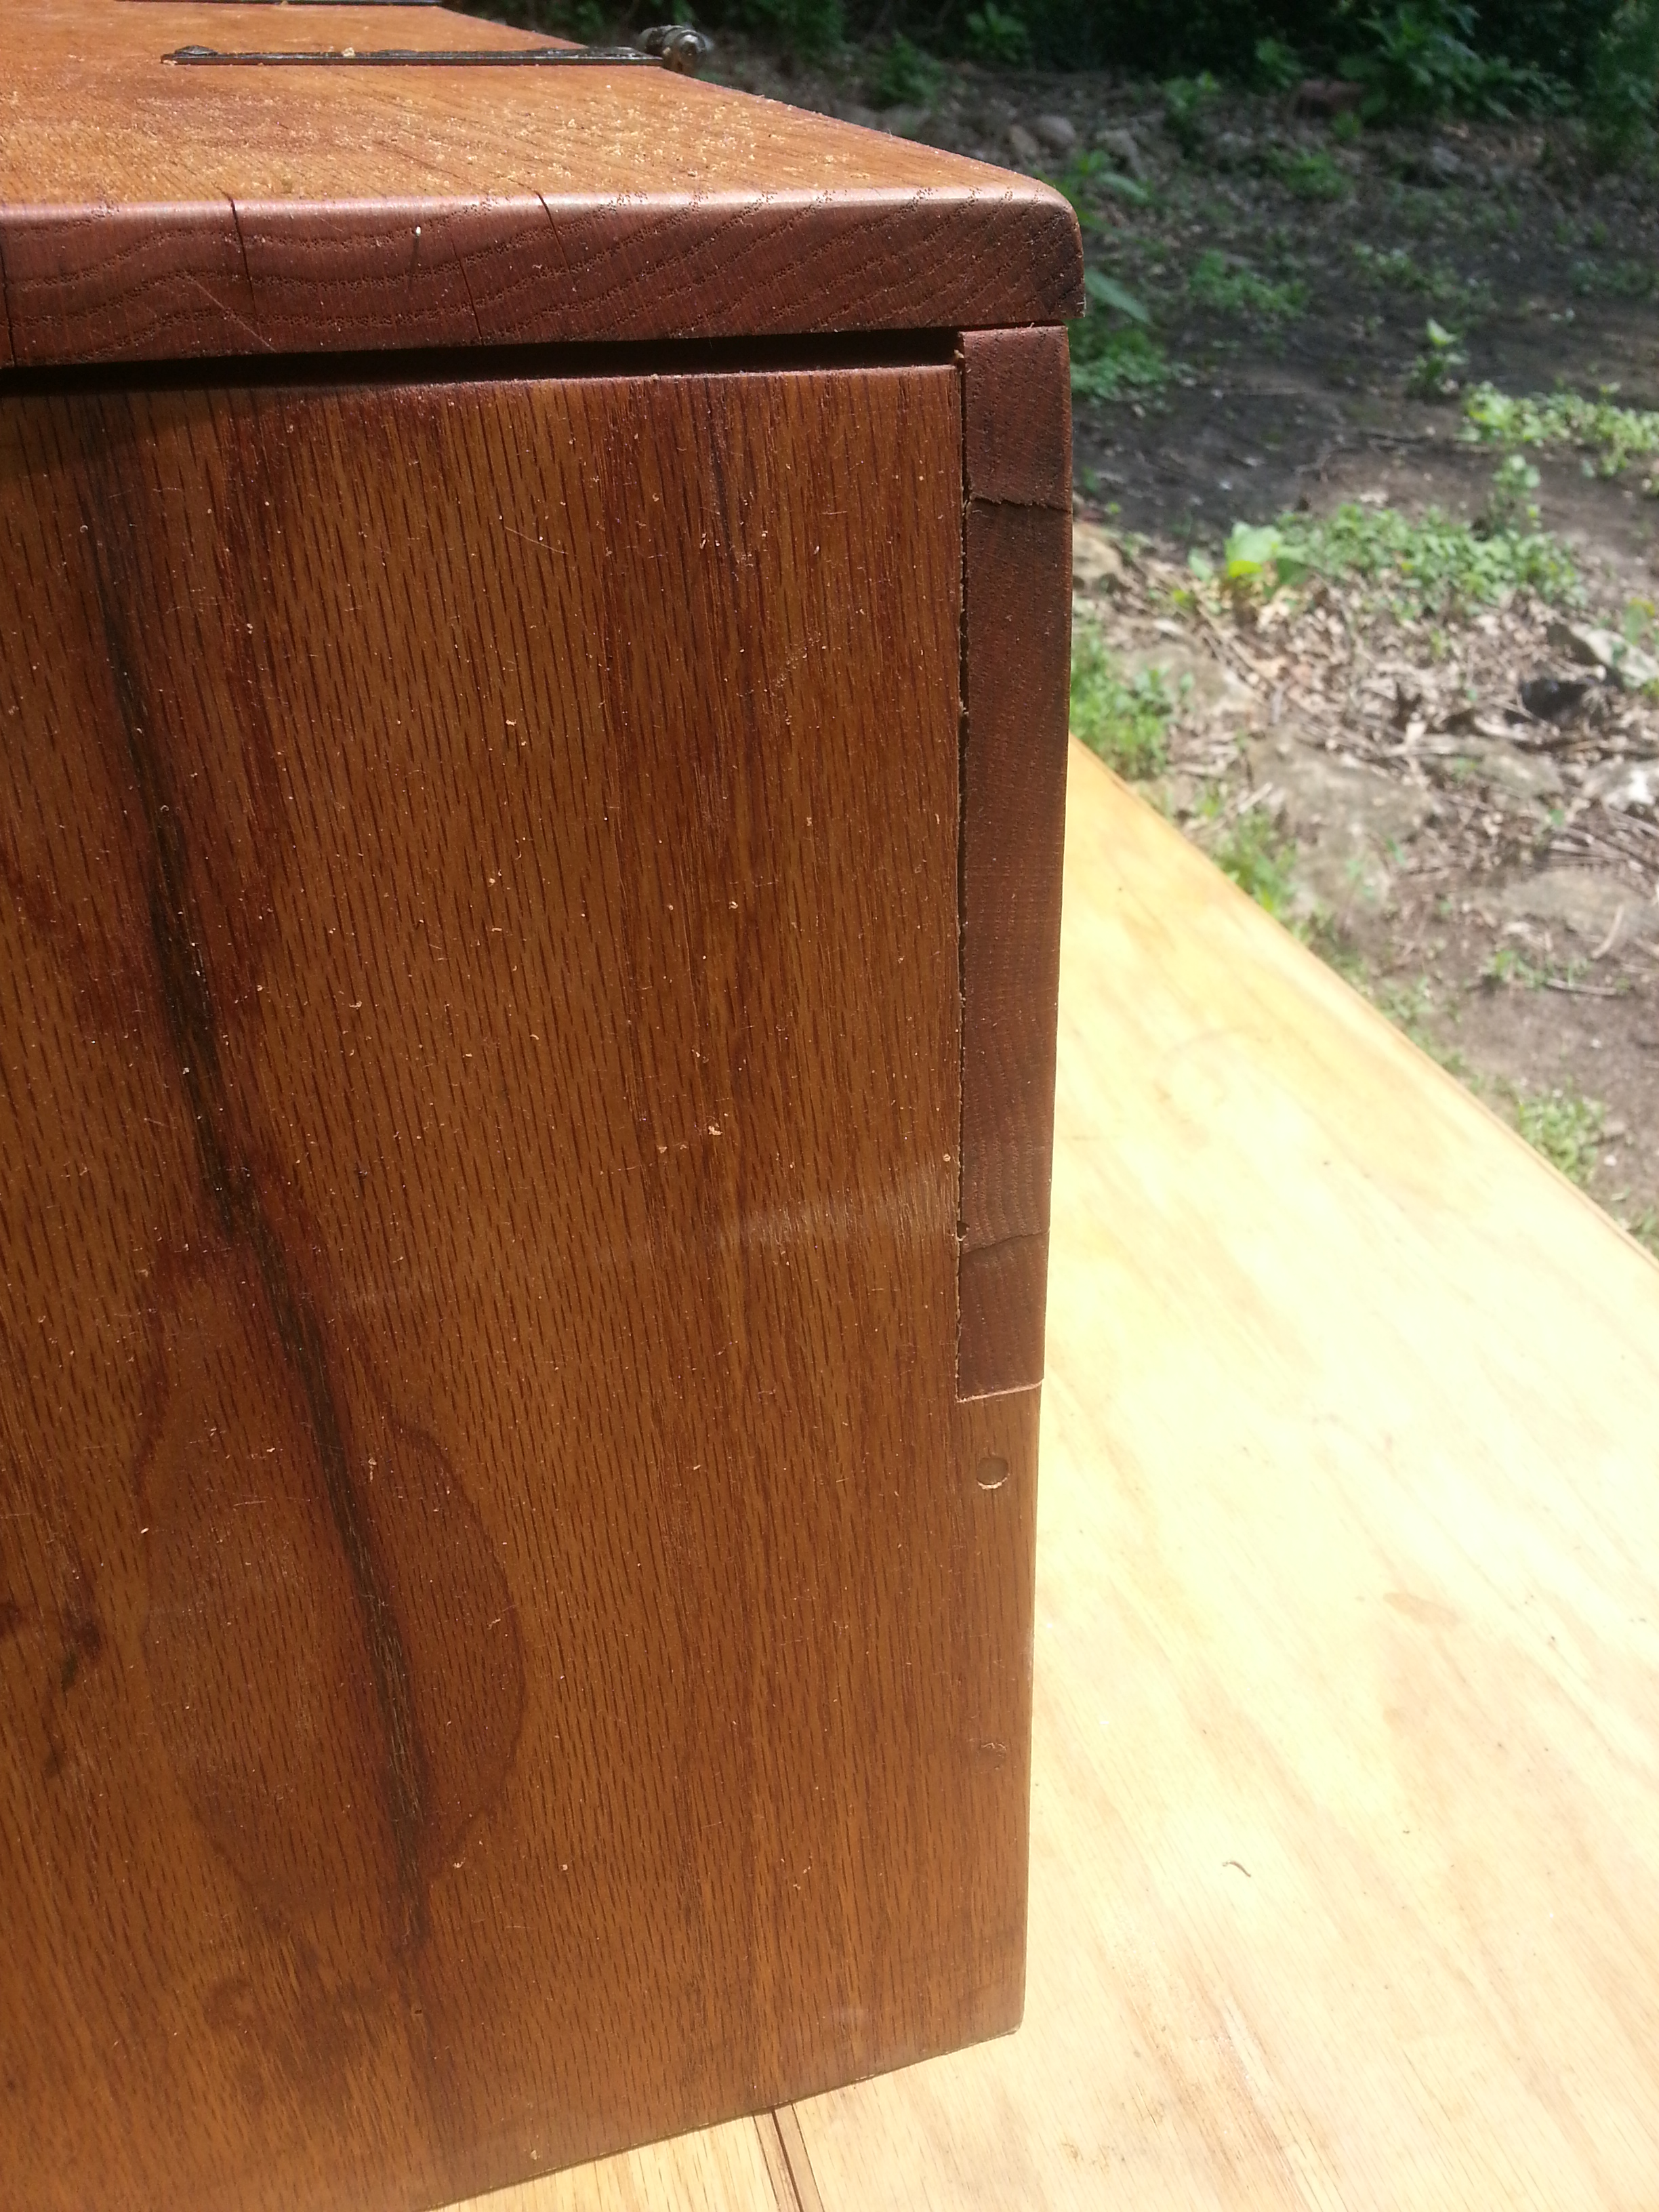
This is Thing 1’s back. Notice the crack that run from the right side of the photograph, through where two nails are being used to hold in the center and left hinge? So this was the lesson to both not use over-dry lumber, and to pre-bore for cut nails at the right diameter. Eventually this split will be repaired with additional metal straps, just not today. Repairing split lumber in such a way appears to have been fairly common during the European Middle Ages and Renaissance. Matter of fact, there are quite a few examples where the straps went beyond simple repairs and became decorative elements in and of themselves.
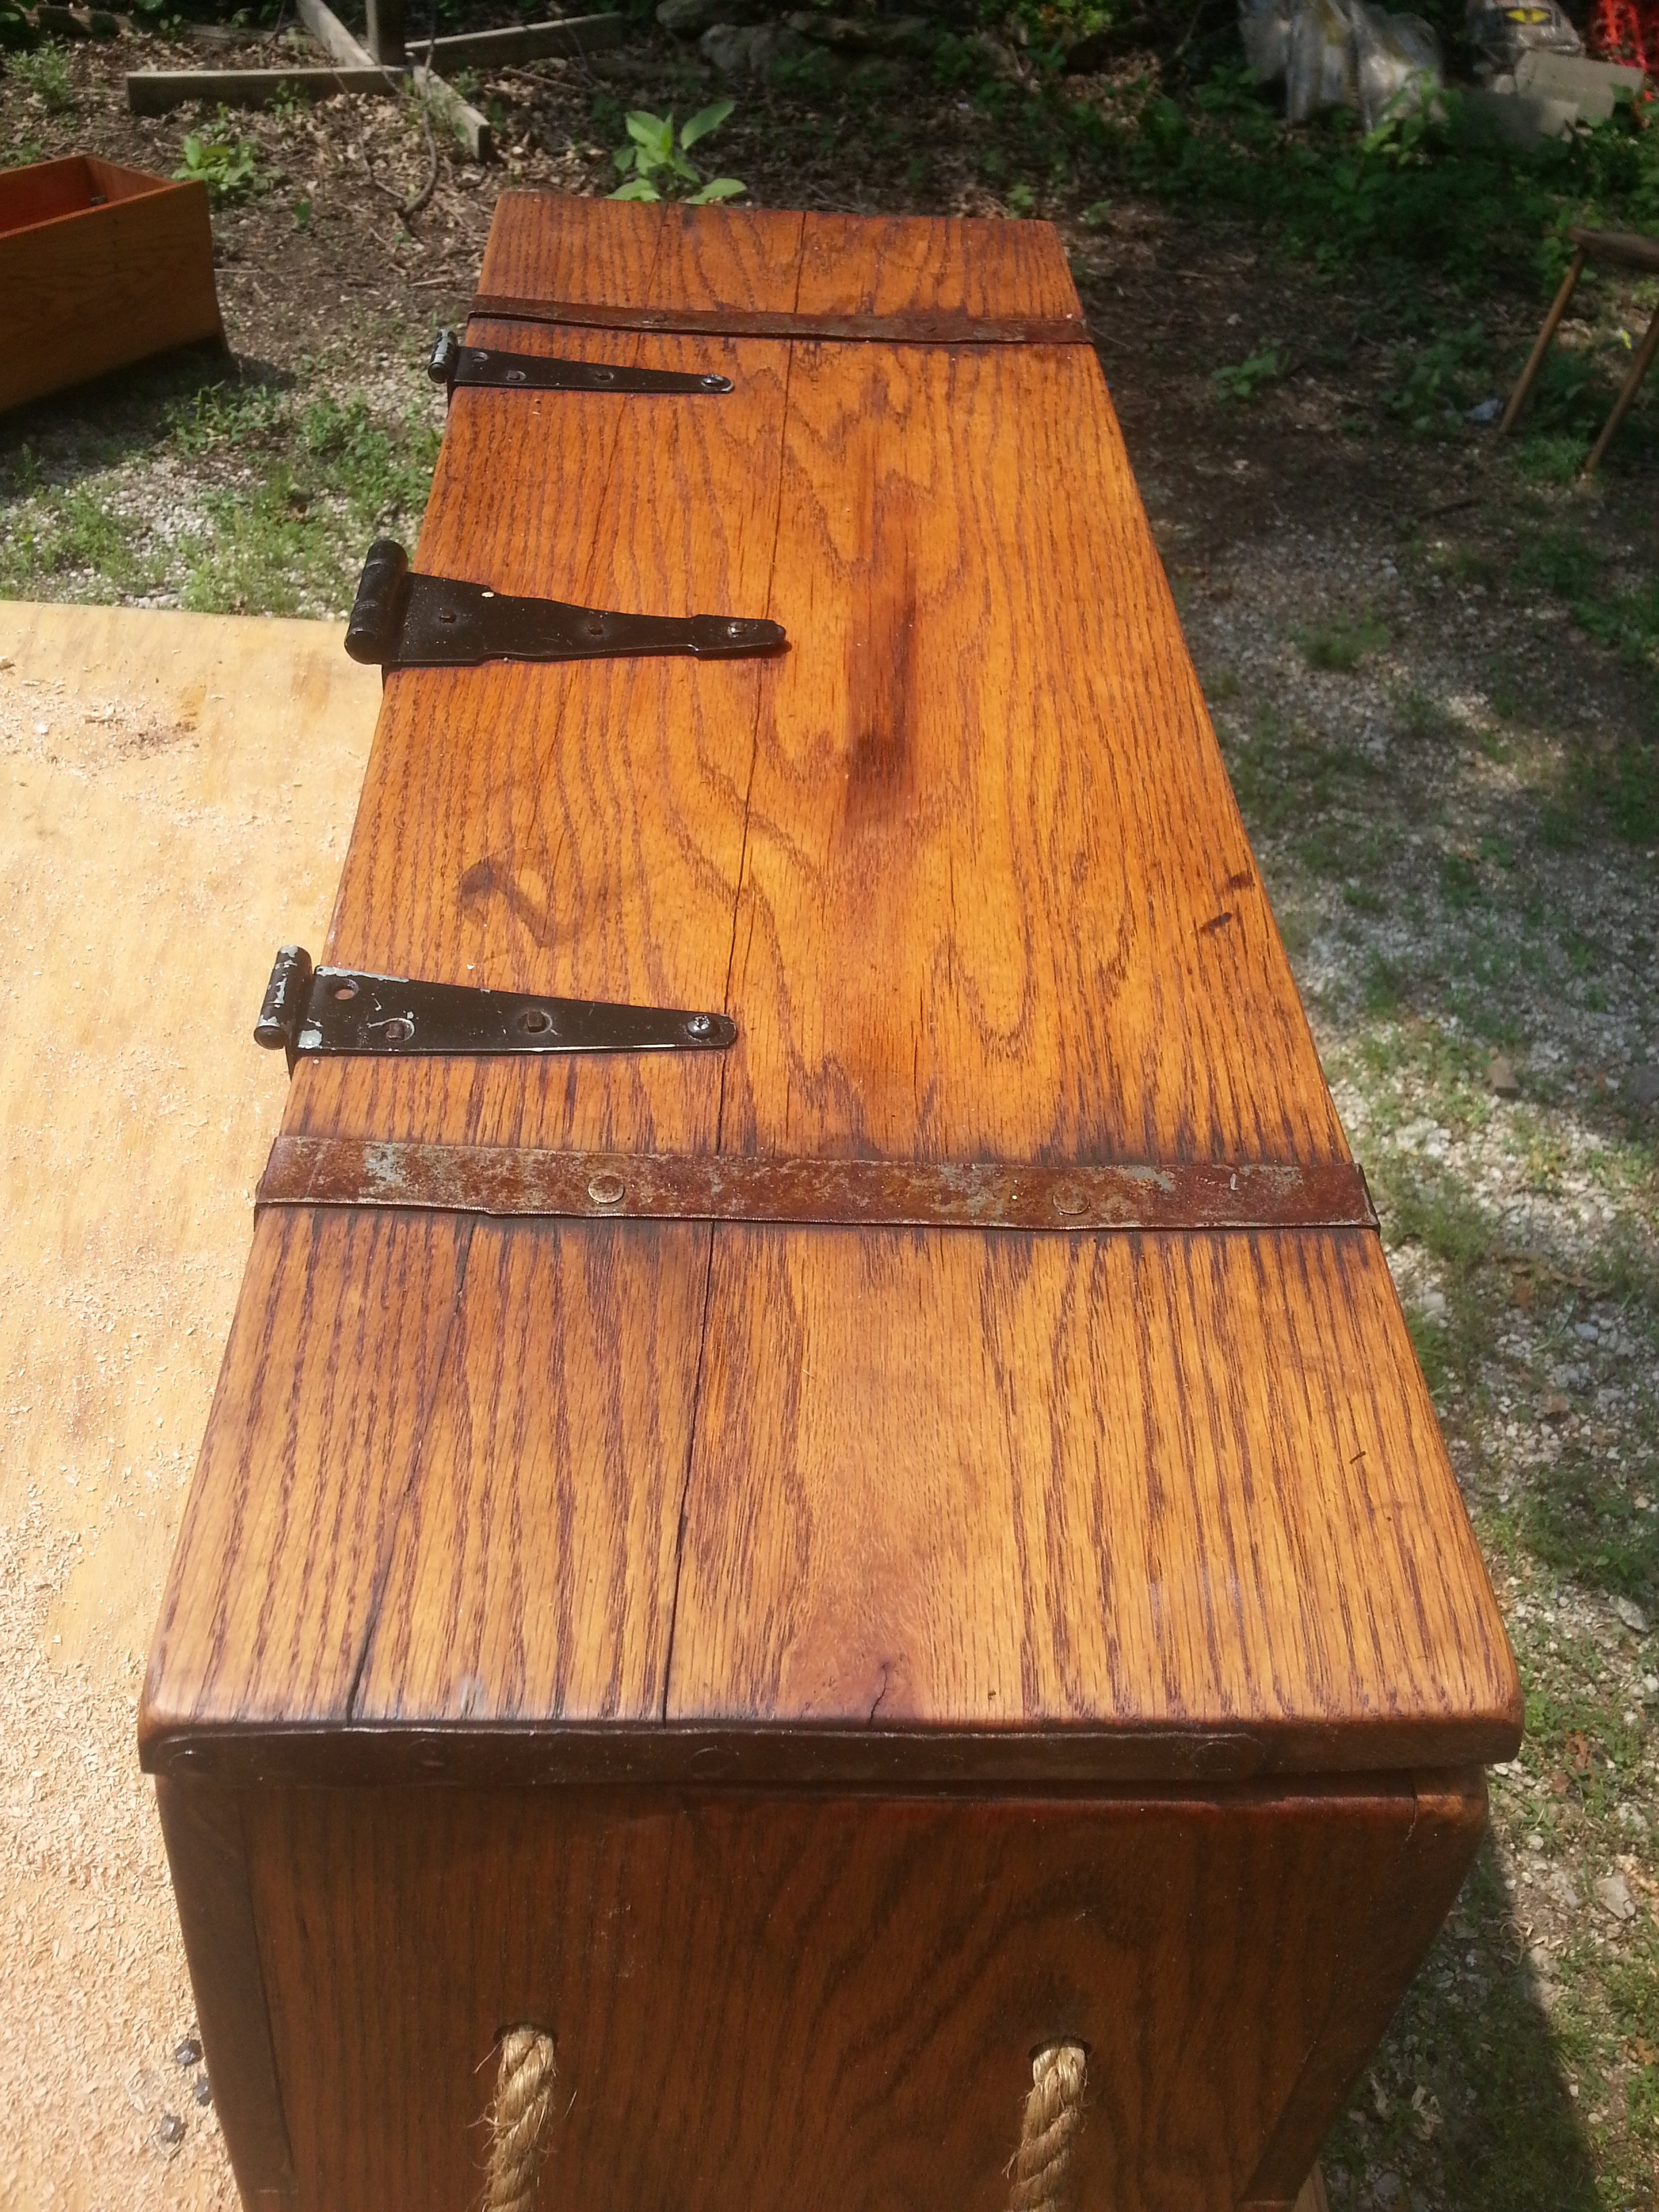 Looking down the lid we can see the same problem here as is on the back board. Obviously there was a crack already existing in the crappy, case-hardened, overdried and poorly stored board I picked up from the home center.
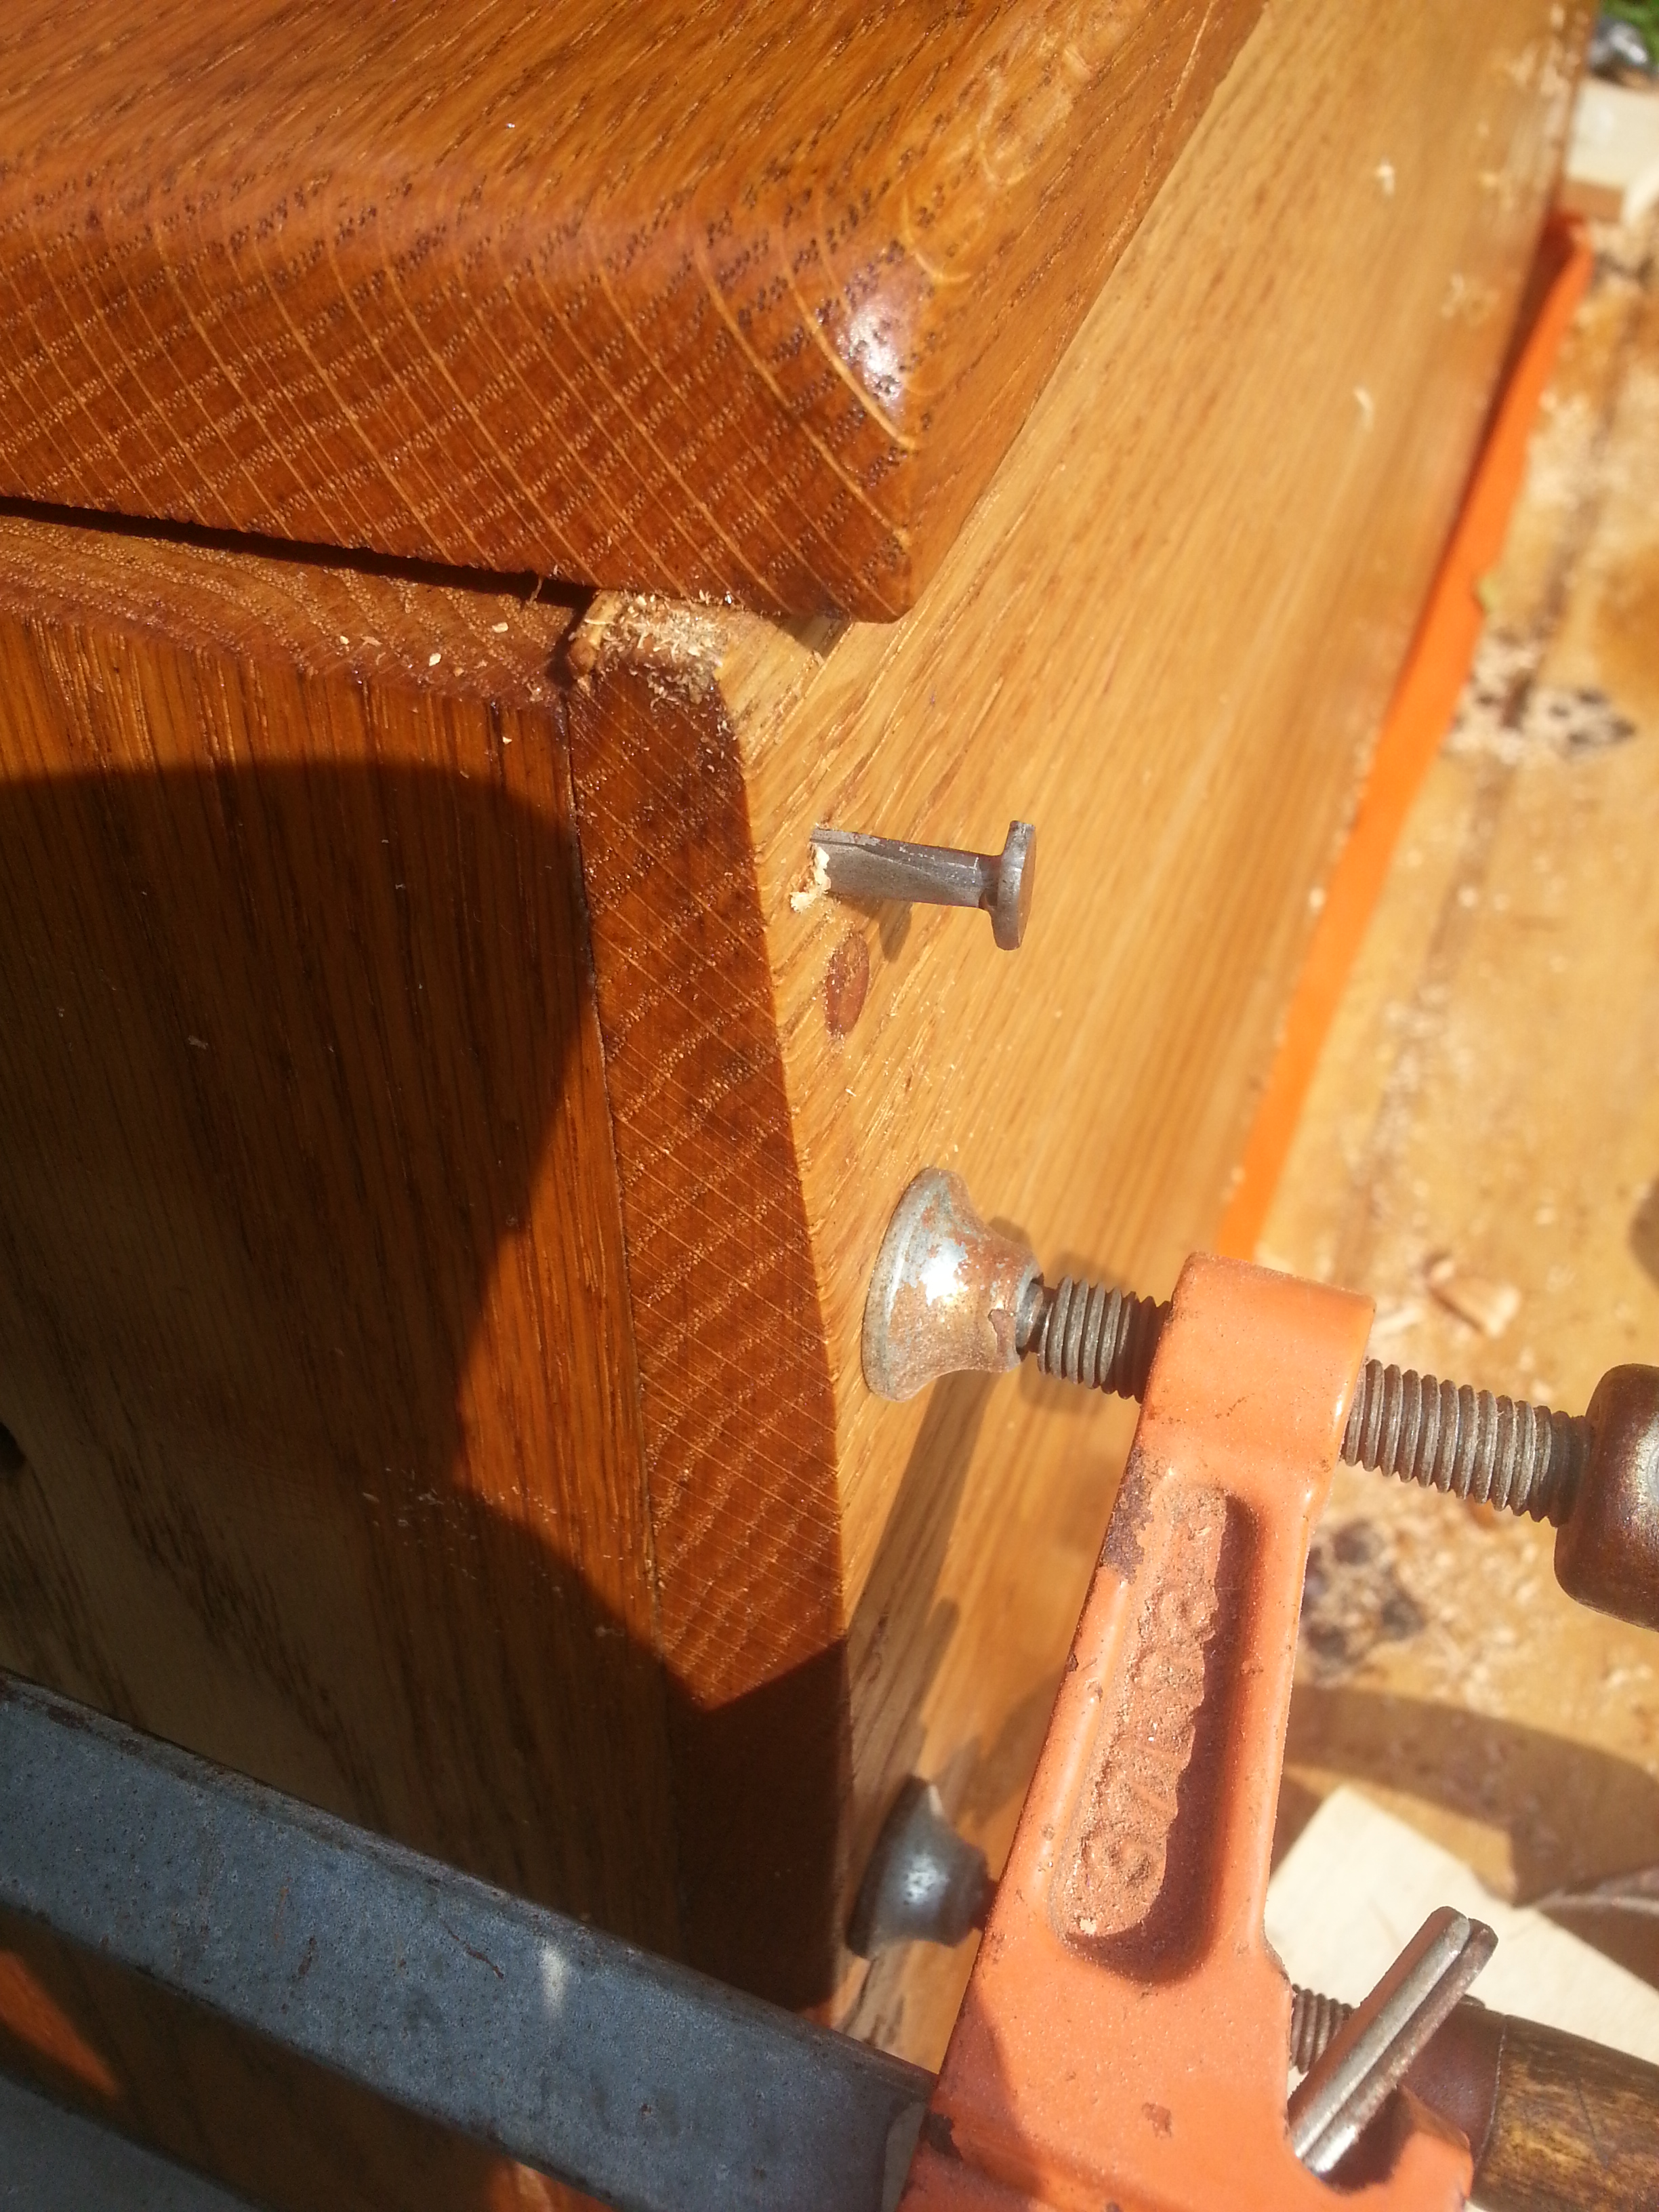
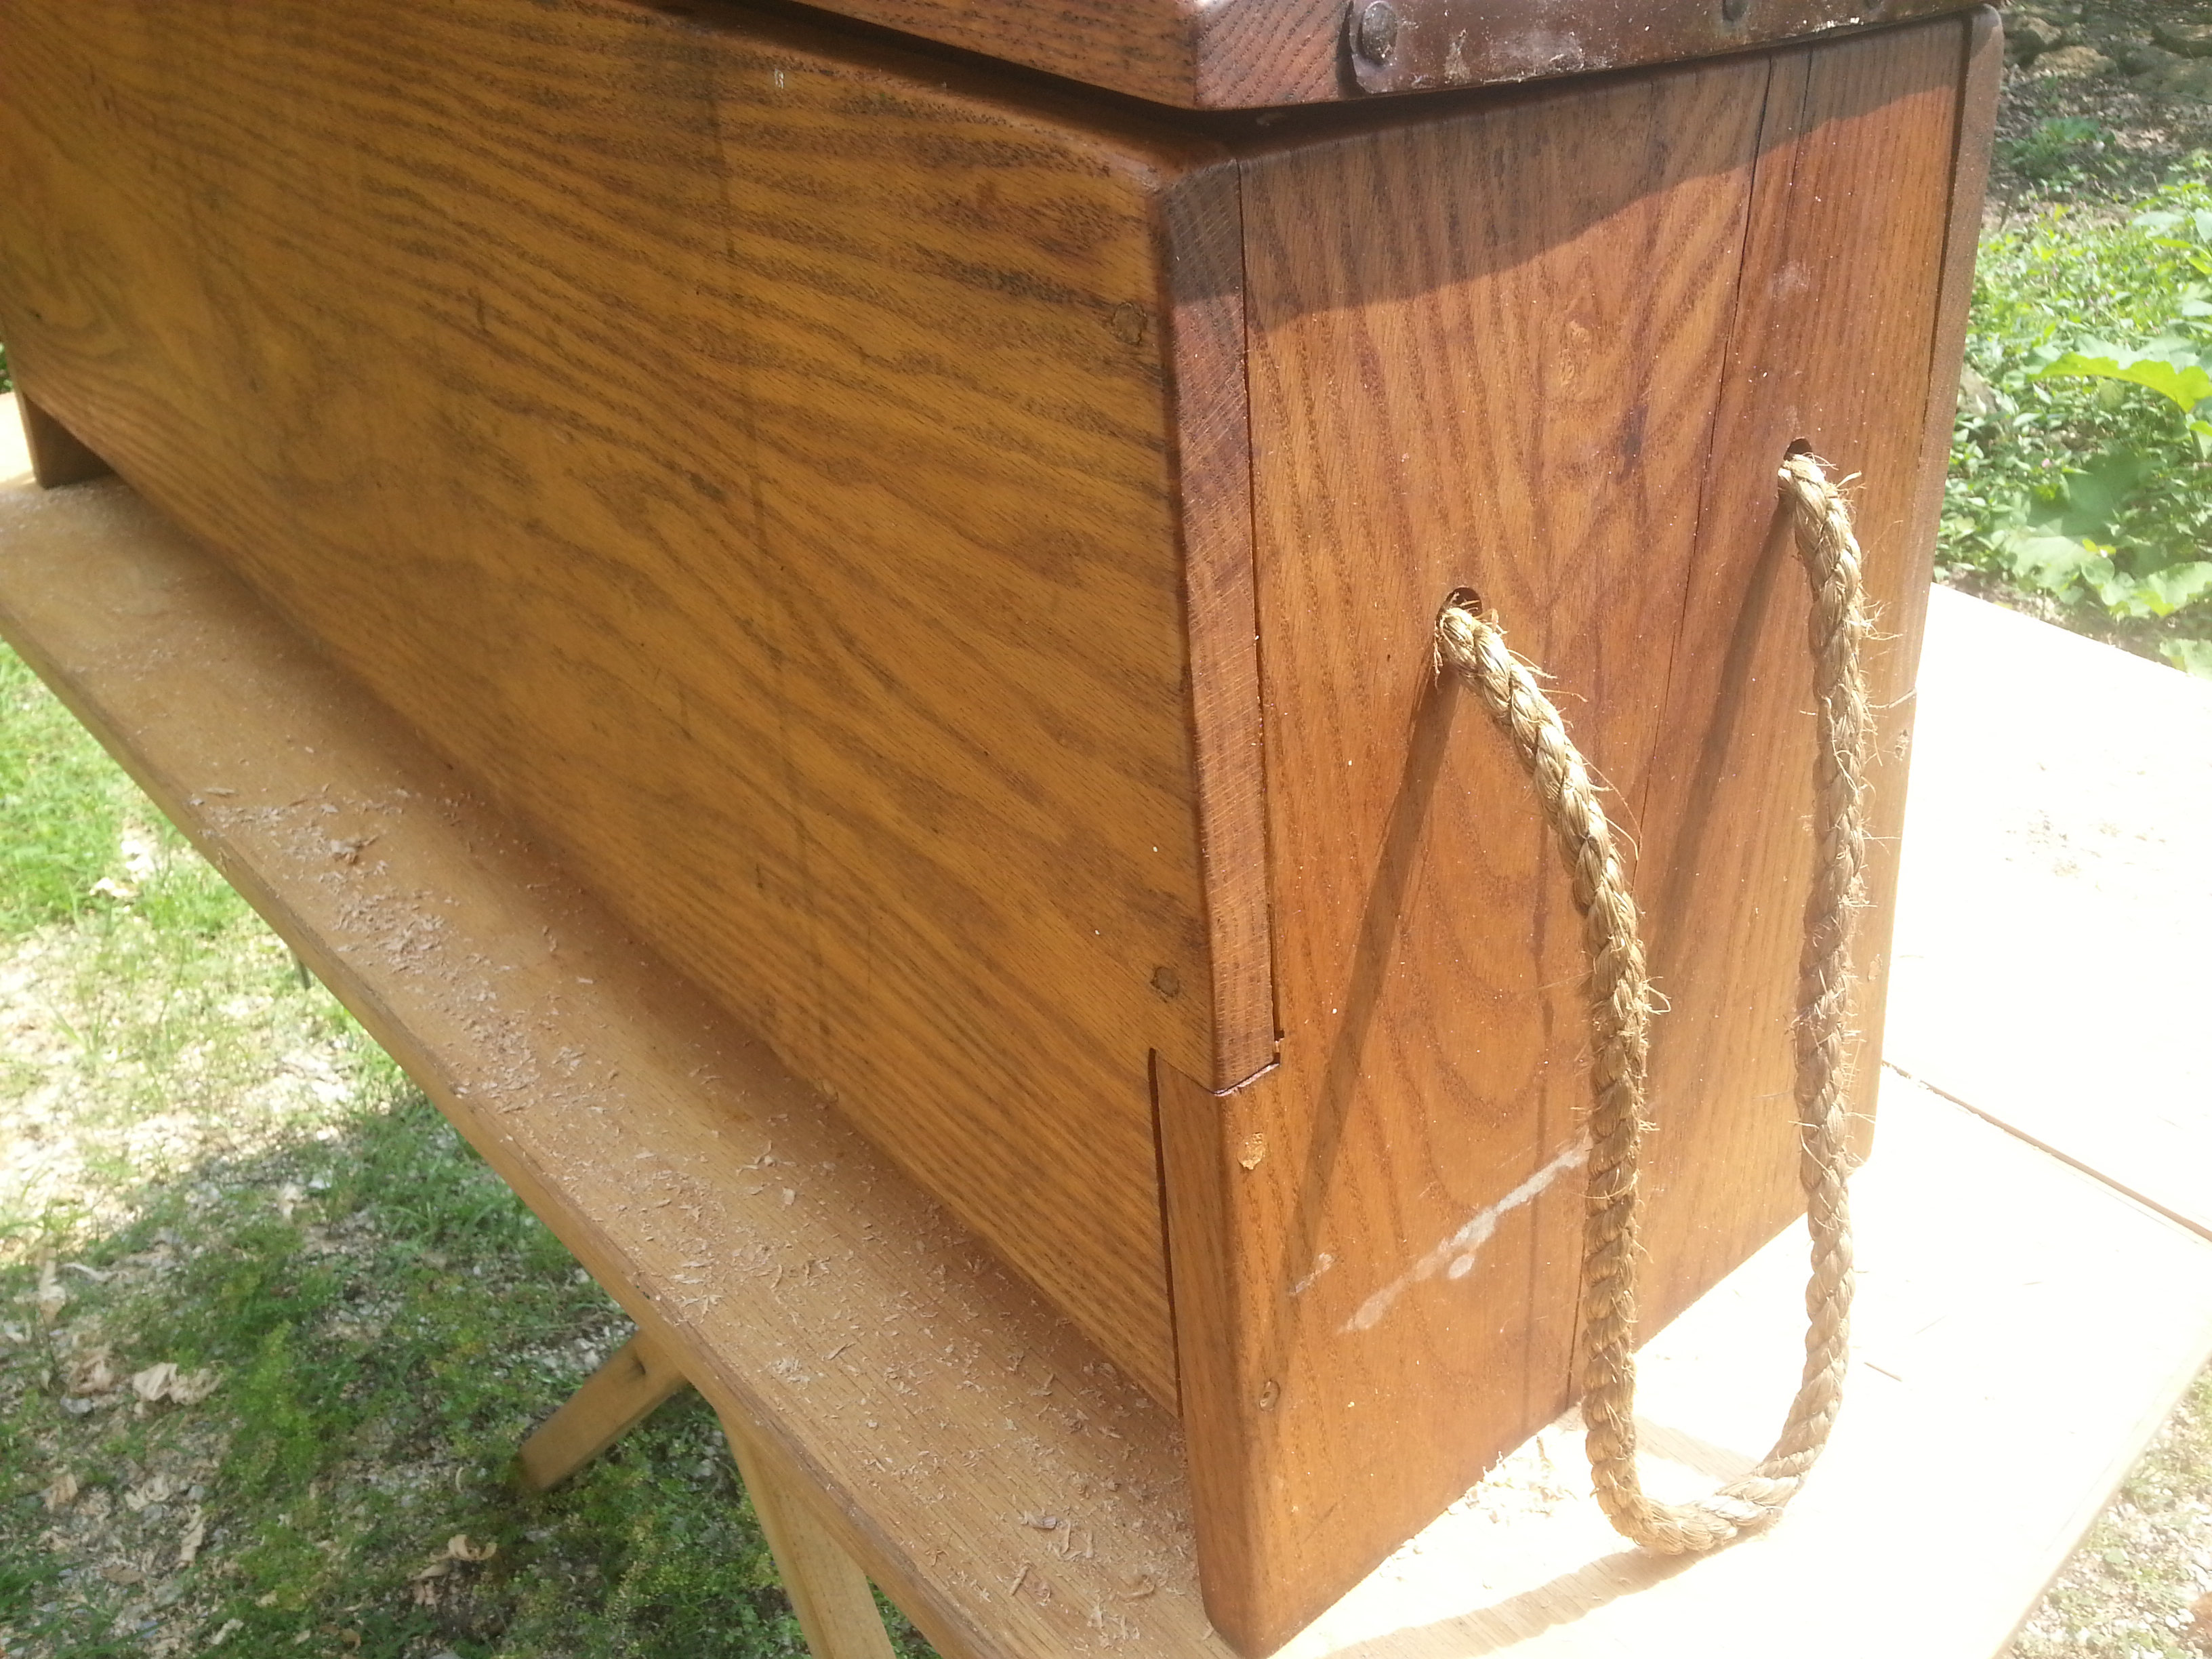 It doesn’t seem like much in the photograph, but that shoulder was tight when this chest was built. Now it has relaxed and wobbles a bit. “How can this be?” you might ask. Well, like a dummy I trusted people who said that pegged joints with glue does just fine for boarded chests. By blowing up the picture (go ahead, click it), you can see that the shoulder joint is open quite a bit, the pegs are sucked out, and the glue, though present, is only adhered to splinters on one side. Why? Because pegs are piss poor for maintaining a cross-grain construction. Were these indoor pieces, or frame and panel constructions where the cross-grain joints were encased, this wouldn’t be much of a problem.
Suck out on the pegs and the face panel of Thing 2 ready to ride itself off for a solo career. I will fully admit that I needed to learn how to build chests. “Learning” from the easy how-to articles I found on the internet did little service. The next set of photos though…
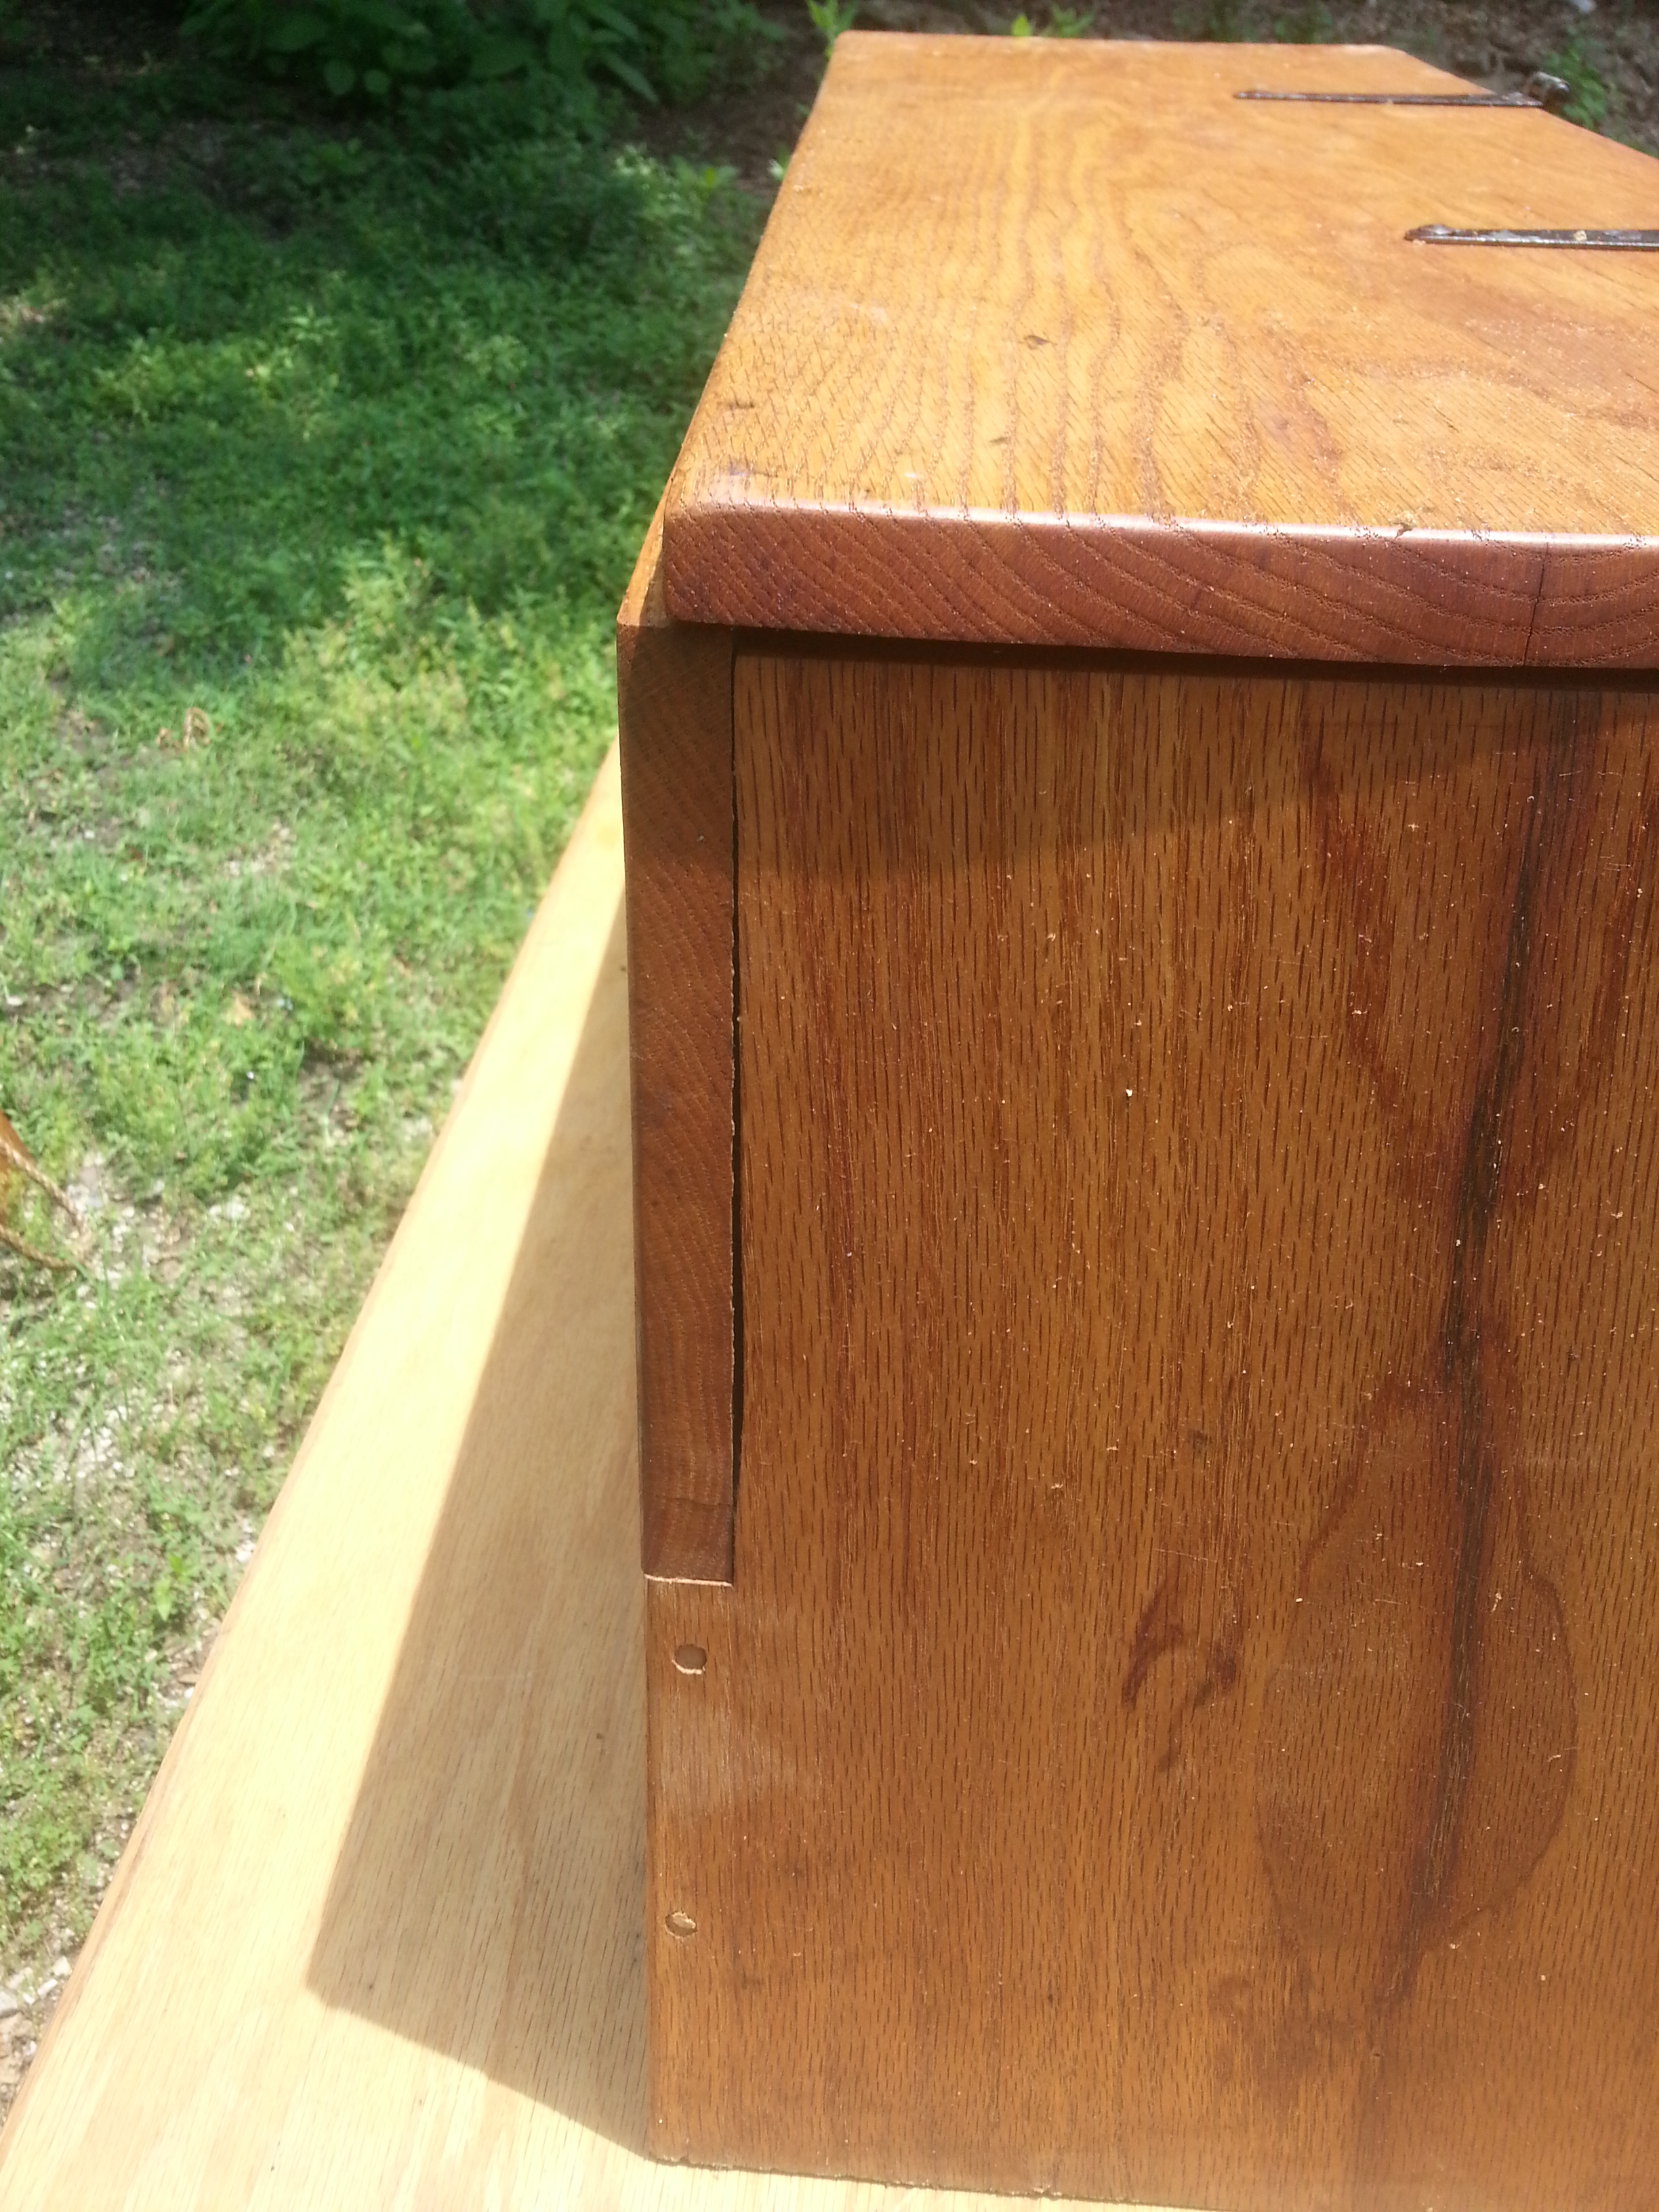
This is the opposite corner of Thing 2. While not entirely trying to run away, the suck out on those poor pulped pegs is pretty problematic. As the wood in the pegs and in the joining boards has moved over time, the movement of the pegs has resulted in them becoming little more than strings of wood filament that are loosely held together. The pegs stopped doing their job several years ago. Add to that, the glue that did keep those pegs together until such time as the wood inside the glue sheath gave up did a darling job of splitting the wood. The endgrain visible on both corners has some wicked cracks on the face boards. So, while the pegs didn’t fail there, the improper application of wood dowels in this type of furniture compromised the wood around it. Remember, these chests are less than 10 years old and are falling apart. Meanwhile, the Mastermyr, which Thing 1 and Thing 2 were loosely based on, sat in a marsh for several hundred years, then continued it’s millennium of functional service under dirt once the swamp was drained. A 1000 year old chest put together from cut nails has shown a greater functional survival state two orders of magnitude greater than two chests put together with modern PVA glue and wooden pegs.
So here I am after less than 10 years of irregular service from these chests, having to essentially rebuild them. It is okay though, it is a short rebuild.
A coworker thought to be nice over the holidays and bought me a set of chisels for Christmas. If it isn’t apparent, I’m rather particular about my tools. Being gracious and polite on such an occasion is still requisite and I thanked him for the gift.
![20150117_134721[1]](https://baroquepearls.files.wordpress.com/2015/01/20150117_1347211.jpg)
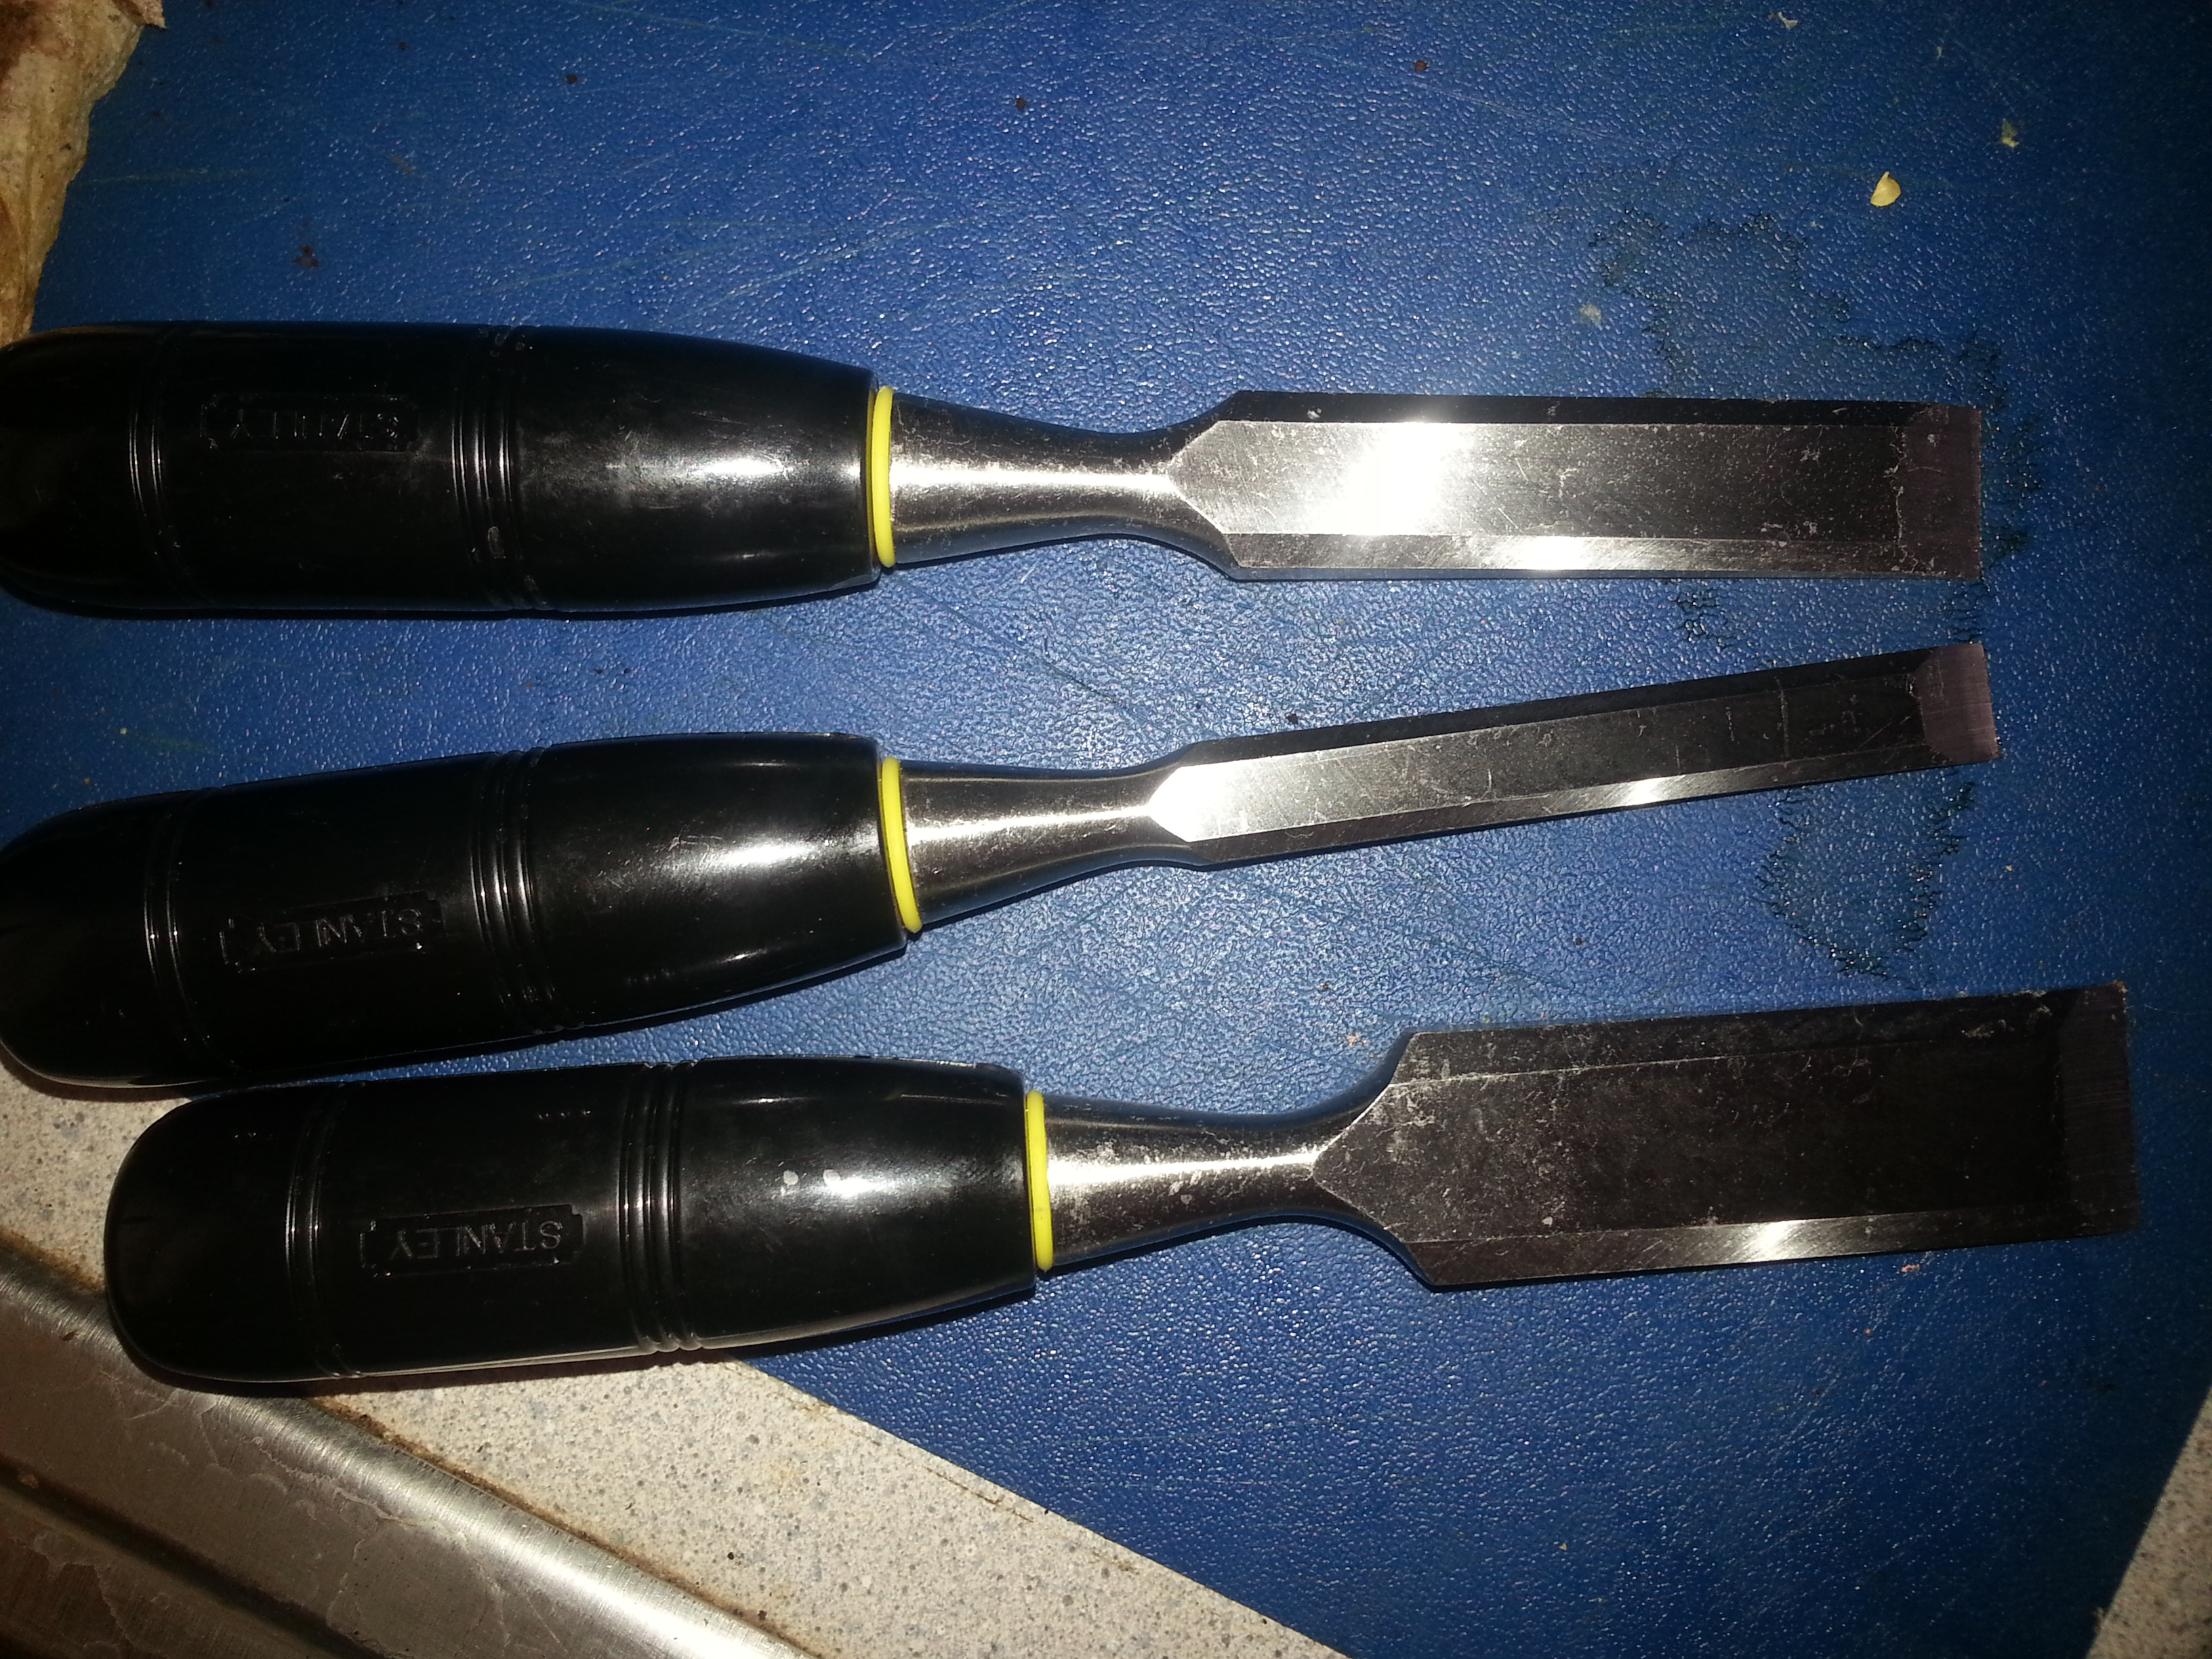
So now what do I do with this big box store set of chisels in 1/2″, 3/4″ and 1″? I could just let them linger in the package for years and eventually gift them off to someone just starting woodworking. For a few years now I’ve wanted to convert my Marples blue-handles into a more historically appearing set for use at public demonstrations. Trouble is, I’d have to decommission them for the amount of time it takes for me to replace the handles. While I’d also love a set that doesn’t have firmer bevels, but instead square sides, that’s another step down the road I’m not ready to pay for.
Modern off the shelf chisels are usually tanged. This means there is a round tenon of steel that is set into the handle. Pre-20th century chisels, especially those from the high age of woodworking, are typically socketed with a wood handle — the handle forms the tenon that fits into the socket. This makes for a better chisel to be struck with a mallet, while a tanged chisel is best for working with hand-pressure only. This design difference is usually the clearest way to determine if you have a bench or a paring chisel staring back at you. A socketed chisel can be stuck on the handle, which drives the handle into the socket, transferring force. A tanged chisel, when struck, pushes on a ferrule, but the tang can and will eventually split the handle. Modern off the shelf chisels tend to have a relatively large ferrule and plastic handles which will not split like wood. Trouble is, they look clearly modern and are rarely balanced correctly, despite looking vaguely like a socketed chisel.
Stanley was once a great name in tools. Through much of the last half-century, the quality of their tools had greatly diminished. Pretty much anything metal with the Stanley label from about 1970 onward can be considered a paperweight. The last few years of boutique and small production hand tools has lent encouragement to Stanley to start producing better quality tools the last half decade. That being said, without knowing the actual provenance of this packaged set, the odds of them actually being “good” chisels is rather dubious.
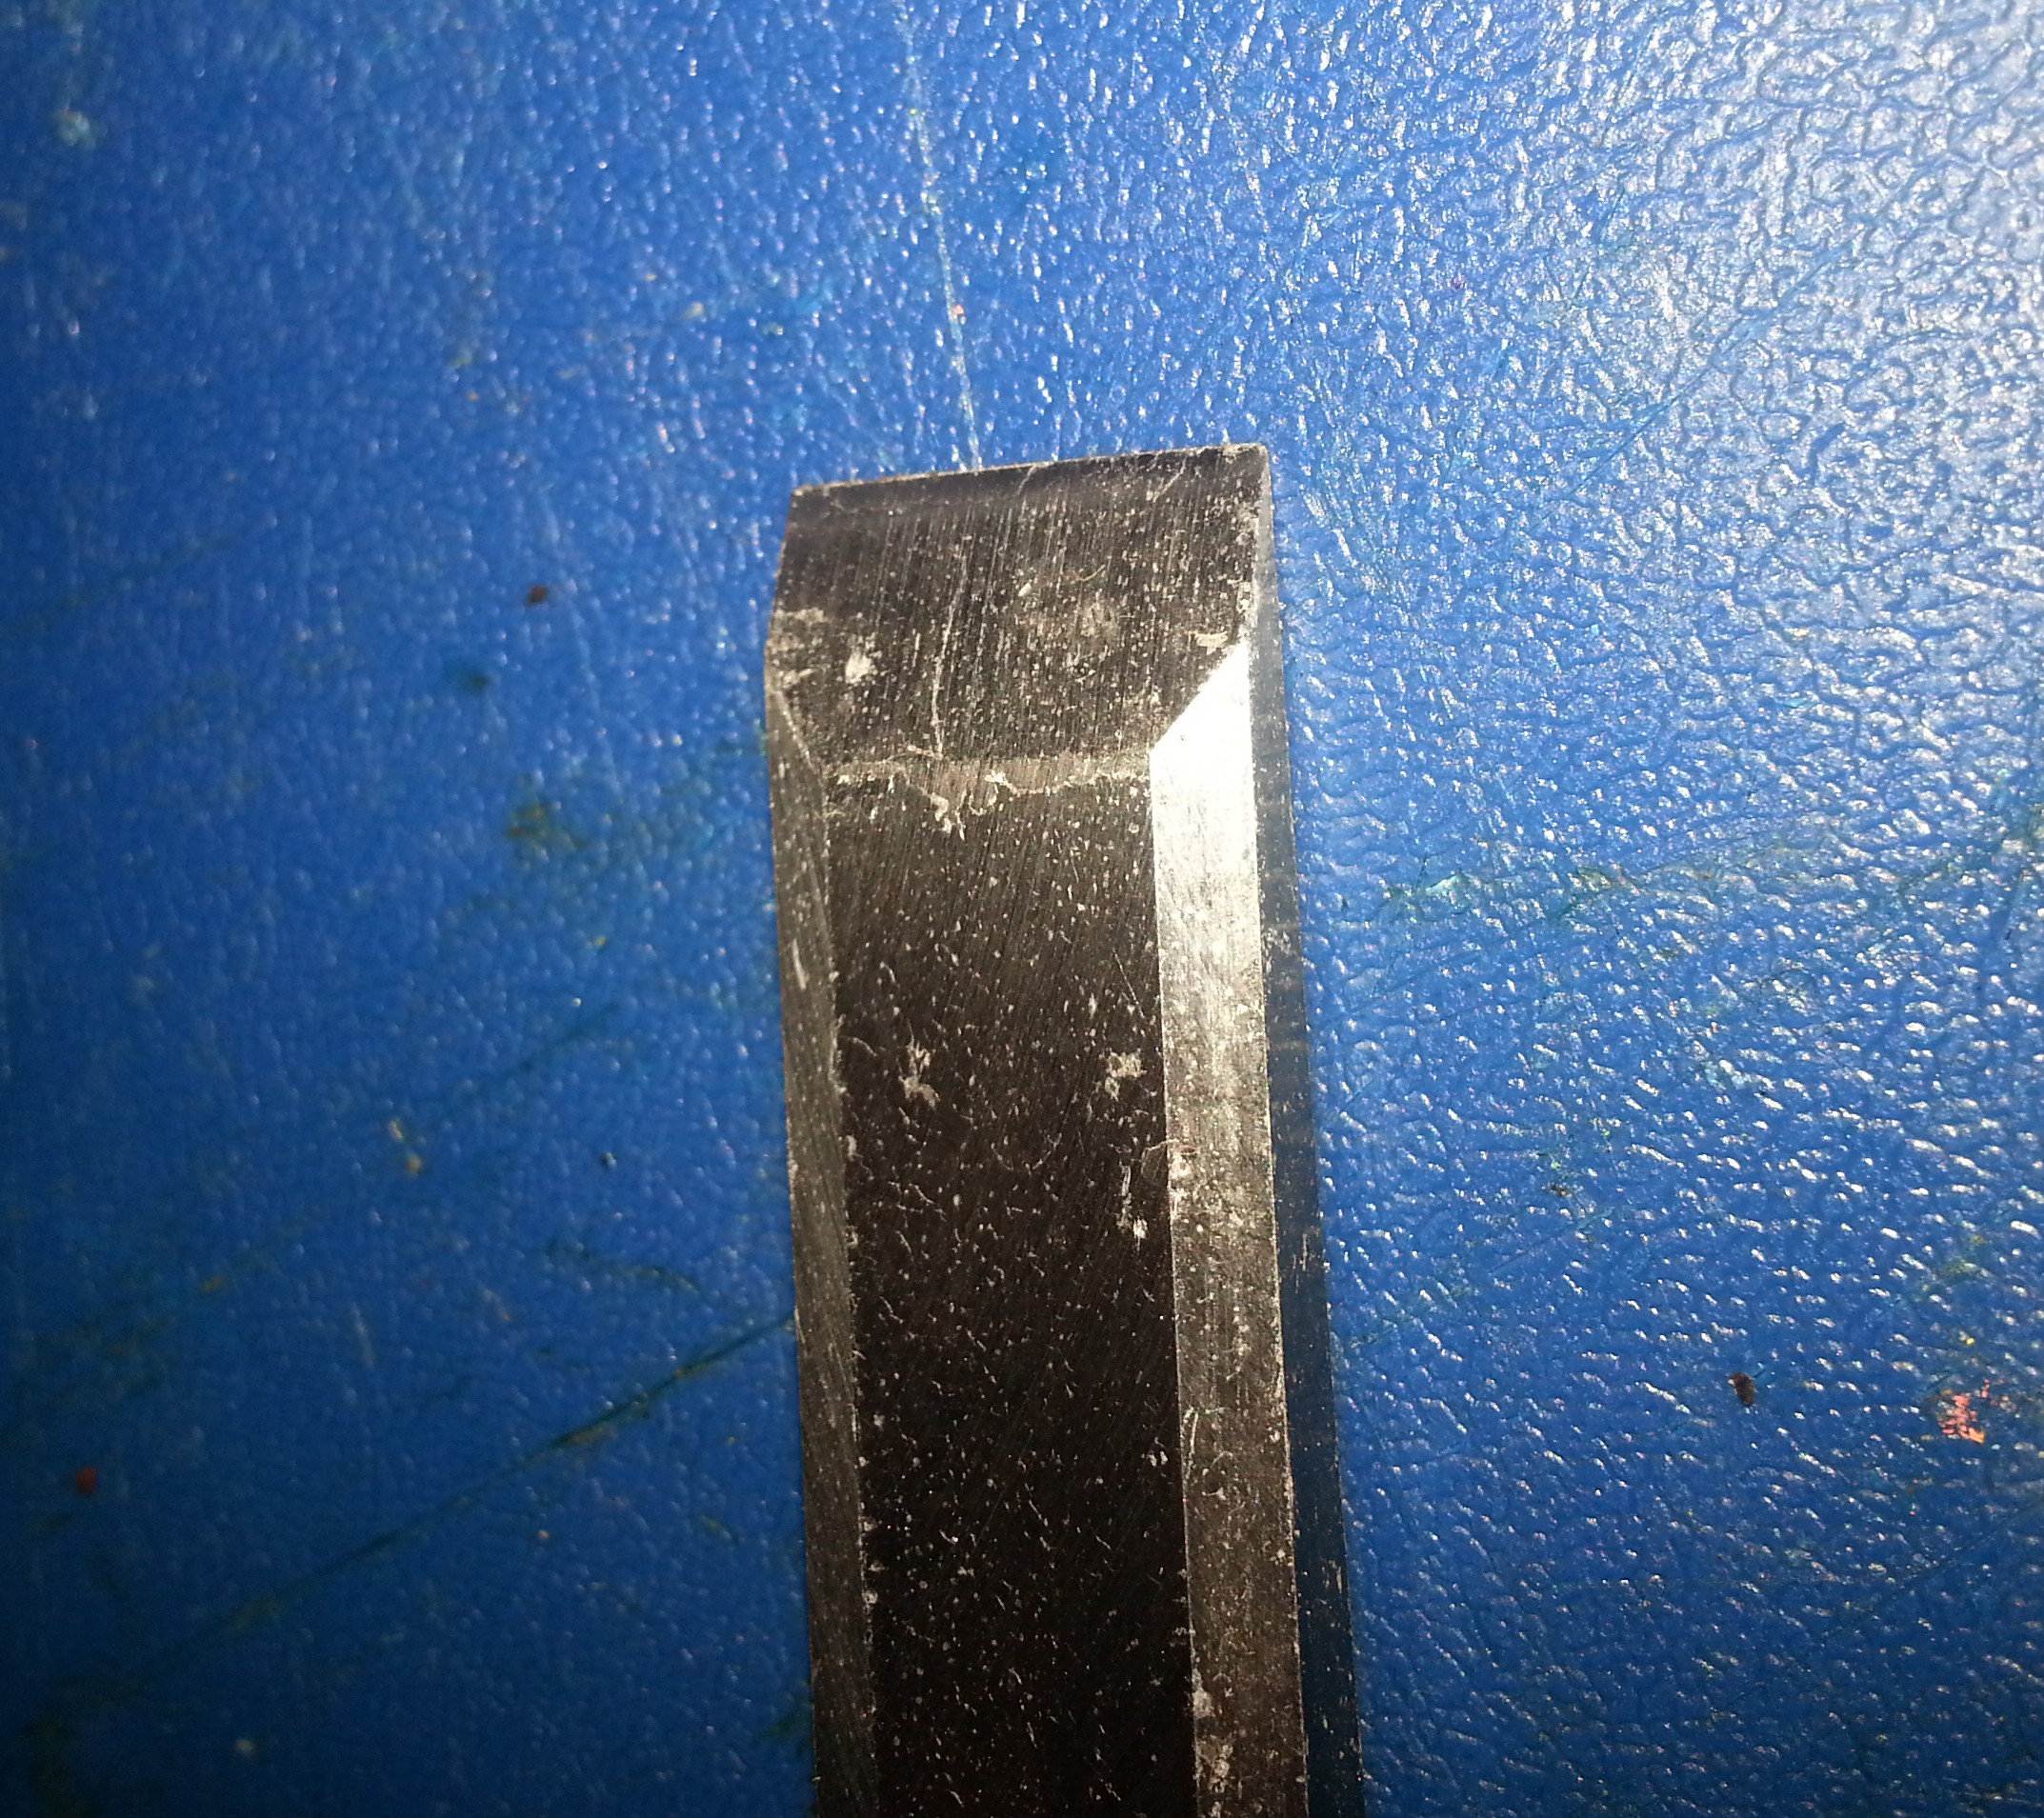
A close inspection shows the factory bevels are rough. That is not really something rare. Most tool manufacturers do not sell hand tools that are ready to use right out of the packaging. Some commissioning and honing is required. These are really questionable, however. Not only are these chisels not close to sharp, they have both sawtooth edges and visibly distinct burrs. It also appears that someone at Stanley decided to sell the shiny by coating the metal in a coat of varnish. It will protect against rust while sitting on the shelf, but completely antithetical to functional use of the tool.
Well, how to do we fix all these little problems and make them look more like their medieval counterparts? A good bit of the polyurethane and sharpening issues will be resolved during the actual commissioning process — that is polishing the back of the chisel and sharpening the bevel into an actual cutting edge. The handles are a whole other story.
About a year ago I chopped down and even turned a couple of handles out of Black Locust. While not at all an Old World hardwood, Black Locust is very rot resistant, very split resistant, and very hard with tight grain. Given that these will be tanged chisels that will be used with a mallet, this is a pretty good wood choice.
I’ve picked three of the handles I prepped. Two are octagonal while the third has been turned.
Getting the plastic handles off was a lot easier than expected. Boiling water has some amazing properties. At the least, it is hot. If you can’t figure out that boiling water is too hot to handle bare-handed, then perhaps you should keep to other hobbies. Twenty minutes in boiling water loosens the glue holding the handles on very effectively. The handles then twist off with a couple pair of pliers large enough to grip the chisels.
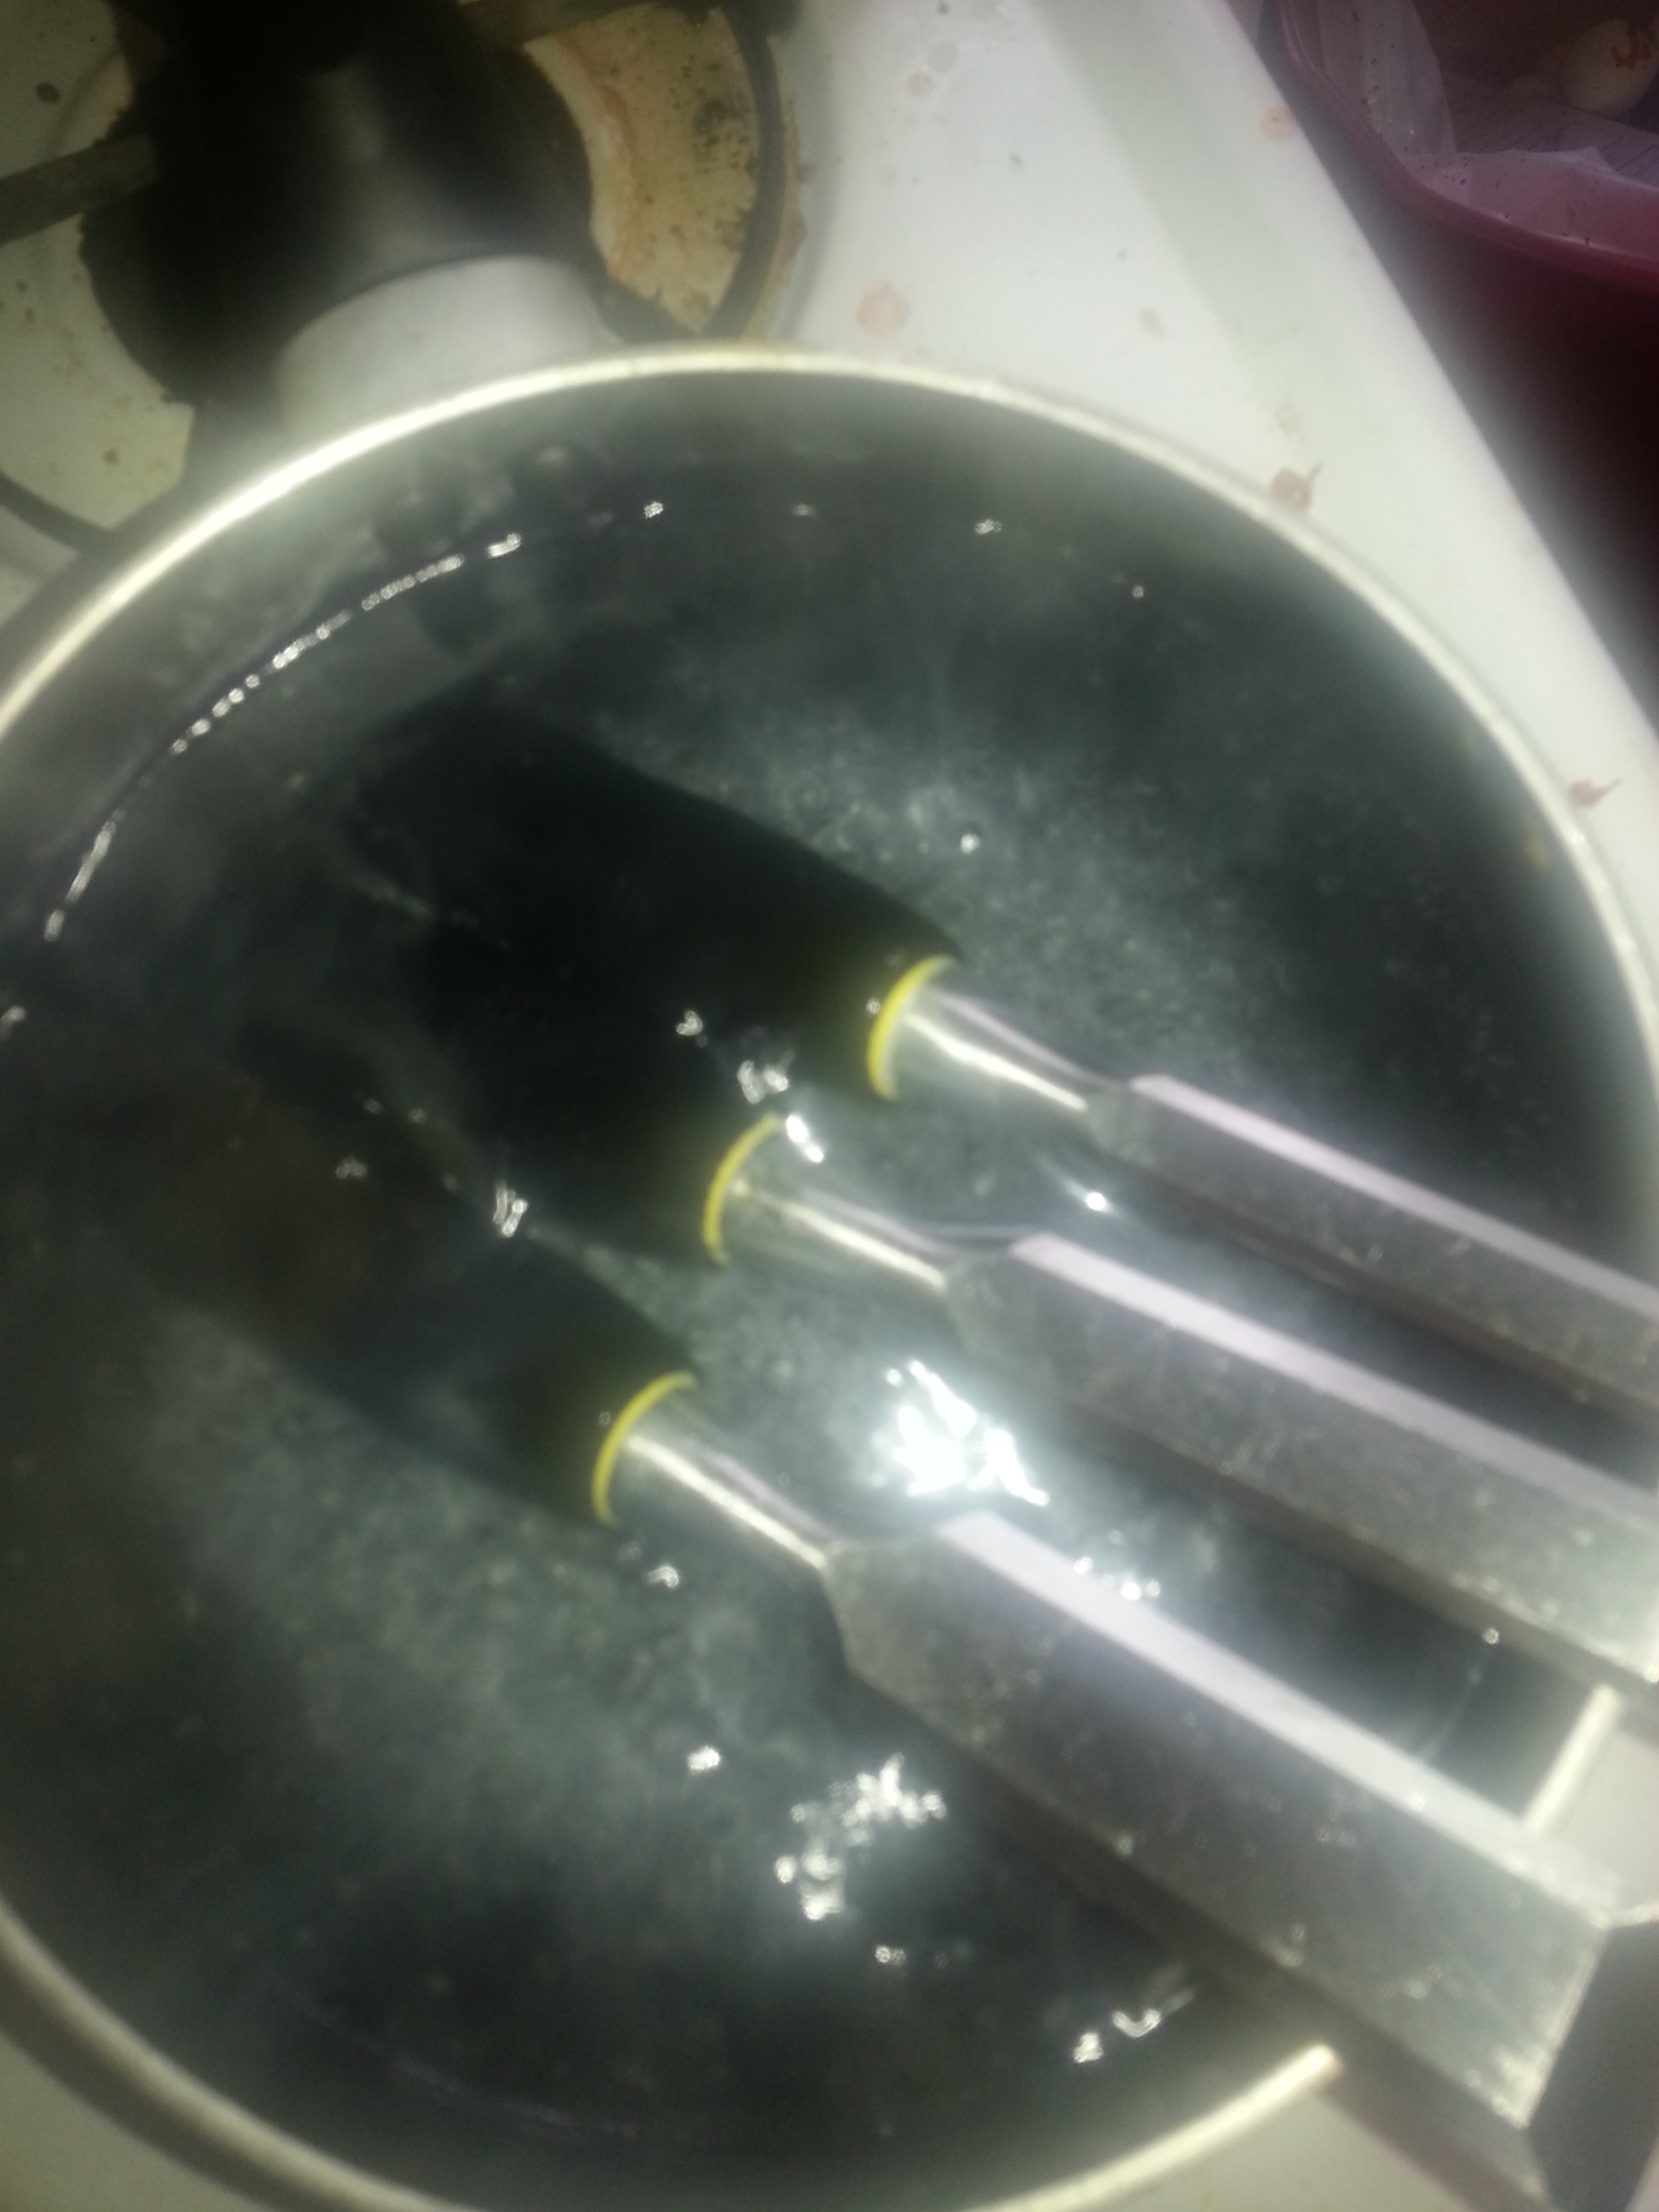
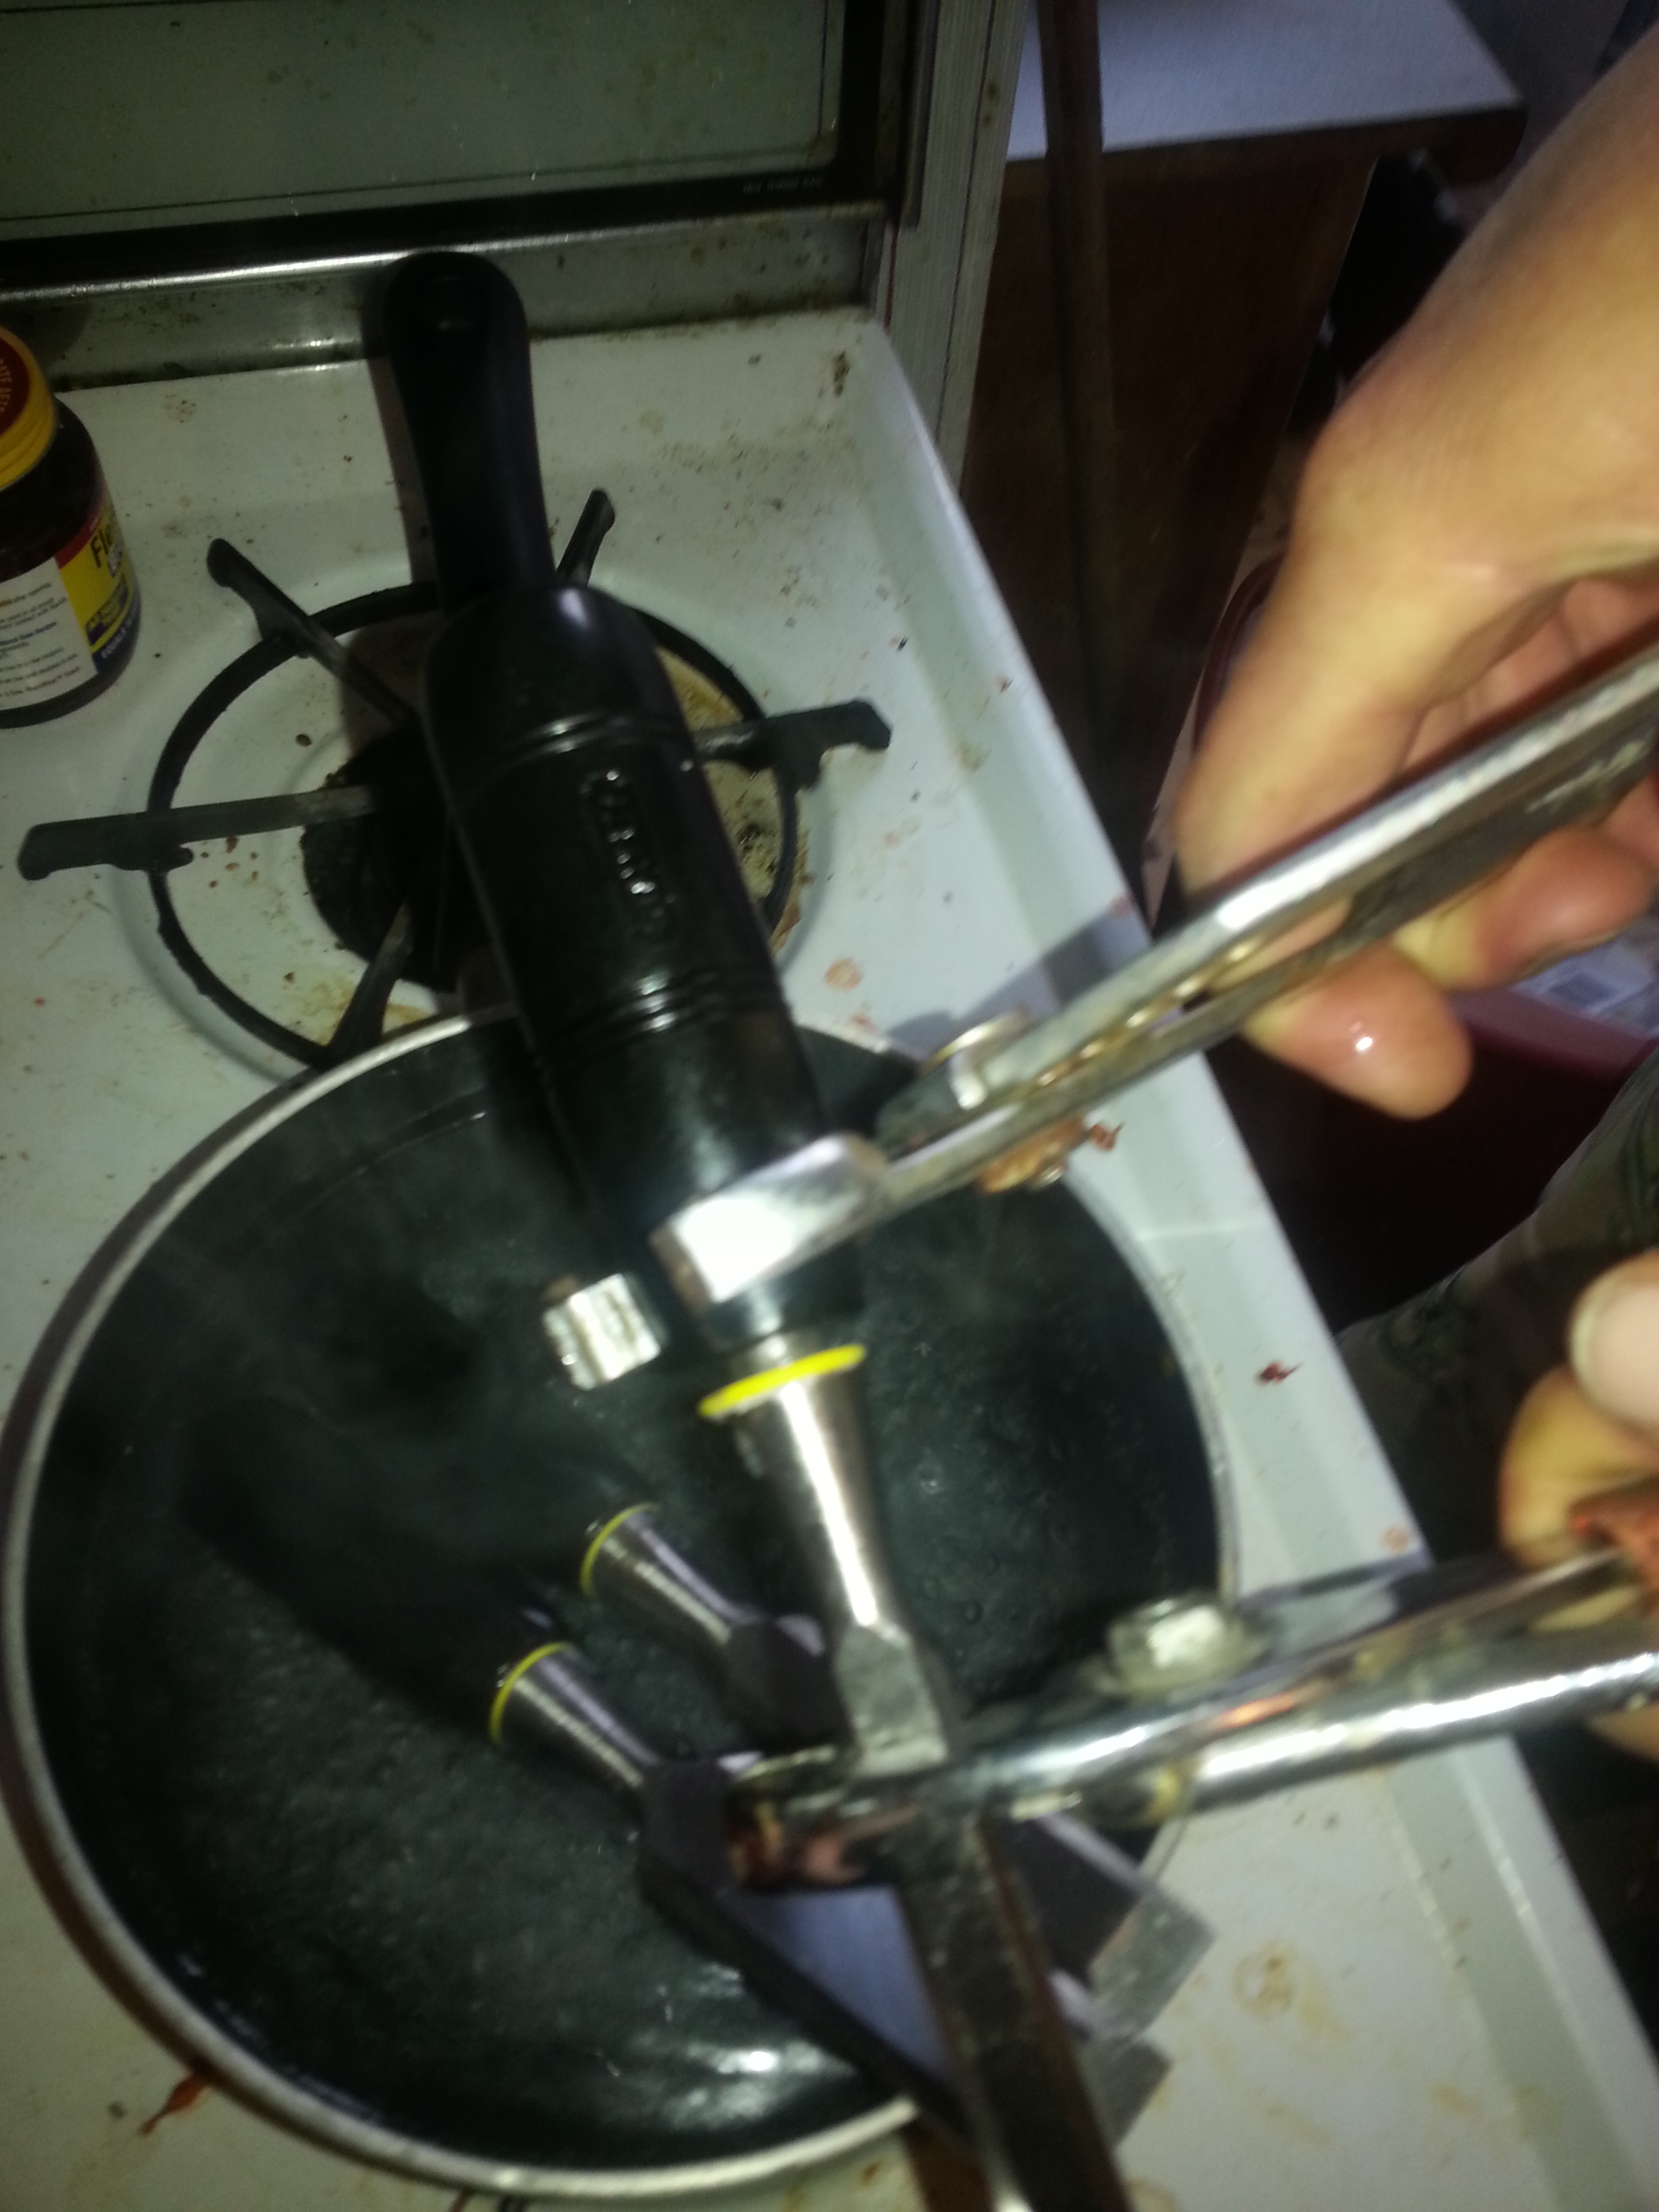
Now that the tangs are exposed, a caliper gives us a measurement of how large they actually are. The most traditional method of getting a tang into a handle is to grip the handle in a vise or clamp and bore a whole of slightly smaller diameter than the cross-section of the tang. Since the new handles have already had the centers marked and I have the technology, it’ll be quick work on a lathe for horizontal boring. It is also important to bore the hole deeper than the length of the tang, otherwise the chisel will not fully seat and won’t allow the ferule to do its job.
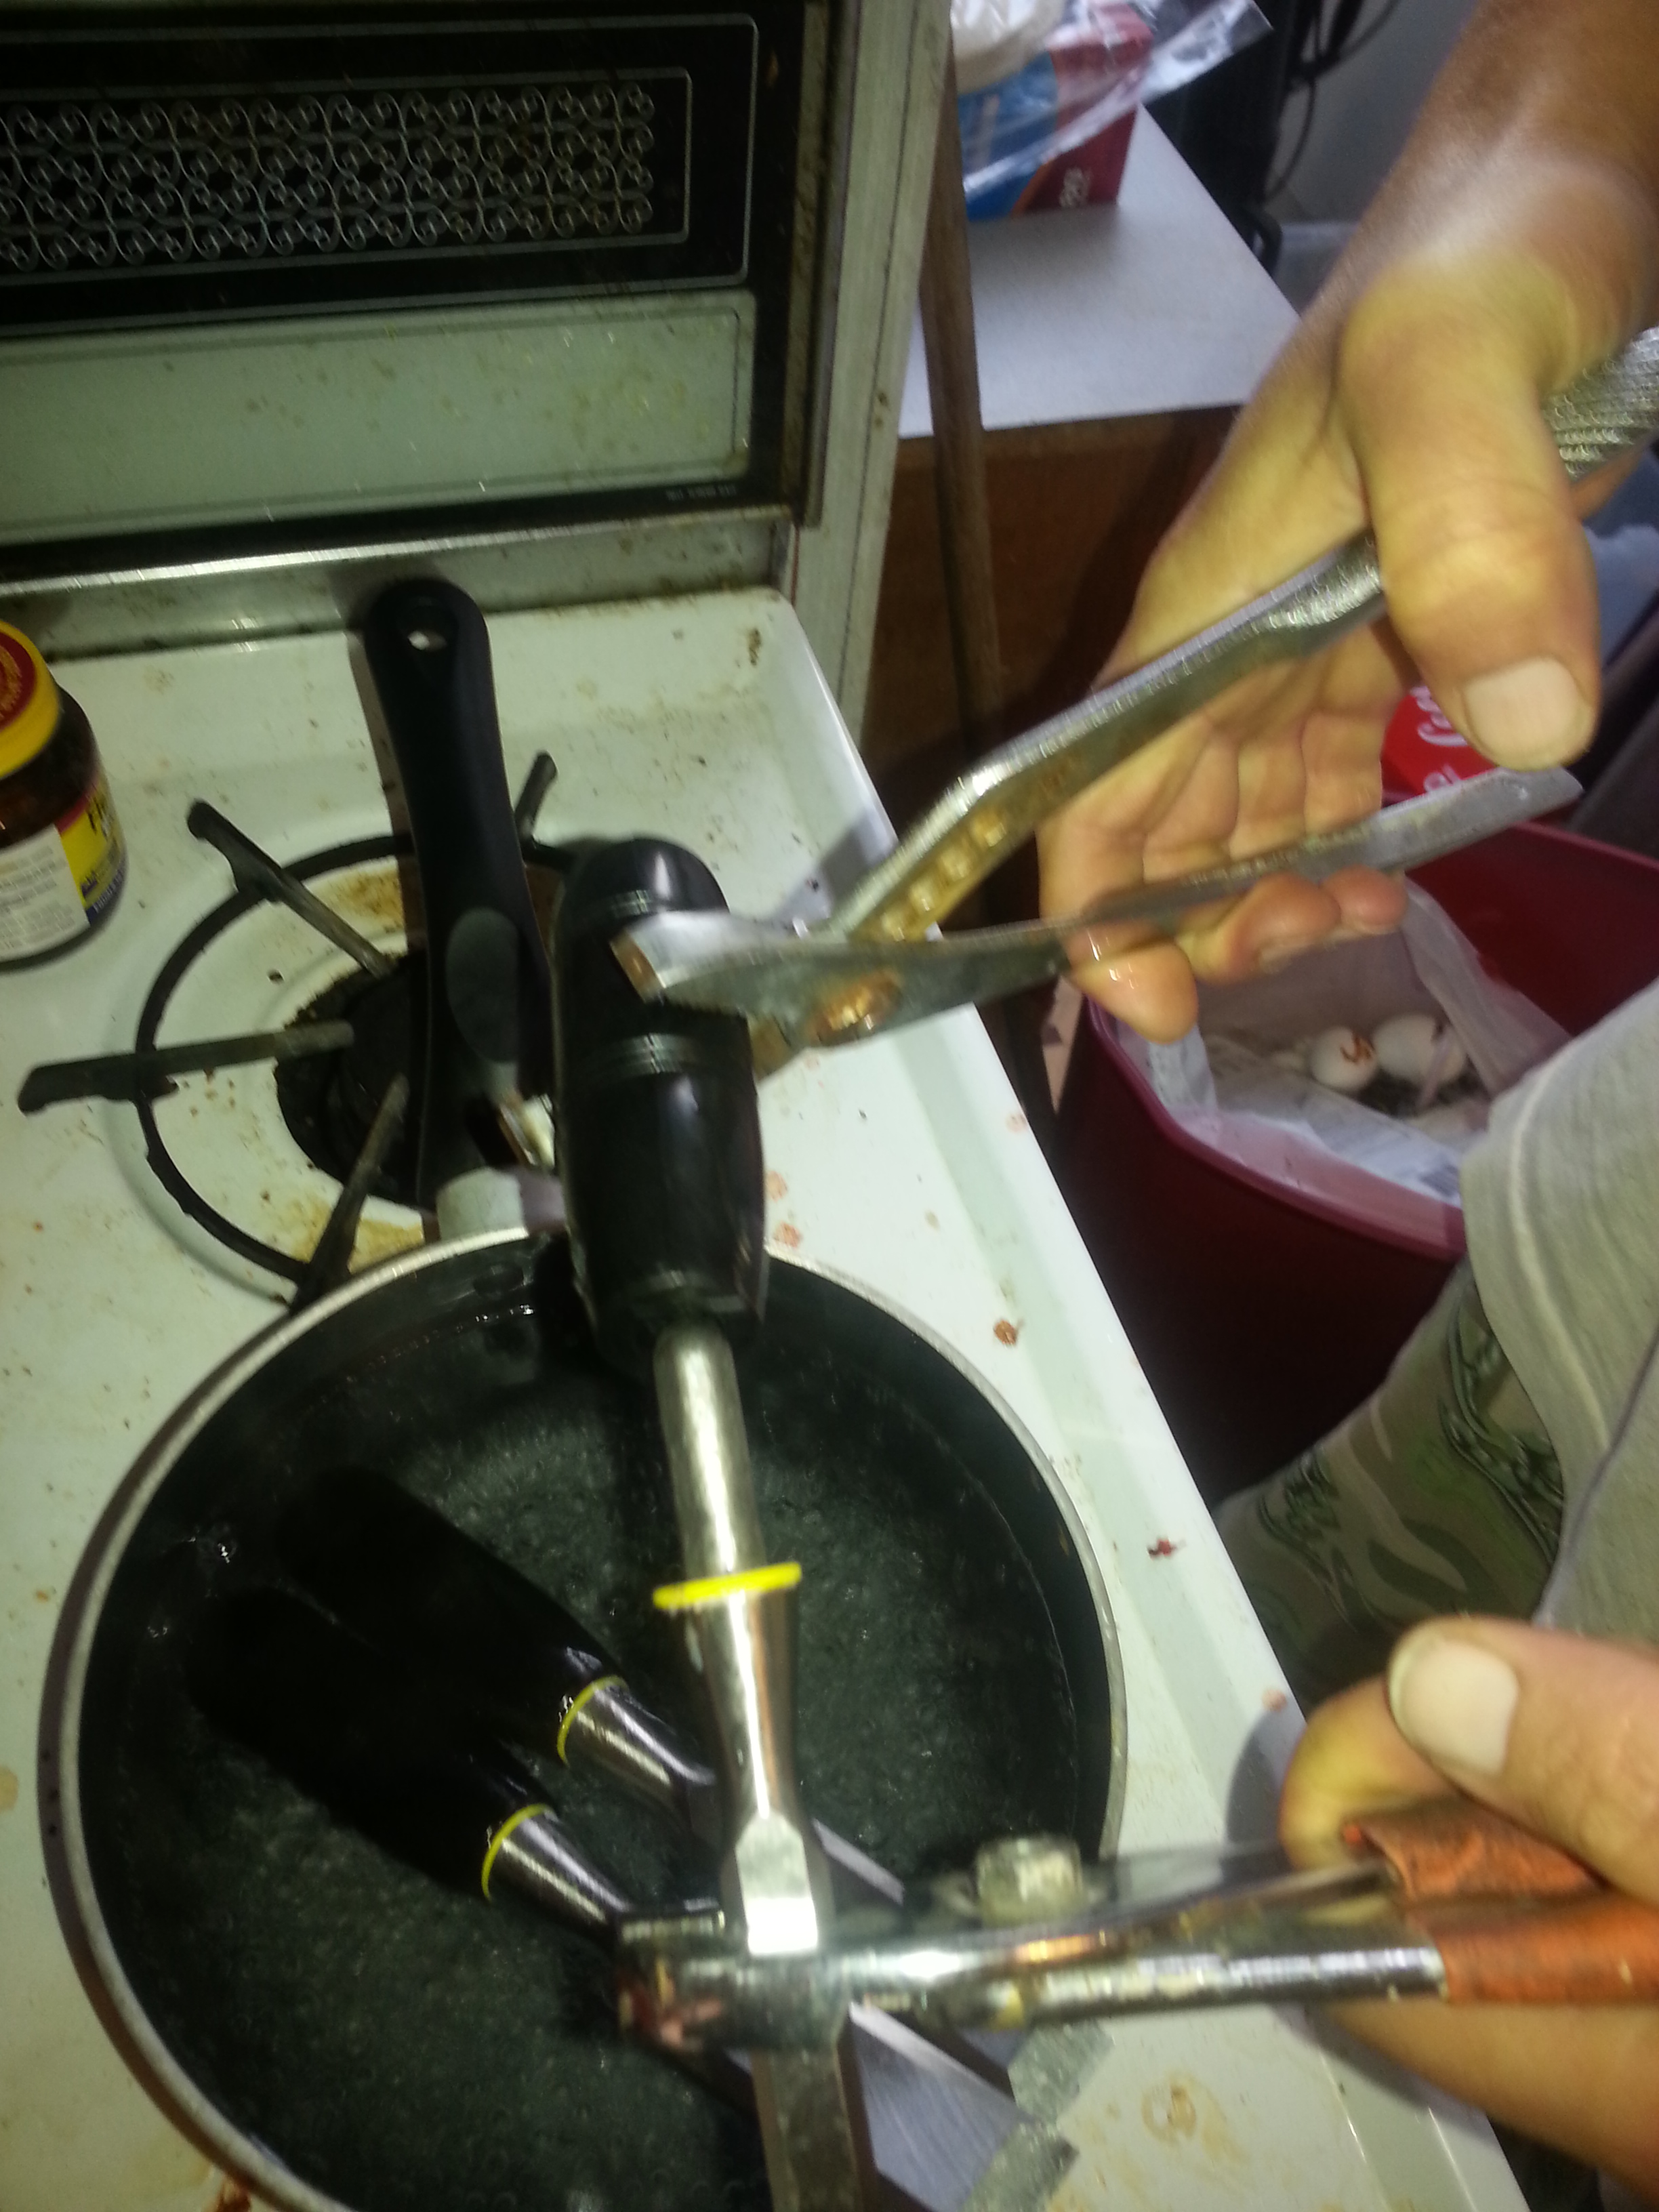
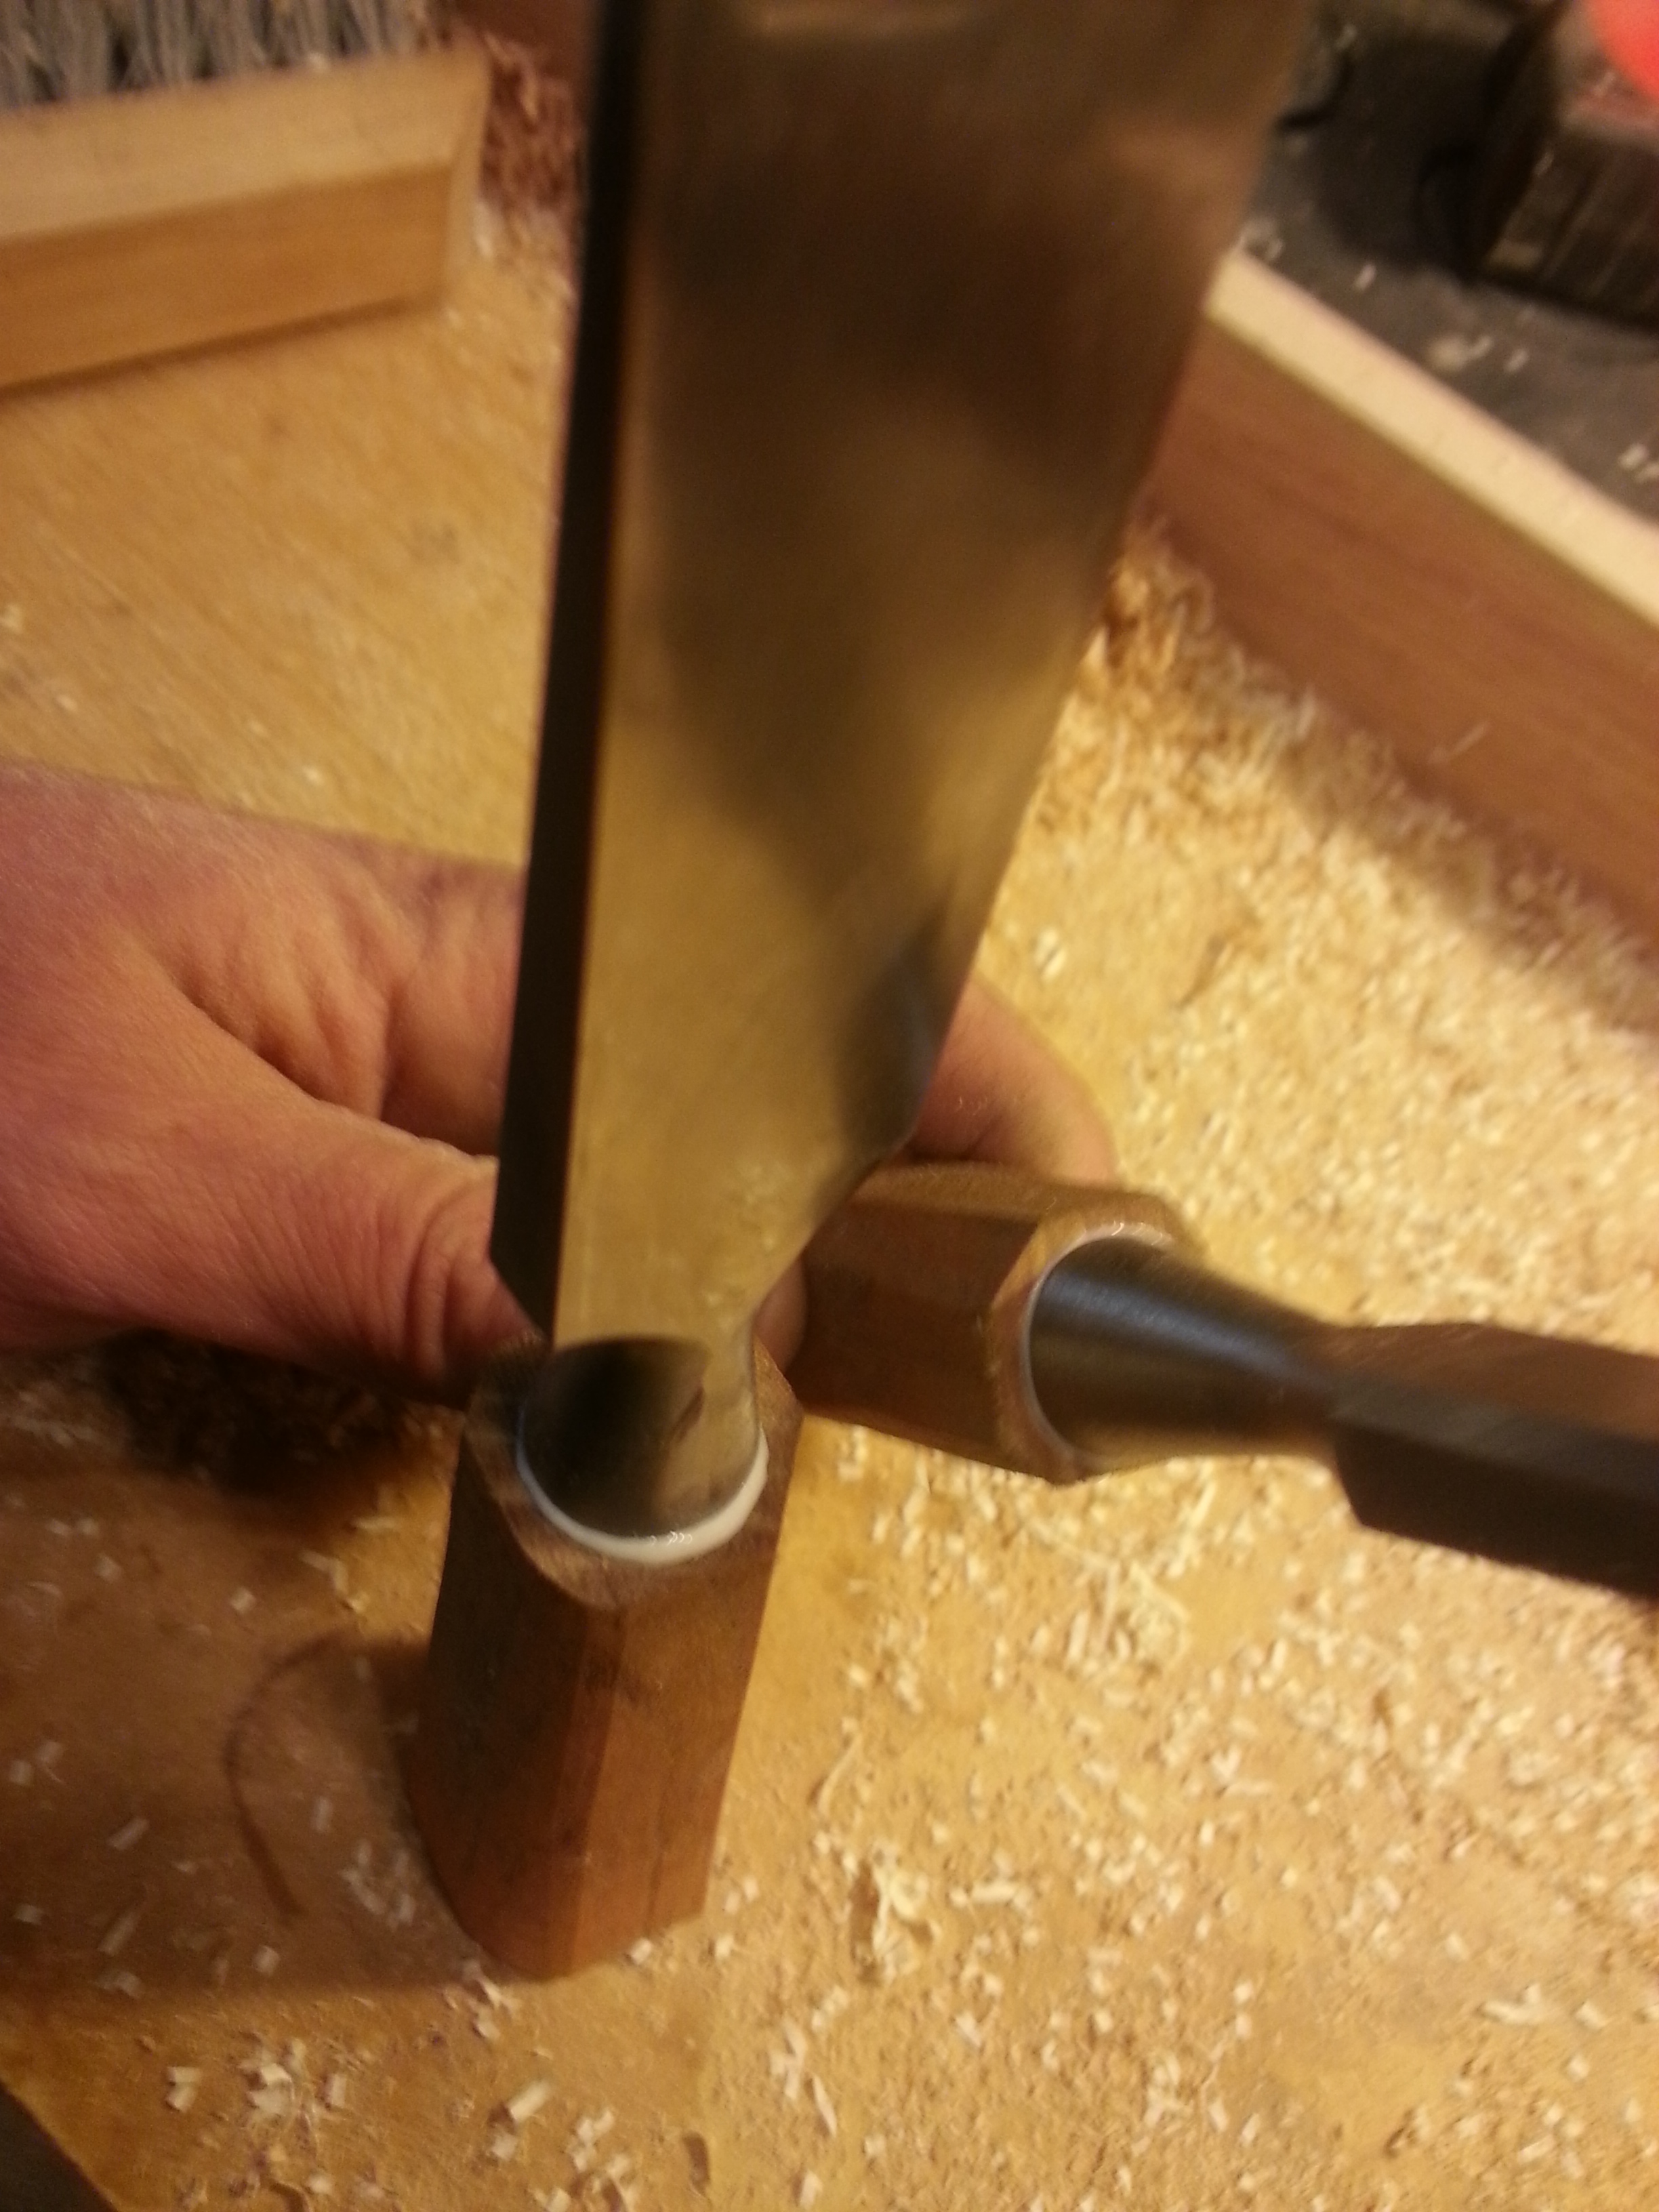
A little jiggering was required to get the tangs secured in the sockets. Being these chisels were cast, the tangs are not wholly consistent. The smallest chisel was easy enough to seat by pounding the handle onto the tang. The other two were a bit more difficult and required boring out larger holes in the handles. When I went a step too large, well…
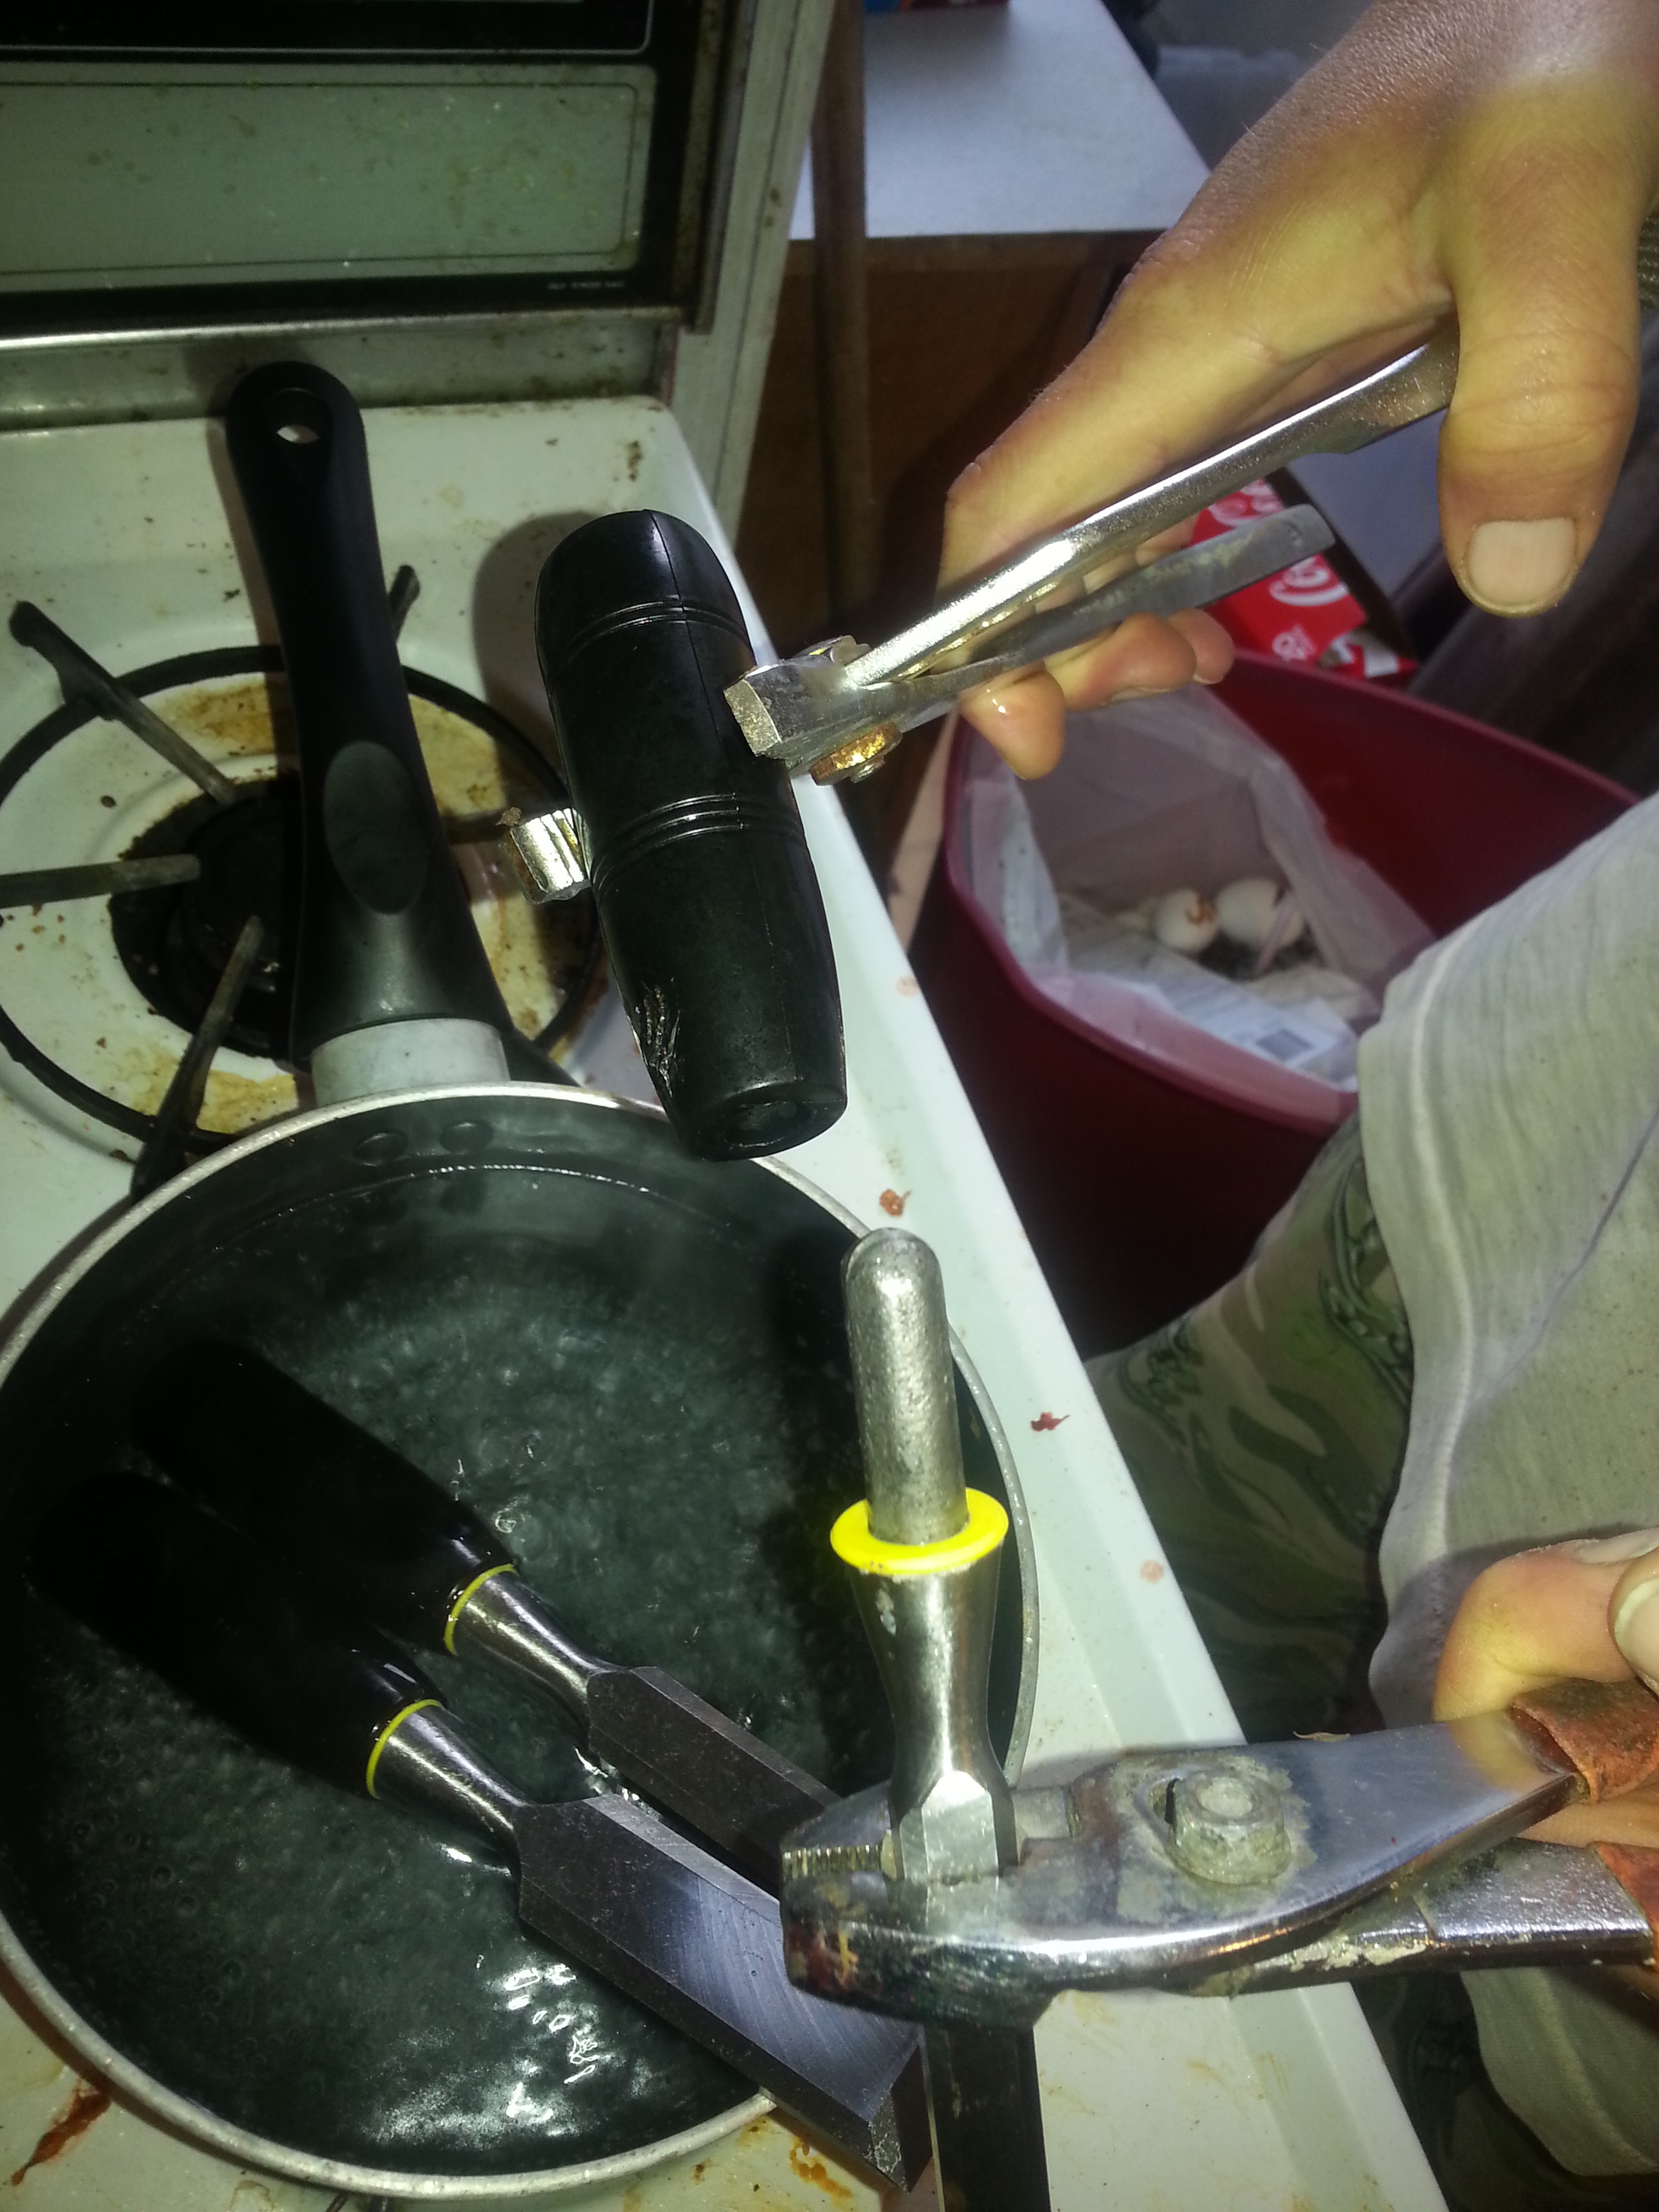
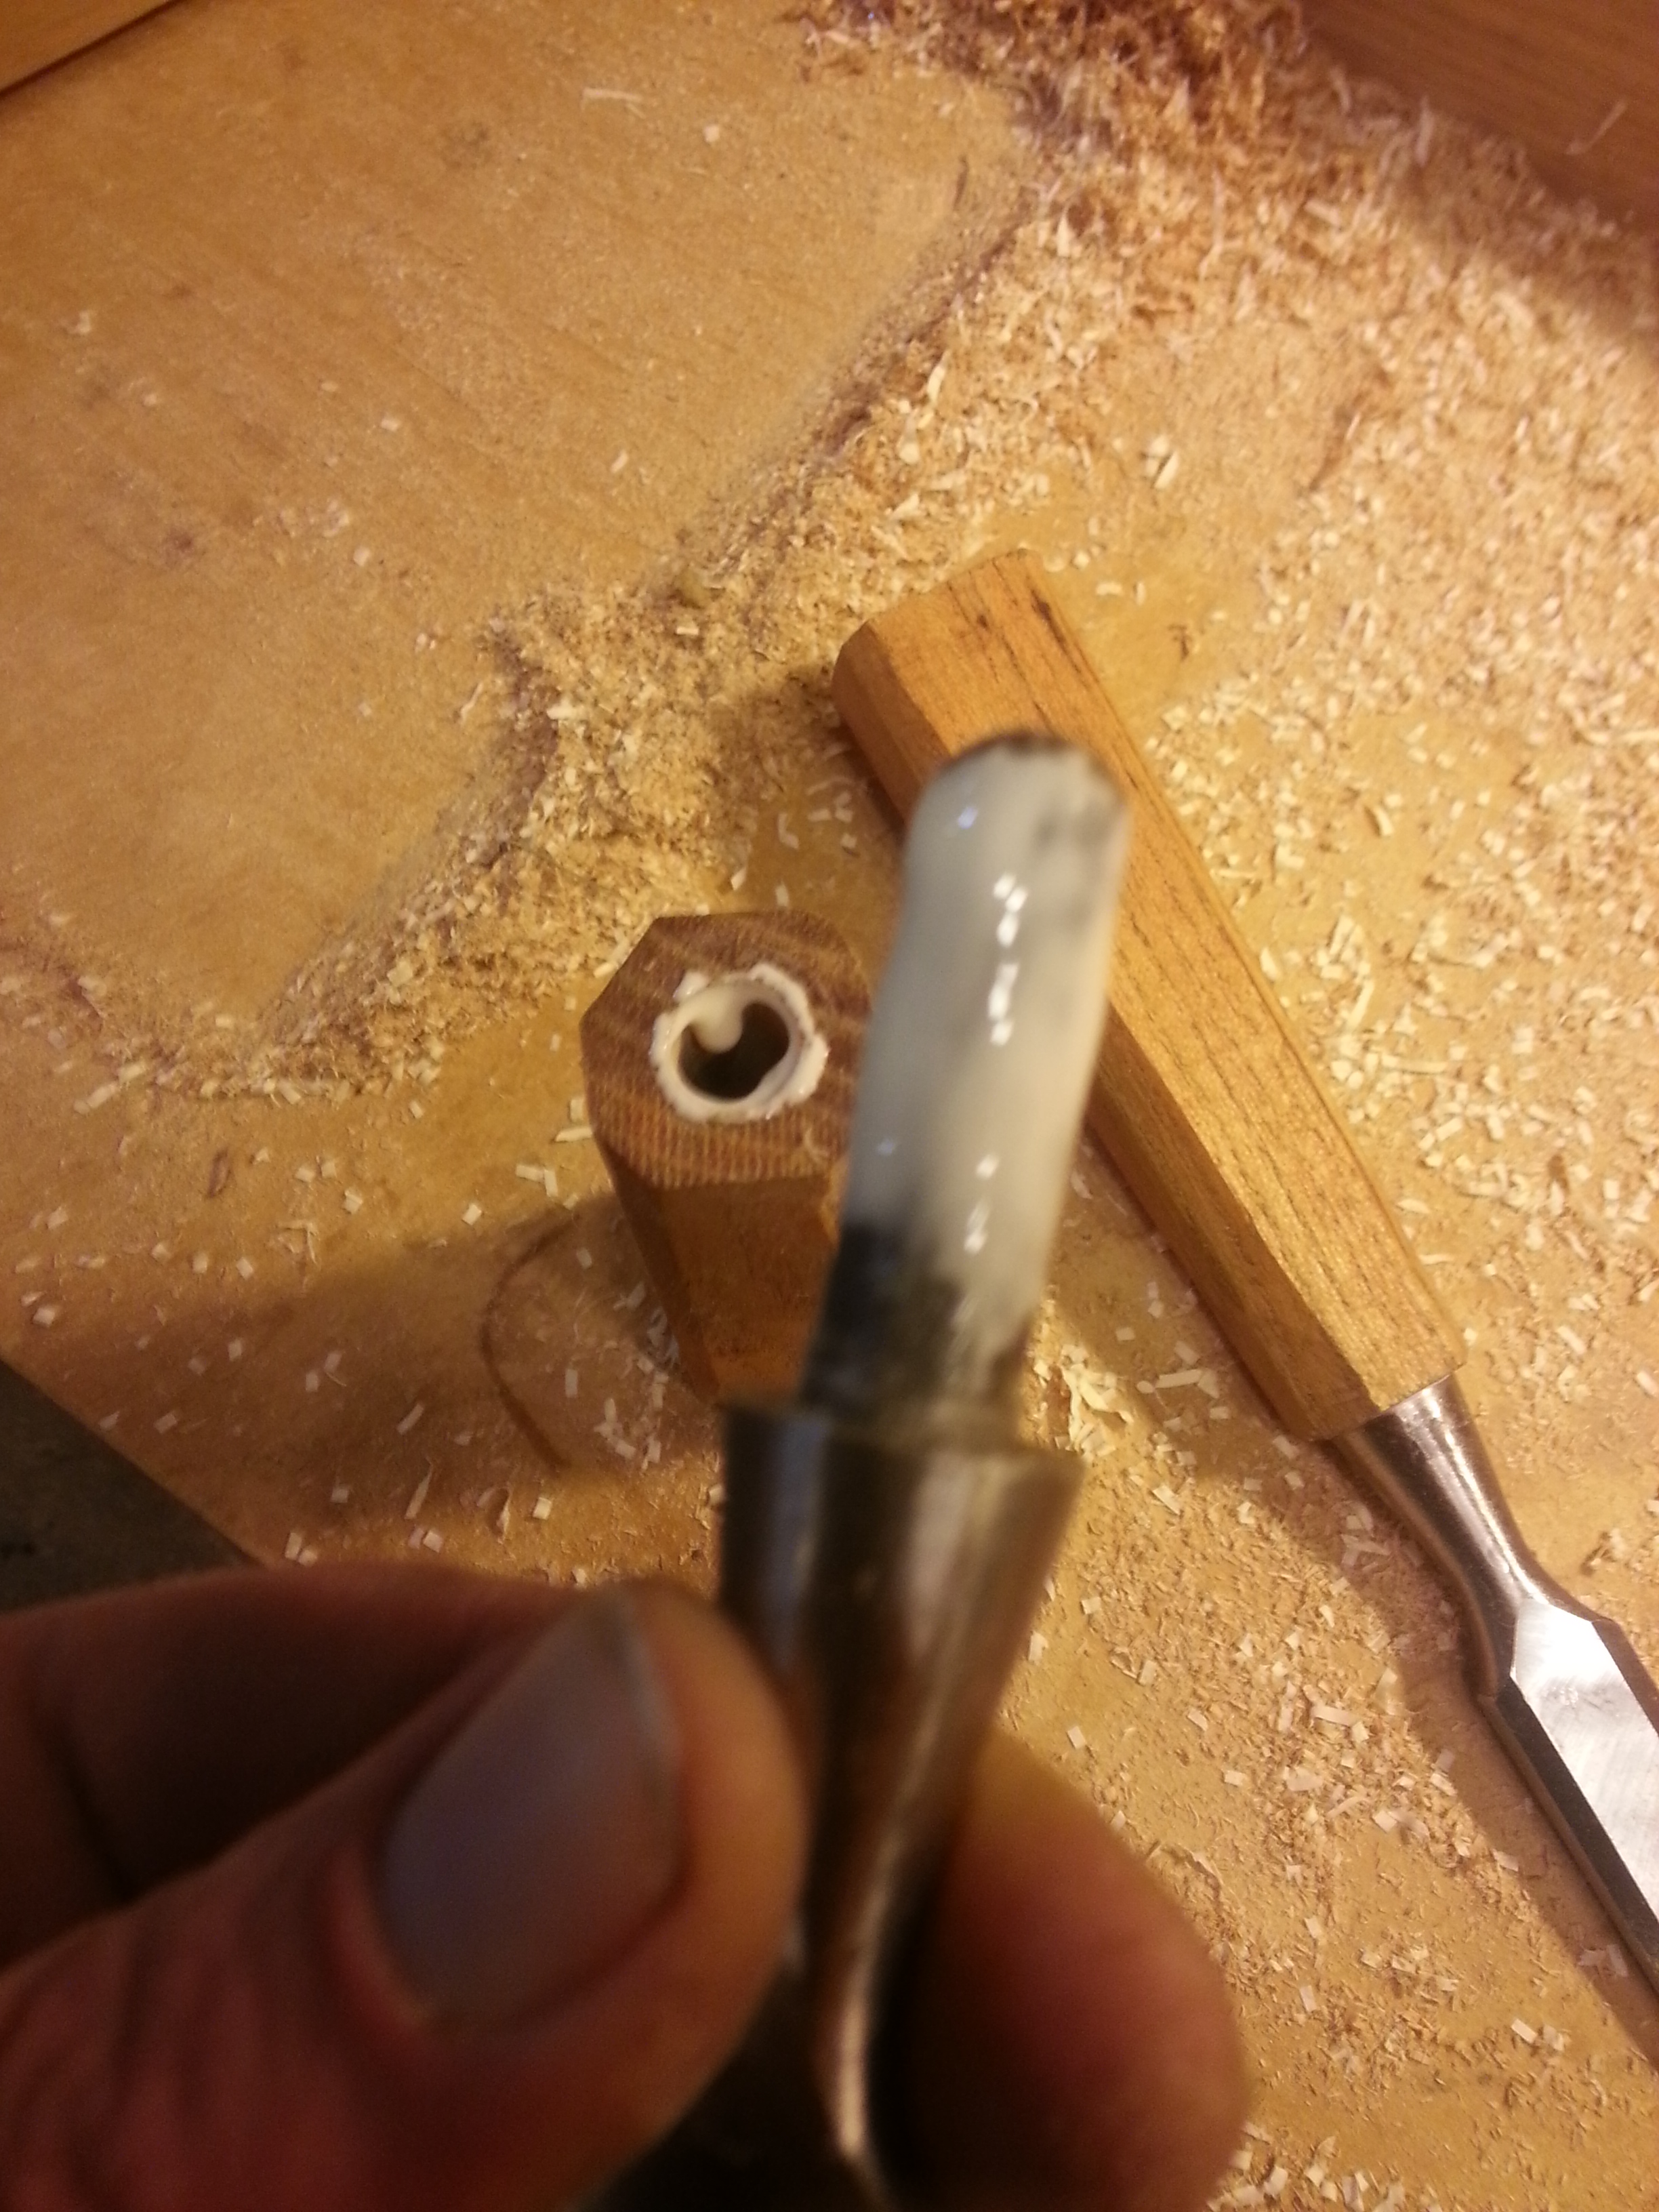 A little PVA glue on the tang and in the handle will serve to keep things together.
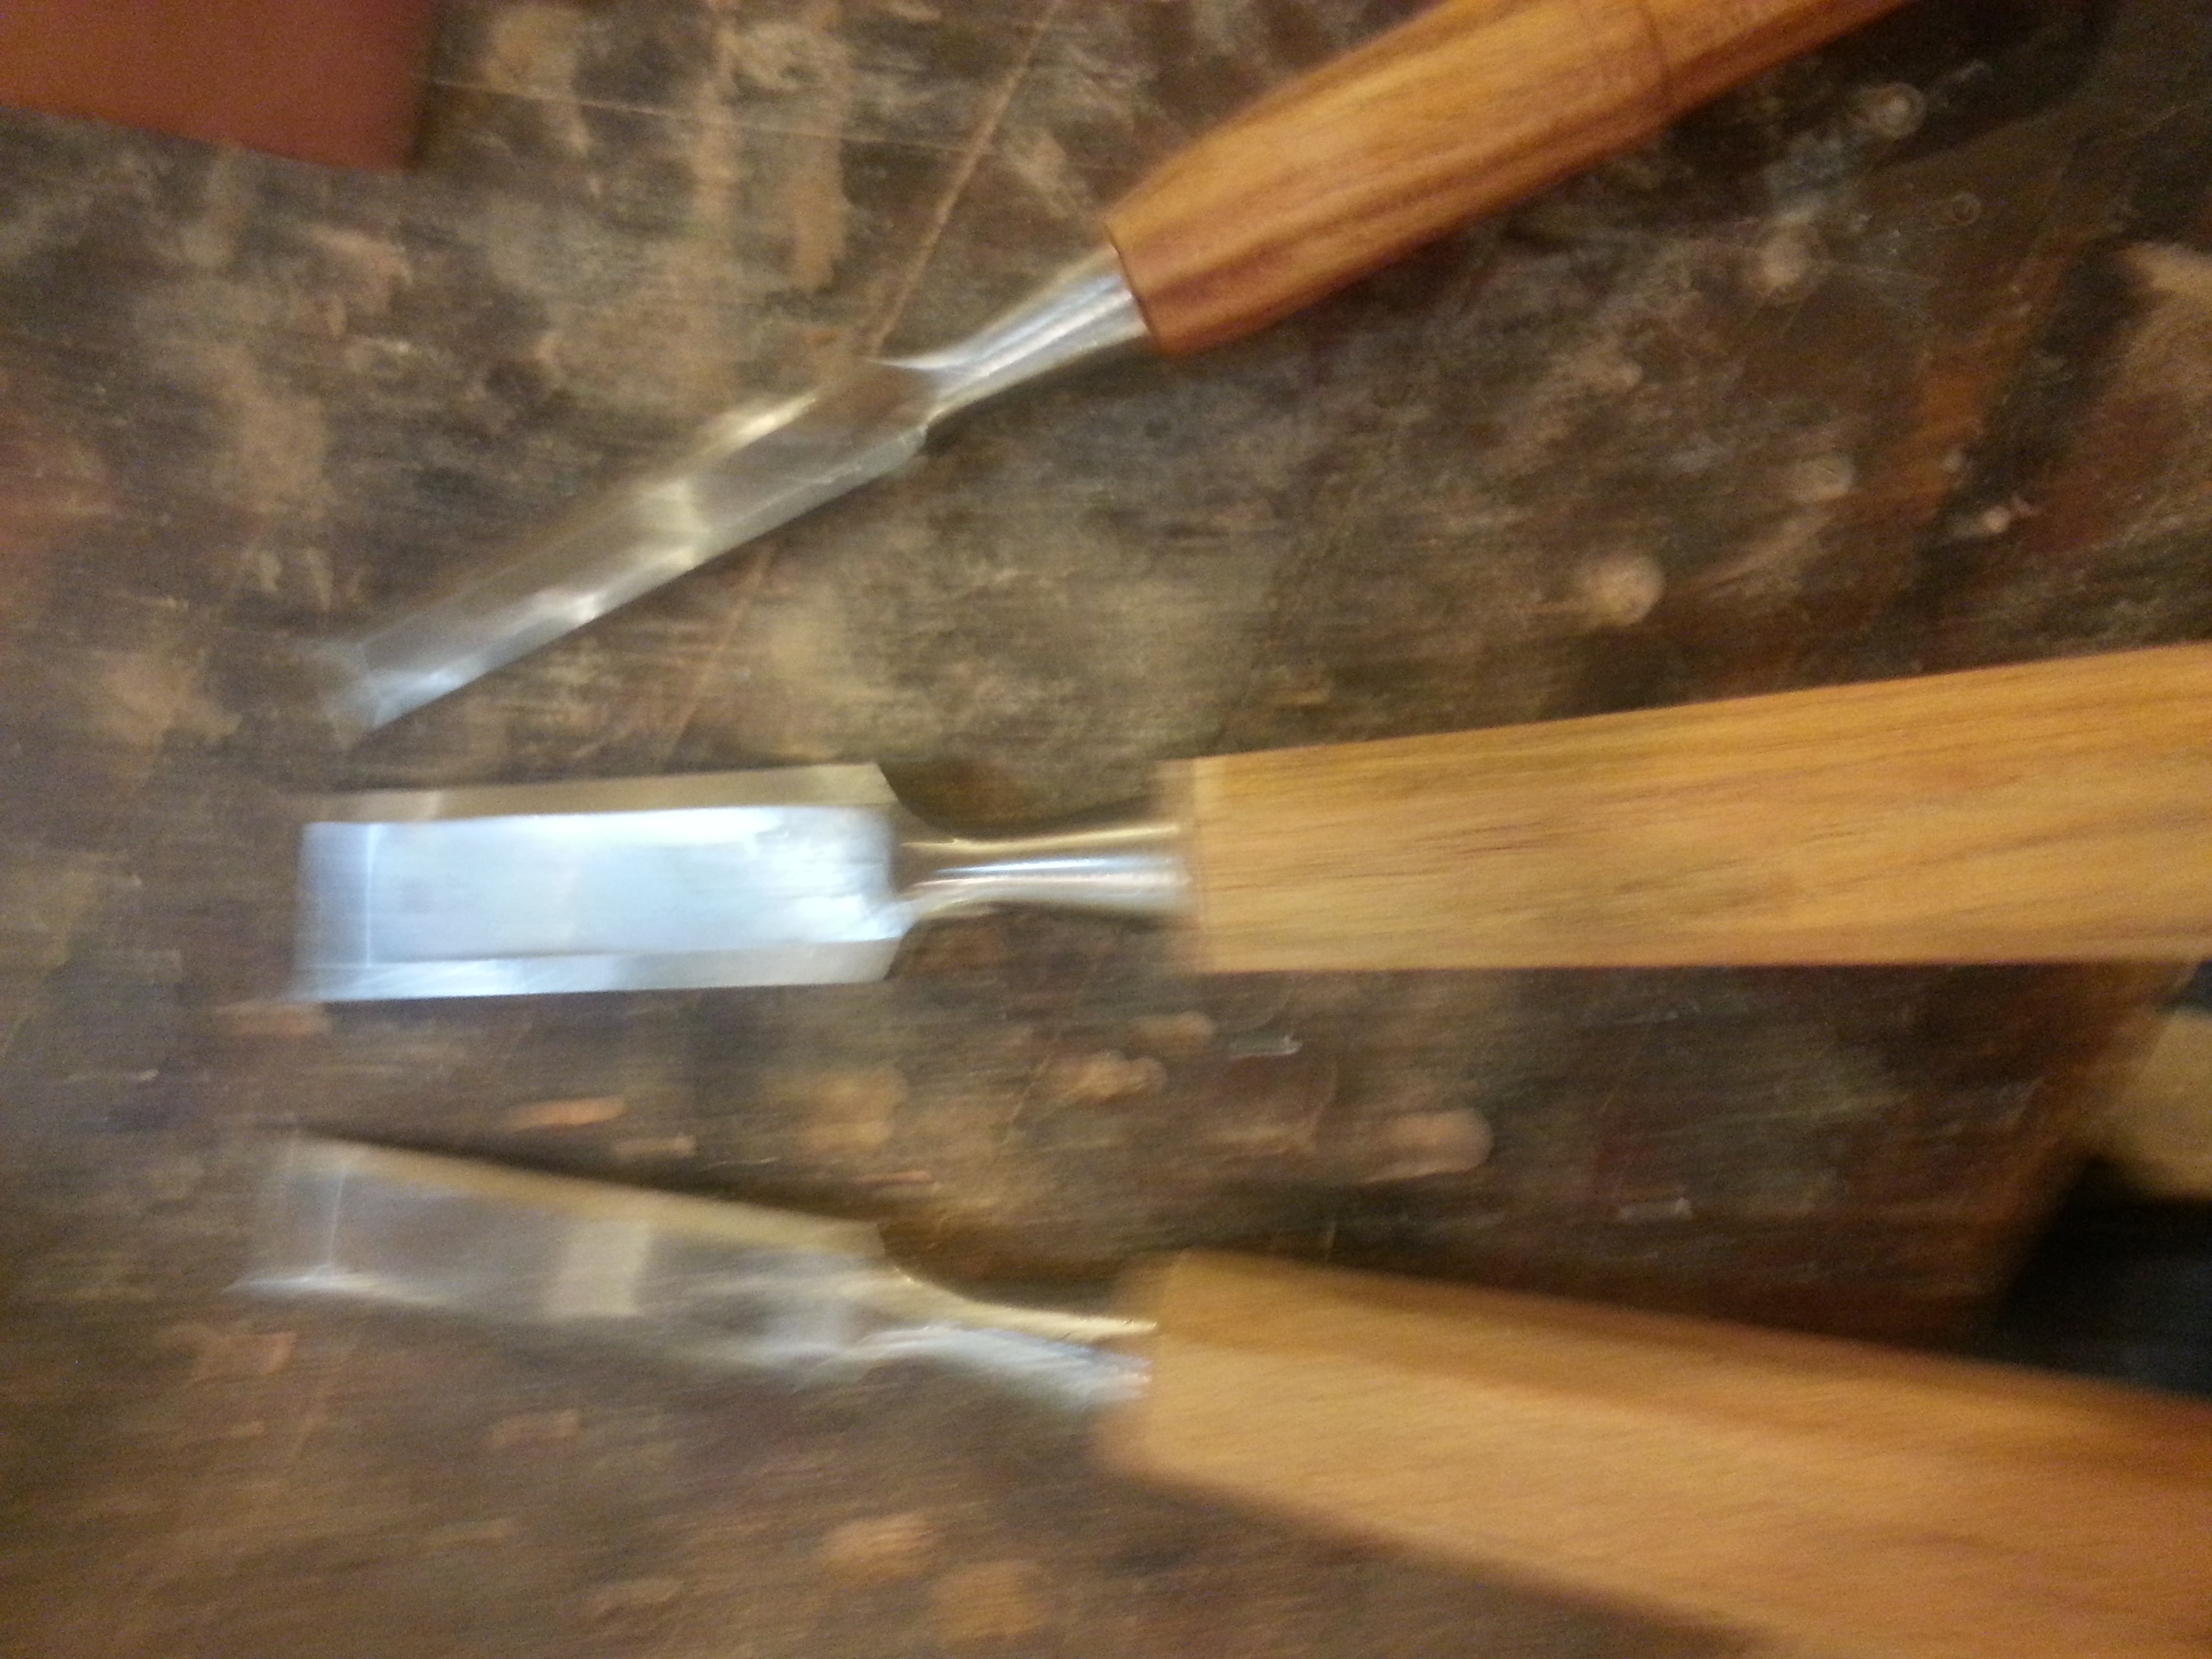
At last, here we are. The little overflow of glue was wiped off after it started to gel up. While not a great period reproduction of a tool, it certainly looks a whole lot better than where we started.
One more thing to discuss here: commissioning the blades.
The backs of these chisels were actually horrible. The side edges and the bit were coplanar, but the bellies themselves were actually not only concave but twisted. It took about an hour between a worksharp and a diamond stone to get the backs actually flat. Most people wouldn’t find this an issue. Hell, most people who bought this set of chisels wouldn’t even know how to sharpen them. Being as the back of a chisel is very often a reference face when I work with them, being truly dead flat is very important.
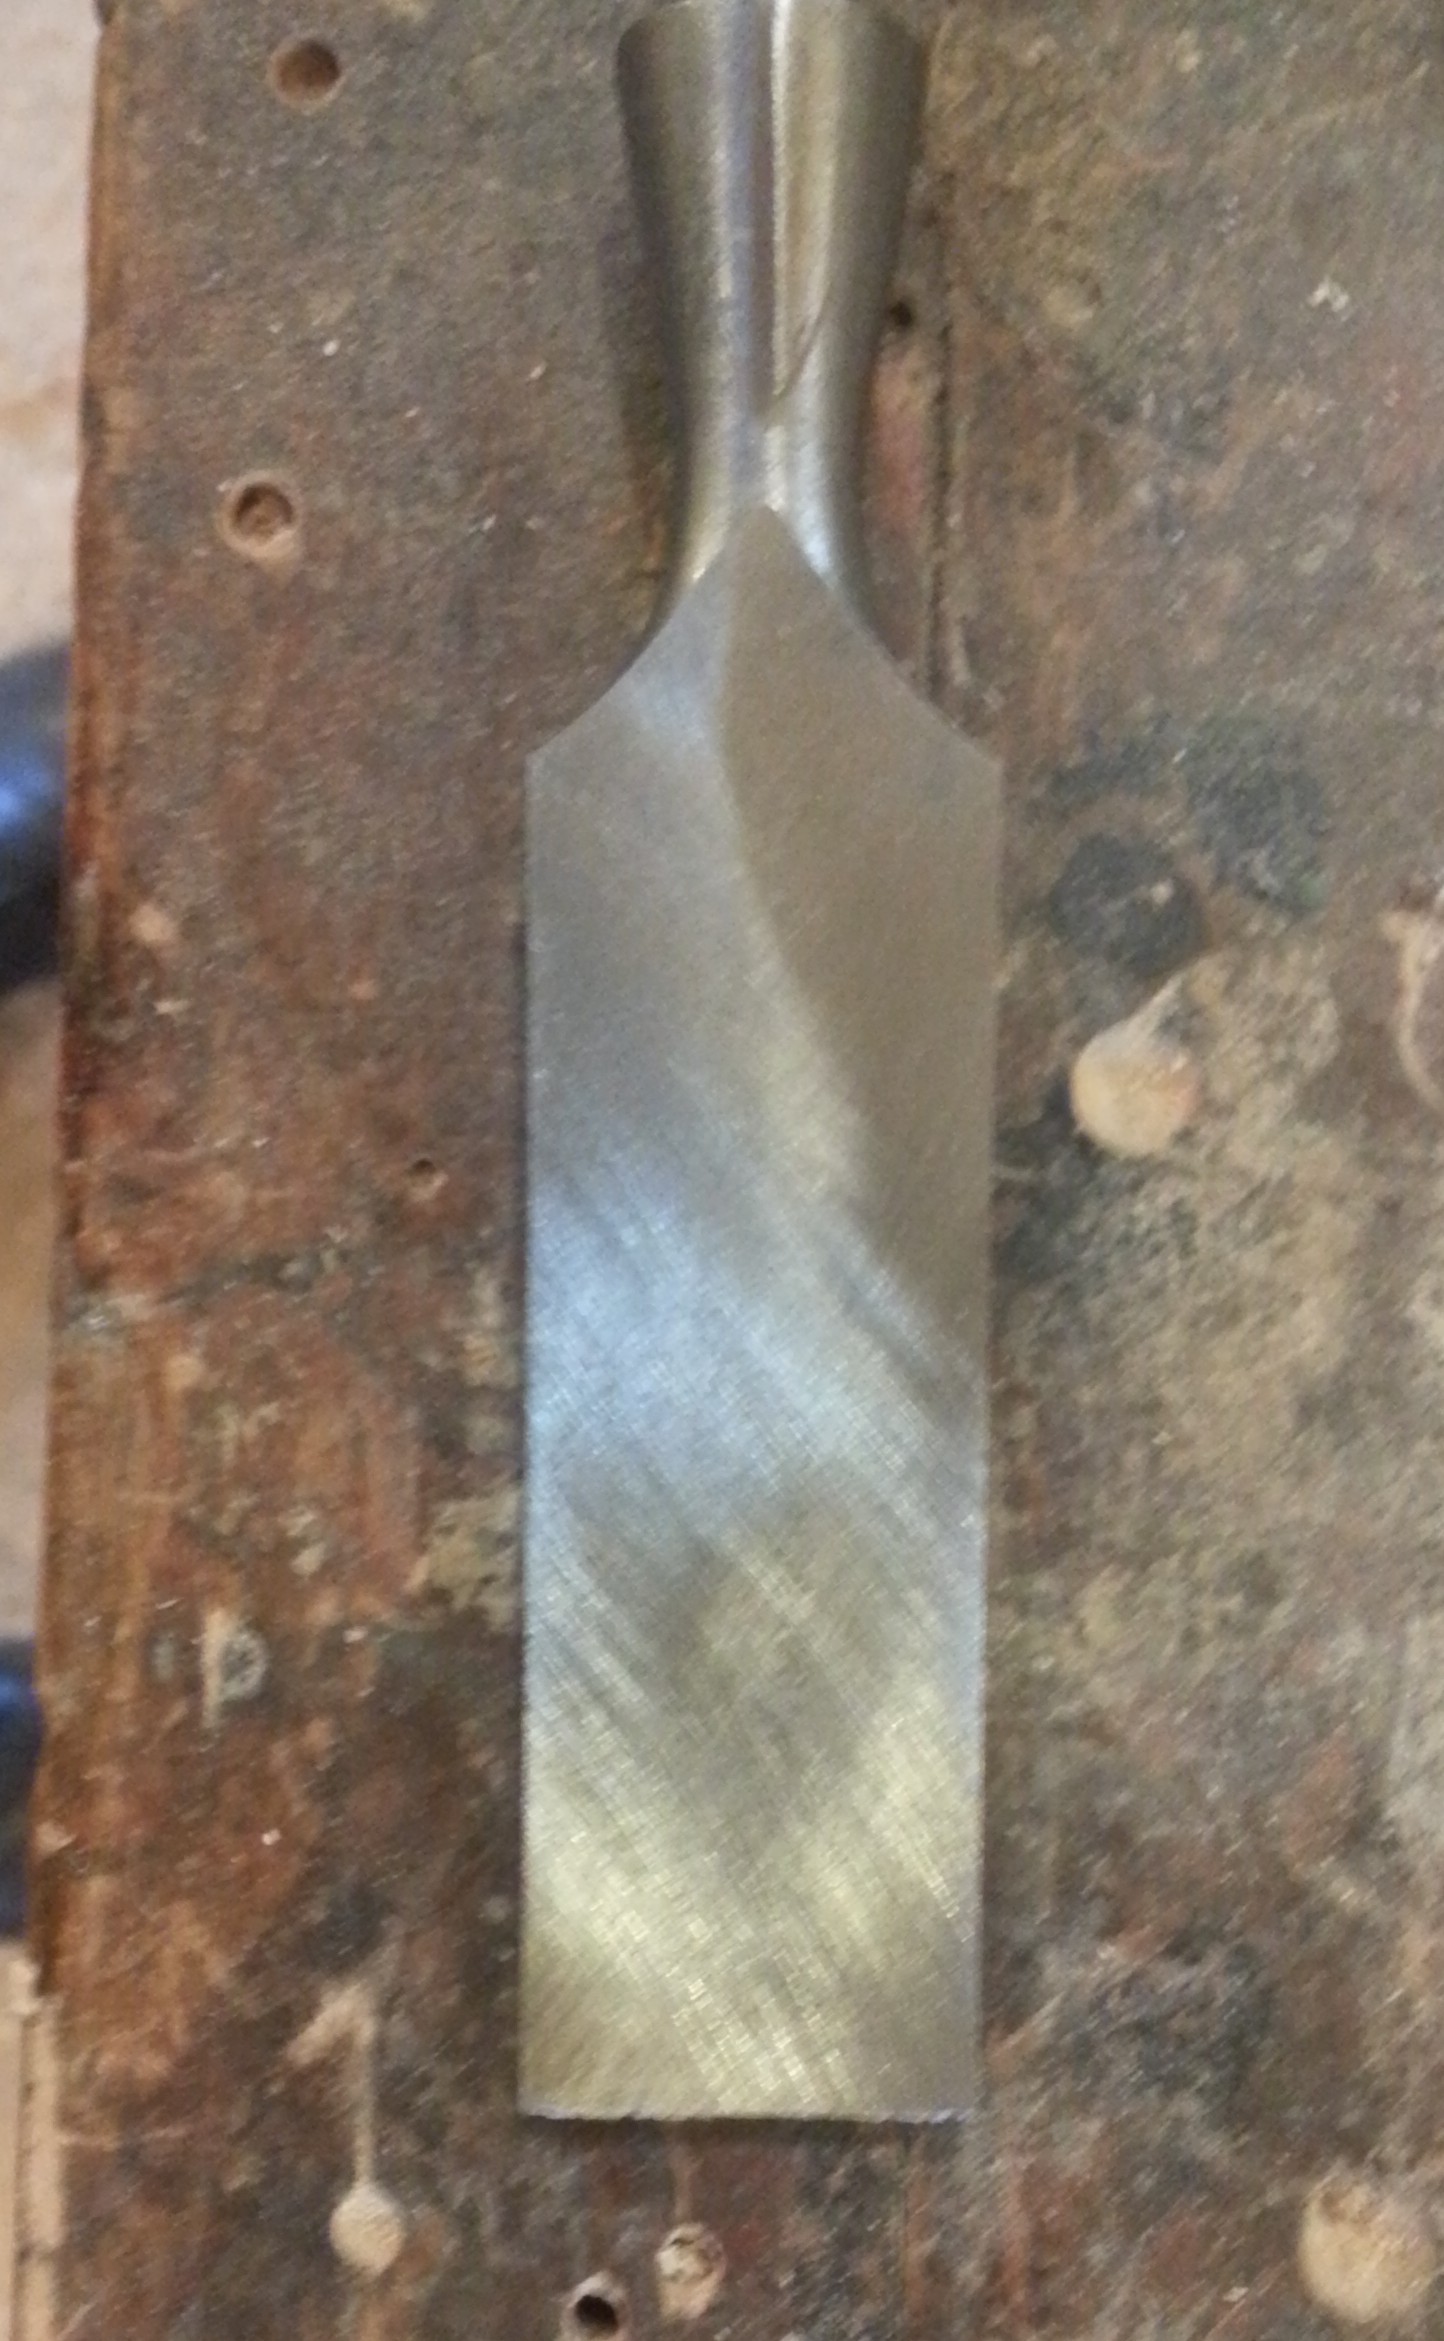
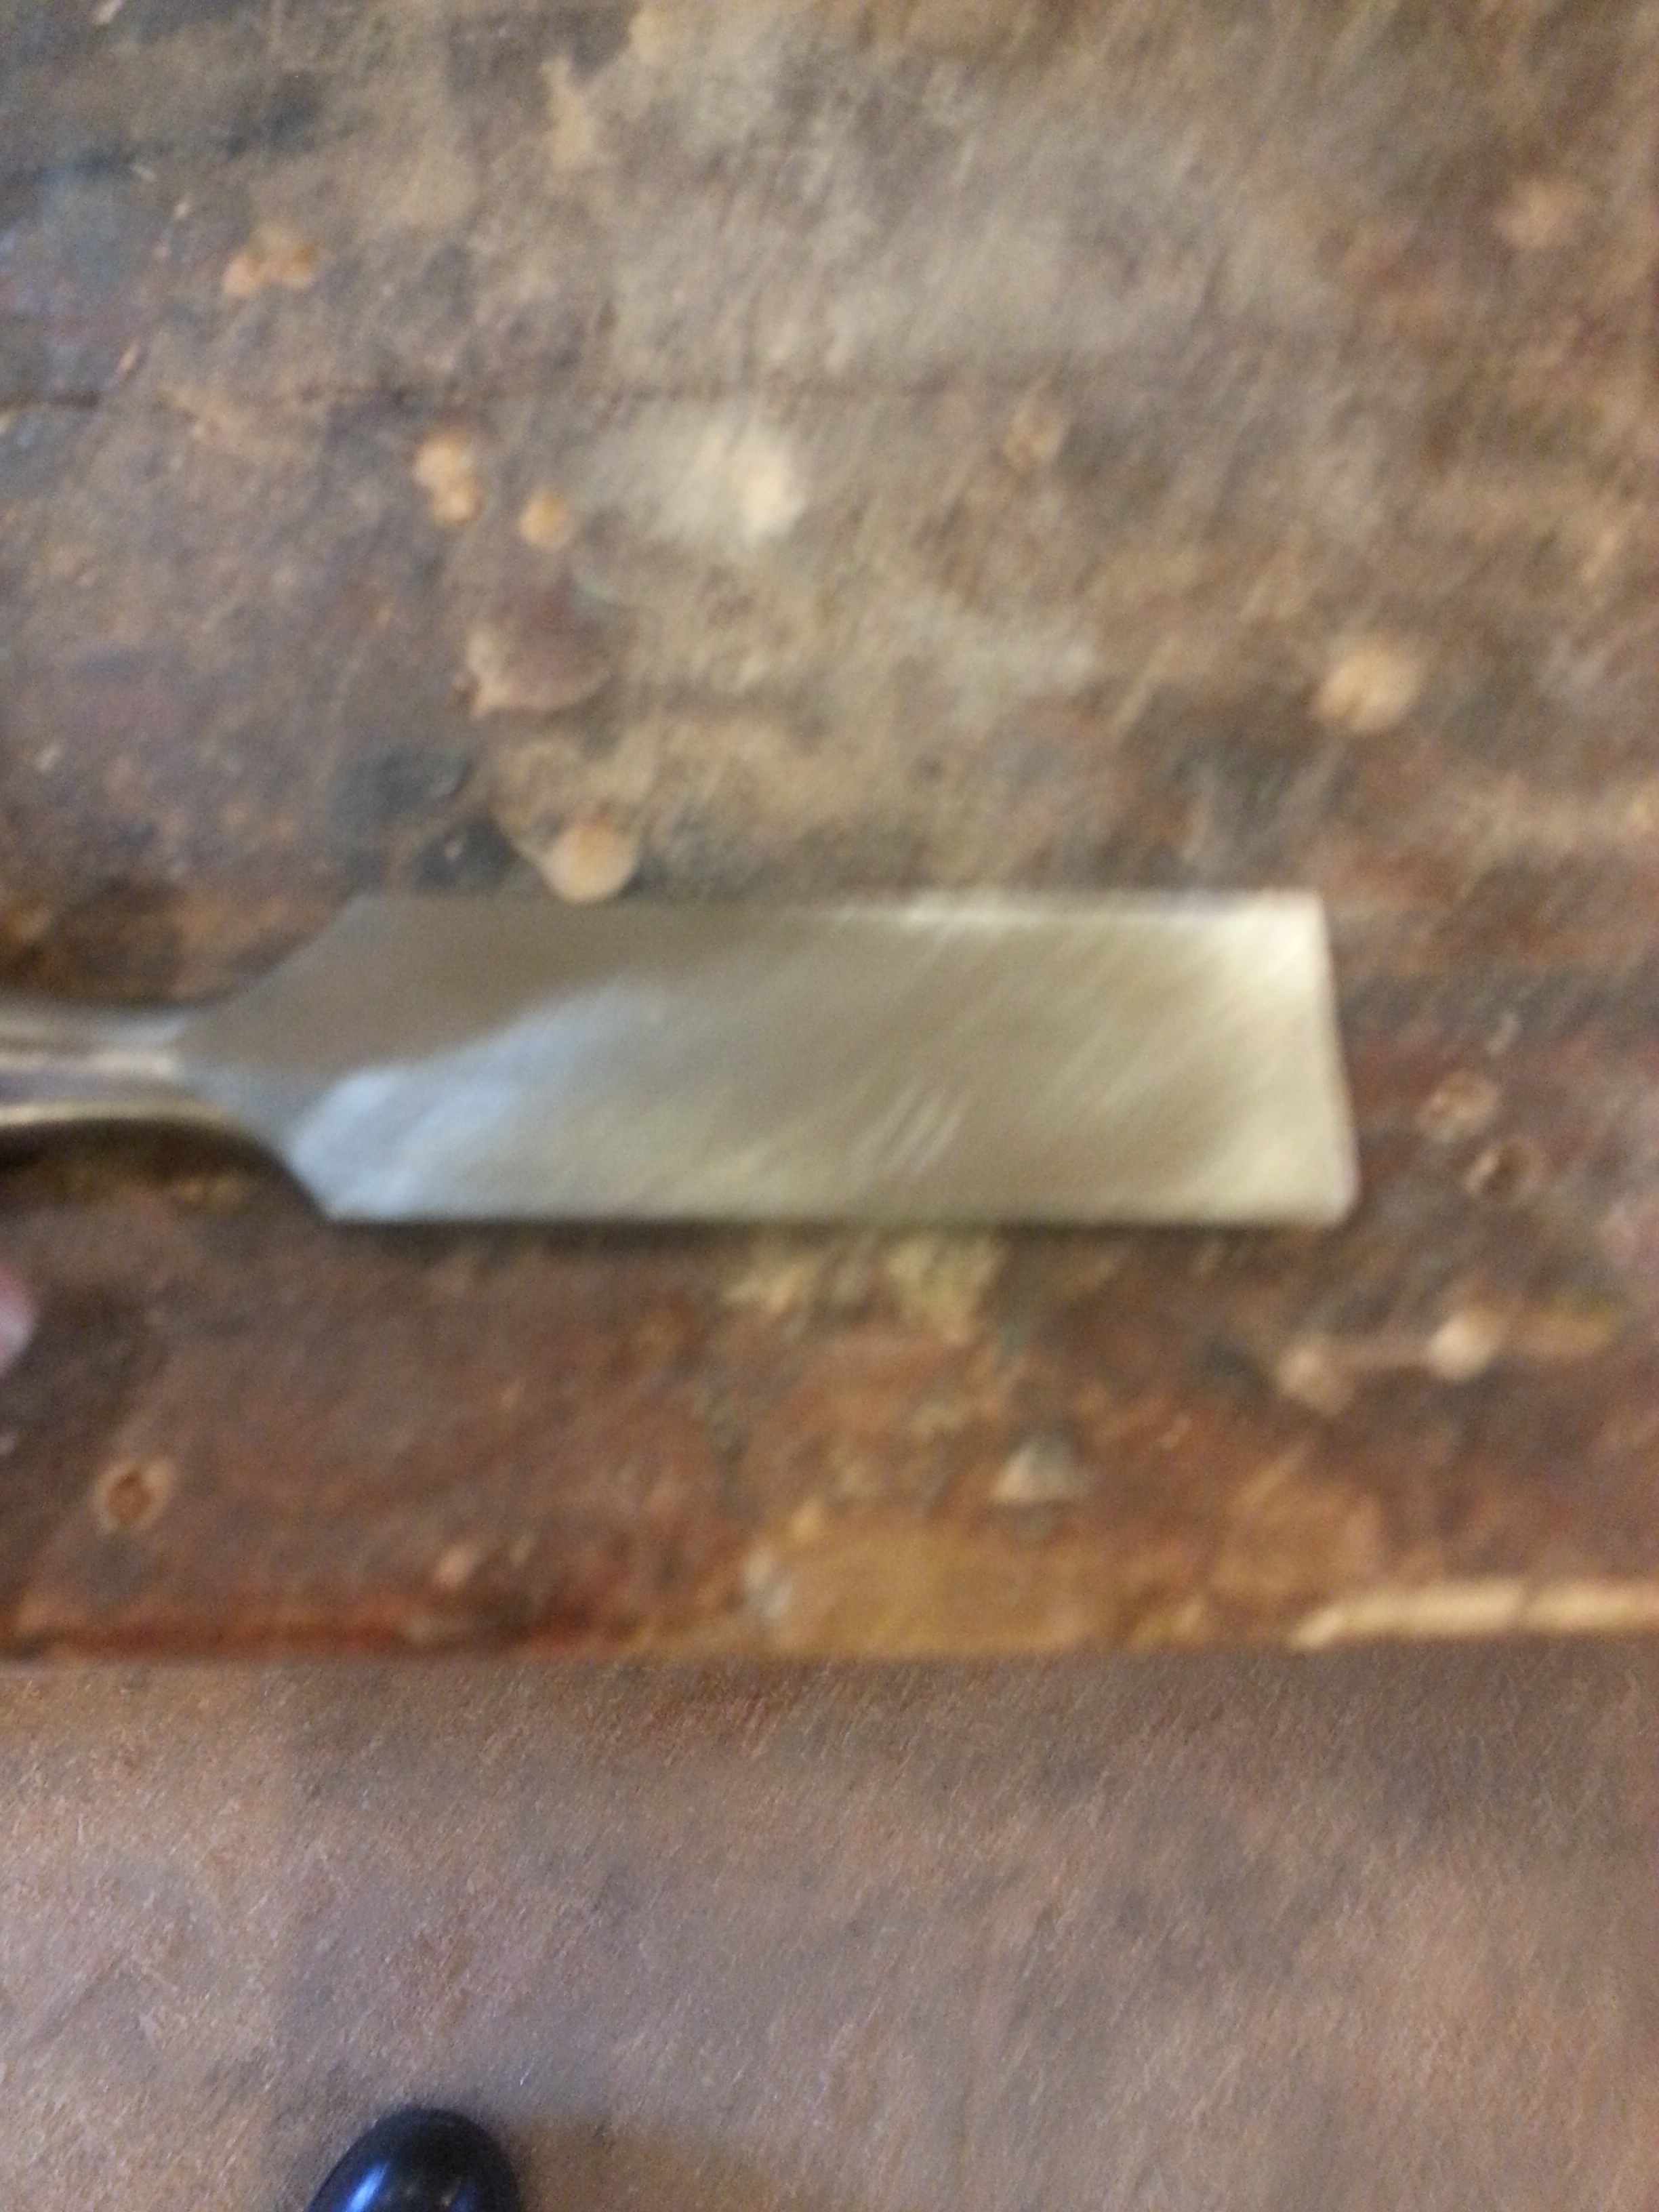
A very small hollow is still present on the 1″ blade. The actual measurement of the hollow is less than a thou. Not so bad, at this point. Once I get them on the water stones and get the mill marks out that hollow should be pretty inconsequential. I still have a few hours of honing ahead to get the scratches out, but from where we started, this is a long way to making a useful and historically appearing tool.
